Title: What have you done with your NeXT computer today?
Post by: Nitro on April 27, 2024, 11:35:39 PM
Post by: Nitro on April 27, 2024, 11:35:39 PM
This is a thread for people to share what they've been working on or doing with their NeXT computers recently. It's for simple things that may not need their own thread. Many forums have a similar thread like this for people to share current projects and activities all in one place. NeXT, Intel, Sun, HP and NS/OS topics, tell us what you're doing with your NeXT computer.
Let's start this thread off with a surviving daily driver, which is my NeXTstation Turbo Color. It's been working great all these years with the original caps, so I finally decided not to push my luck any further. I managed to recap the board without letting the smoke out. I like the look of the original style caps so I went with those. I contemplated wrapping the 47µF caps in masking tape and painting the polarity stripes black to match the originals. Is that weird? ;D
(click to enlarge)
Title: Re: What have you done with your NeXT computer today?
Post by: cooltr6 on April 28, 2024, 12:51:54 AM
Post by: cooltr6 on April 28, 2024, 12:51:54 AM
Well, I'll be the first one to jump into this...
Since I'm on the disabled list for a short while, I didn't actually do any work on any of the NeXT's around home - but I have a few projects going on...
1. Working with Rob to make 'Gold Master' SD Cards for use with Blue/ZuluSCSI that he would send out with a new or existing purchase. Copying all the files and applications to a hard drive, sorting through it all, making a list of applications and then once that's all done will get whatever installers and license numbers and do a from the ground up installation of NeXTSTEP/OPENSTEP and applications placed in logical folders, along with additional hard drive files [should someone need to add more storage].
2. Recently acquired an HP 712/60 pizza box, which after I recap the power supply, will setup either a dual boot to HP/UX and NeXTSTEP or just dedicated NeXTSTEP...haven't decided on that one.
3. Working with Eric of BlueSCSI to work through some performance issues being experienced. He's been quite helpful...but we're not done yet with addressing small issues. He's also started working on some NeXT-specific applications [to start, CD Switcher]...so that all of us with Black hardware who use BlueSCSI can take advantage of 'extended' functionality.
I'm also going to engage him about Quirks specific to NeXT. Still need to ask some questions about that, but it might be helpful to discuss any differences how the NeXT box handles SCSI, along with discussing how to address drive geometry 'things'...with the hope that BlueSCSI can more inform NeXT hardware of differing size drives and handle them more elegantly.
4. Recently acquired a Turbo Mono station logic board, which I'll recap, test and put on the shelf as a spare. If I happen across a Slab case with PSU, might get that up and running...still to be decided. [This board might be known as one found in the eBay Finds thread.]
5. Continuing to read and learn more about the 'under the hood' things about NeXT/OPENSTEP.
Lots of things going on related to Black hardware and the NeXT OSes. =)
Title: Re: What have you done with your NeXT computer today?
Post by: MindWalker on April 28, 2024, 04:39:58 AM
Post by: MindWalker on April 28, 2024, 04:39:58 AM
Thumbs up for the 1. perhaps throw in a Black Hole -inspired wallpaper as well? 8)
I have a 712/600 too! I looked at the PSU and everything looked pristine, but I'd love to have a copy of the list of caps in the PSU for the eventual recap.
Also I'd be very interested to hear how to setup a dual-boot with HP-UX and NeXTStep. I currently have two images on my ZuluSCSI to swap between the the OS' (requires swapping the files on the SD card, ie. opening the case every time).
Quote from: cooltr6 on April 28, 2024, 12:51:54 AM2. Recently acquired an HP 712/60 pizza box, which after I recap the power supply, will setup either a dual boot to HP/UX and NeXTSTEP or just dedicated NeXTSTEP...haven't decided on that one.
I have a 712/600 too! I looked at the PSU and everything looked pristine, but I'd love to have a copy of the list of caps in the PSU for the eventual recap.
Also I'd be very interested to hear how to setup a dual-boot with HP-UX and NeXTStep. I currently have two images on my ZuluSCSI to swap between the the OS' (requires swapping the files on the SD card, ie. opening the case every time).
Title: Re: What have you done with your NeXT computer today?
Post by: trixster on April 28, 2024, 07:28:24 AM
Post by: trixster on April 28, 2024, 07:28:24 AM
Nothing much other than playing a few mp3s! I try and get most of my retro hardware working when I have some spare time, and today was the cube's turn!
Title: Re: What have you done with your NeXT computer today?
Post by: trixster on April 28, 2024, 09:49:06 AM
Post by: trixster on April 28, 2024, 09:49:06 AM
Actually, my mate who's a professor of computer science at York University has just challenged my Cube to a game of chess, so it's now running that!
Title: Re: What have you done with your NeXT computer today?
Post by: paolo.bertolo on April 28, 2024, 09:45:22 PM
Post by: paolo.bertolo on April 28, 2024, 09:45:22 PM
Quote from: cooltr6 on April 28, 2024, 12:51:54 AM2. Recently acquired an HP 712/60 pizza box, which after I recap the power supply, will setup either a dual boot to HP/UX and NeXTSTEP or just dedicated NeXTSTEP...haven't decided on that one.
I'm afraid it's not possible, it's clearly indicated in the installation guide of NEXTSTEP 3.3 for PARISC. Best you can have is the two OSes installed on two different SD cards and swap them. However, this is assuming to have easy access to the innards of the machine. But the top lid is so fragile that you don't want to touch it too often. Unfortunately, SD cable extensions will not work. And the sw available for the PARISC flavor is somehow limited, too. It's indeed a pity, as those machines are so much faster than the black hardware and you have very nice color, too.
Additional drawback: RAM expansion modules are almost unobtainable.
Other than that, it's all blue skies and sunshine... :-)
Title: Re: What have you done with your NeXT computer today?
Post by: rjbrown99 on May 02, 2024, 12:27:48 AM
Post by: rjbrown99 on May 02, 2024, 12:27:48 AM
On both a Sparcstation 20 and Next turbo color, I removed the floppy drives and wired the scsi2sd board to fit exactly to the open slot where the floppies used to go. No need to open the case now and easy to swap sd cards.
Took an extended length scsi cable for both.
Took an extended length scsi cable for both.
Title: Re: What have you done with your NeXT computer today?
Post by: Nitro on May 13, 2024, 12:29:06 AM
Post by: Nitro on May 13, 2024, 12:29:06 AM
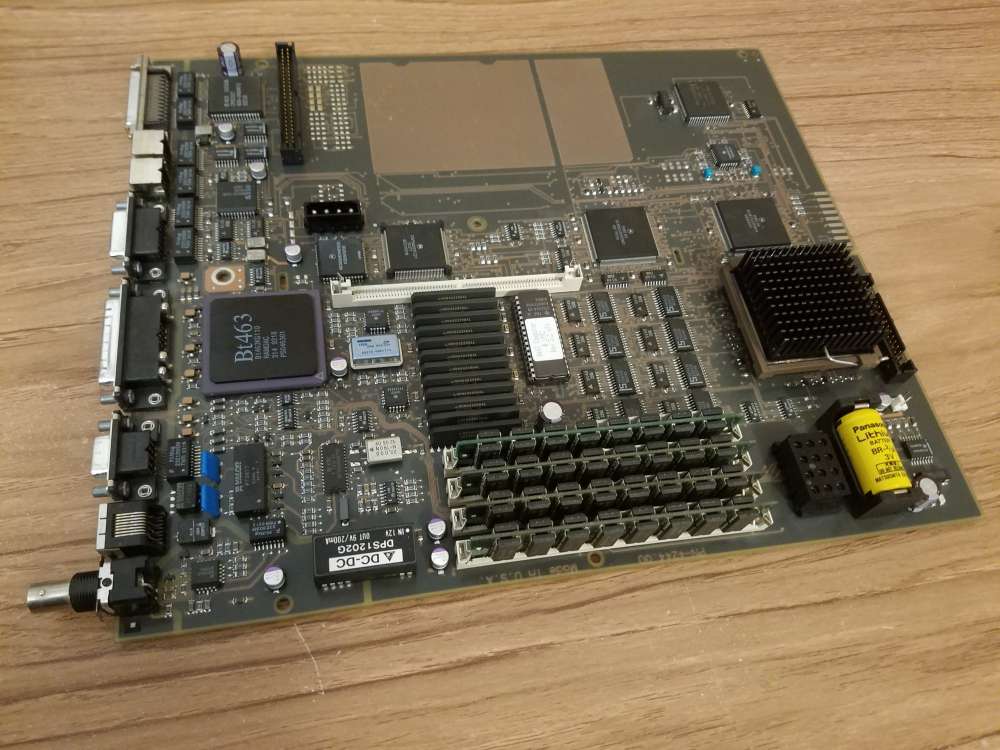
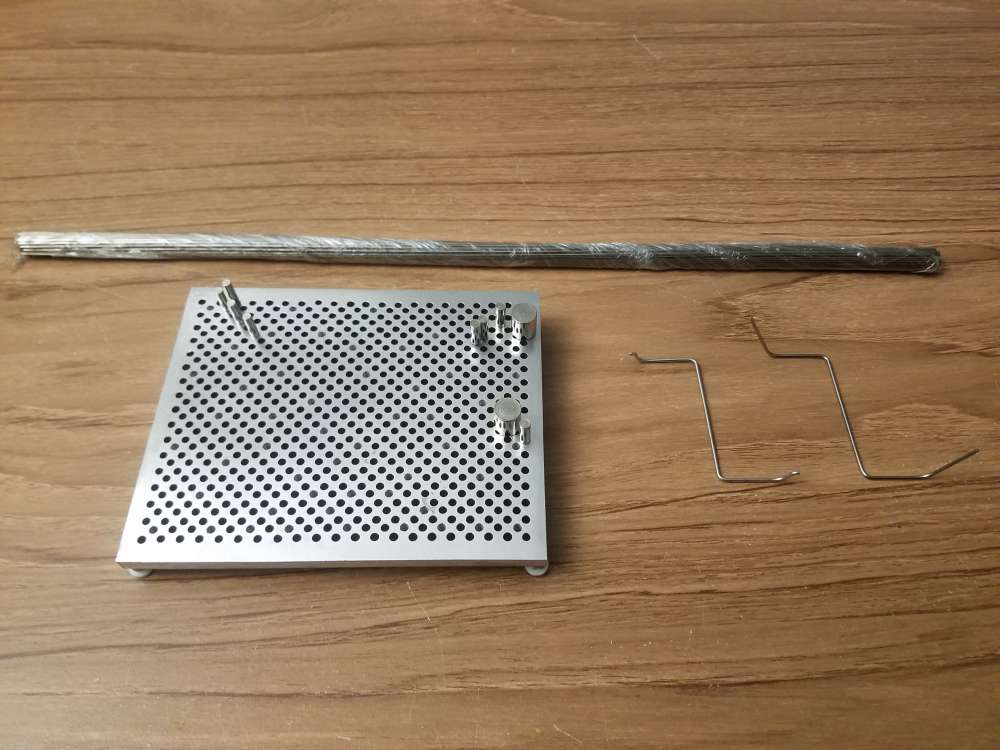
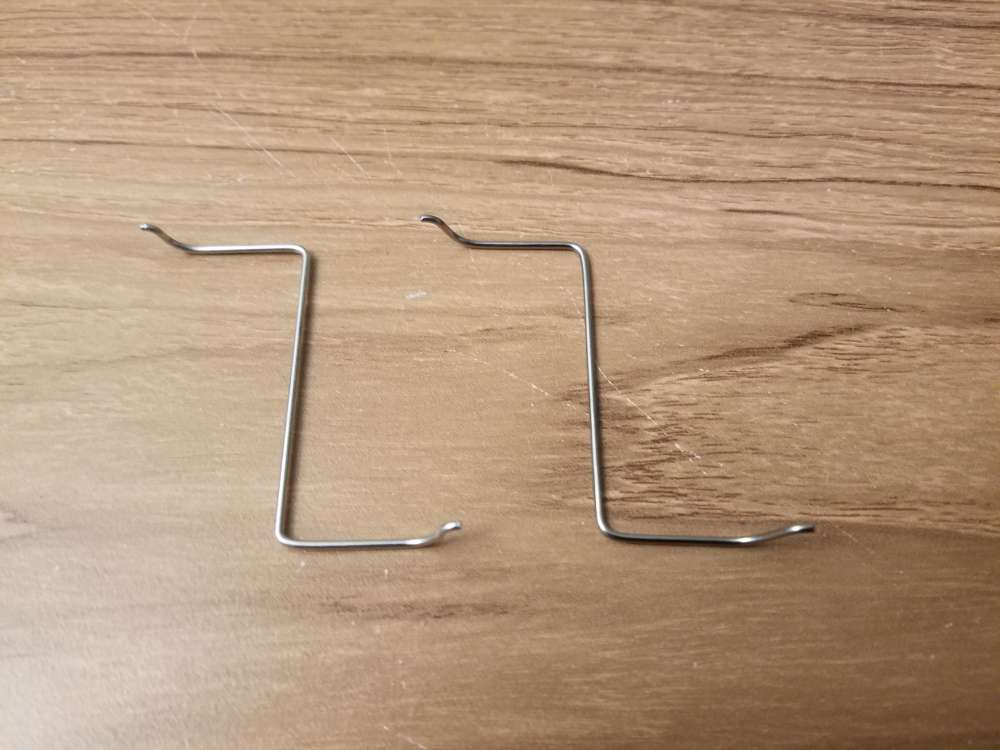
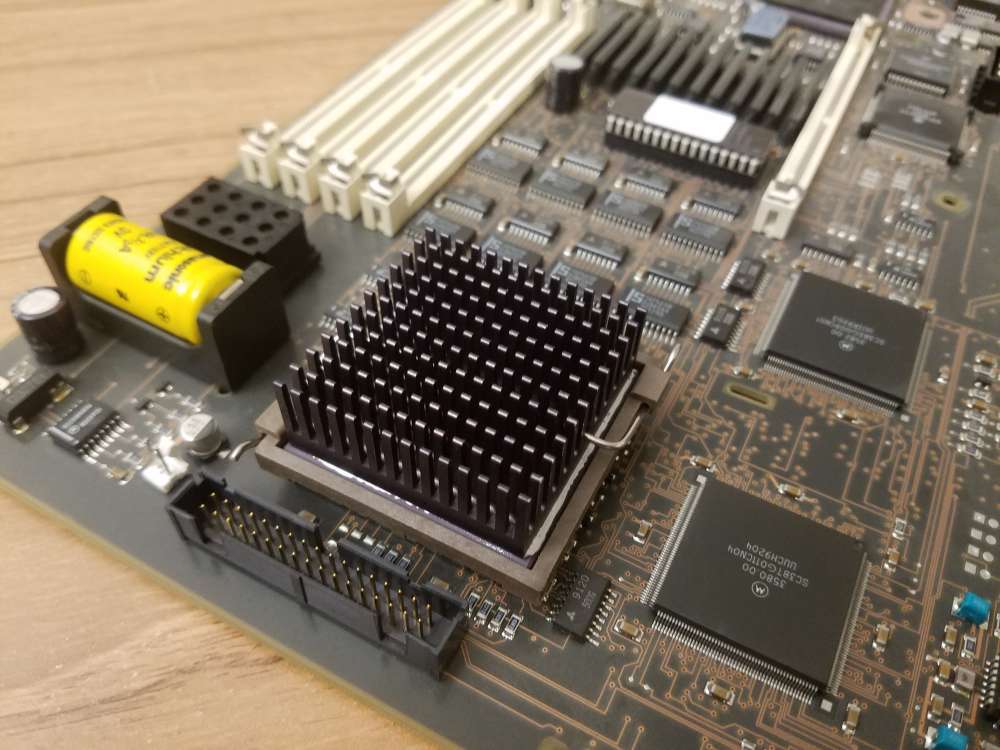
I did some wire bending today. A while ago I removed the heatsink from a Turbo Color slab and the project ended up sitting for a long time. As luck would have it the wire retaining clip grew legs and ran away. Rather than do the smart thing and buy an original clip I chose to bend one up. Amazon had a bundle of spring wire with different diameters and a cheap wire bending jig. The first attempt was too narrow but the second one was good.
Title: Re: What have you done with your NeXT computer today?
Post by: legodude on May 16, 2024, 03:02:02 PM
Post by: legodude on May 16, 2024, 03:02:02 PM
Quote from: paolo.bertolo on April 28, 2024, 09:45:22 PMI'm afraid it's not possible, it's clearly indicated in the installation guide of NEXTSTEP 3.3 for PARISC. Best you can have is the two OSes installed on two different SD cards and swap them. However, this is assuming to have easy access to the innards of the machine. But the top lid is so fragile that you don't want to touch it too often. Unfortunately, SD cable extensions will not work. And the sw available for the PARISC flavor is somehow limited, too. It's indeed a pity, as those machines are so much faster than the black hardware and you have very nice color, too.
Additional drawback: RAM expansion modules are almost unobtainable.
Other than that, it's all blue skies and sunshine... :-)
I was able to upgrade my 712 from 64mb to 128mb pretty cheaply within the past year, so they are not entirely unobtainable. I would similarly love to have my machine dual boot Next and HPUX. I had similar thoughts as you re: SD cards. My solution (and eventual rainy day project) is to see if BlueSCSI or ZuluSCSI can be easily modified to switch config files based on a physical switch which could be mounted on the back of the case. One config file would load Next, the other would load HPUX. I have the dual monitor board so it is a very nice Next experience.
And Nitro, thanks for that tip re: the bending jig. I have the same need to replace a heatsink clip.
Title: Re: What have you done with your NeXT computer today?
Post by: MindWalker on May 17, 2024, 09:45:30 AM
Post by: MindWalker on May 17, 2024, 09:45:30 AM
Quote from: paolo.bertolo on April 28, 2024, 09:45:22 PMBest you can have is the two OSes installed on two different SD cards and swap them. However, this is assuming to have easy access to the innards of the machine. But the top lid is so fragile that you don't want to touch it too often. Unfortunately, SD cable extensions will not work.
In my experience, SD-cable extensions are somewhat inconsistent in quality, but they can work. I am running my HP 712/60 with a ZuluSCSI and a SD-cable extension, and I designed a printable slot bracket to mount the SD-card reader in the rear for easy access. And it works. The slot bracket files are available here: https://www.thingiverse.com/thing:6612532 (https://www.thingiverse.com/thing:6612532), in the description is a link to the extension cable I used.
Quote from: legodude on May 16, 2024, 03:02:02 PMI was able to upgrade my 712 from 64mb to 128mb pretty cheaply within the past year, so they are not entirely unobtainable. My solution (and eventual rainy day project) is to see if BlueSCSI or ZuluSCSI can be easily modified to switch config files based on a physical switch which could be mounted on the back of the case. One config file would load Next, the other would load HPUX. I have the dual monitor board so it is a very nice Next experience.
Having a switch to swap between configs would be nice; currently I just take the SD card out and rename the two hard disk images I have (NS and HP-UX) when I want to swap. At least ZuluSCSI allows adding two push-buttons and those can be used to swap CD-images (https://github.com/ZuluSCSI/ZuluSCSI-firmware/blob/main/README.md#physical-eject-button-for-cdrom) so sure it sounds possible.
EDIT: this got me thinking, and while experimenting, it actually is possible to dual-boot the 712! See my new thread here: https://www.nextcomputers.org/forums/index.php?topic=5639
Do you have a part number or search term for the 712 RAMs? I could use some addition for my current 64MB. I didn't knew there was a dual monitor board for the 712 that works with NS, that sounds very neat!
Title: Re: What have you done with your NeXT computer today?
Post by: scarecrow on May 17, 2024, 10:28:43 AM
Post by: scarecrow on May 17, 2024, 10:28:43 AM
Nothing :(
Title: Re: What have you done with your NeXT computer today?
Post by: cuby on May 17, 2024, 11:10:28 AM
Post by: cuby on May 17, 2024, 11:10:28 AM
...used the Turbo Color floppy drive to write some 720k DD floppies with ST-Oberon V4 for my Atari ST...
Title: Re: What have you done with your NeXT computer today?
Post by: legodude on May 18, 2024, 07:44:46 AM
Post by: legodude on May 18, 2024, 07:44:46 AM
Quote from: MindWalker on May 17, 2024, 09:45:30 AMIn my experience, SD-cable extensions are somewhat inconsistent in quality, but they can work. I am running my HP 712/60 with a ZuluSCSI and a SD-cable extension, and I designed a printable slot bracket to mount the SD-card reader in the rear for easy access. And it works. The slot bracket files are available here: https://www.thingiverse.com/thing:6612532 (https://www.thingiverse.com/thing:6612532), in the description is a link to the extension cable I used.
Having a switch to swap between configs would be nice; currently I just take the SD card out and rename the two hard disk images I have (NS and HP-UX) when I want to swap. At least ZuluSCSI allows adding two push-buttons and those can be used to swap CD-images (https://github.com/ZuluSCSI/ZuluSCSI-firmware/blob/main/README.md#physical-eject-button-for-cdrom) so sure it sounds possible.
EDIT: this got me thinking, and while experimenting, it actually is possible to dual-boot the 712! See my new thread here: https://www.nextcomputers.org/forums/index.php?topic=5639
Do you have a part number or search term for the 712 RAMs? I could use some addition for my current 64MB. I didn't knew there was a dual monitor board for the 712 that works with NS, that sounds very neat!
I love the SD card holder. I have a floppy drive cover 95% designed, and it could easily be modified to mount a SD card out front. I'll post it once finalized.
The buttons for the CD gave me the idea for a switch. Your dual booting option is slick.
https://www.openpa.net/doc/mem.html
OpenPA has a nice list of memory modules.
I'm planning a post on my 712 as soon as I get my retro desk cleaned up enough to be photographed without shame.
Title: Re: What have you done with your NeXT computer today?
Post by: Nitro on June 03, 2024, 04:50:03 PM
Post by: Nitro on June 03, 2024, 04:50:03 PM
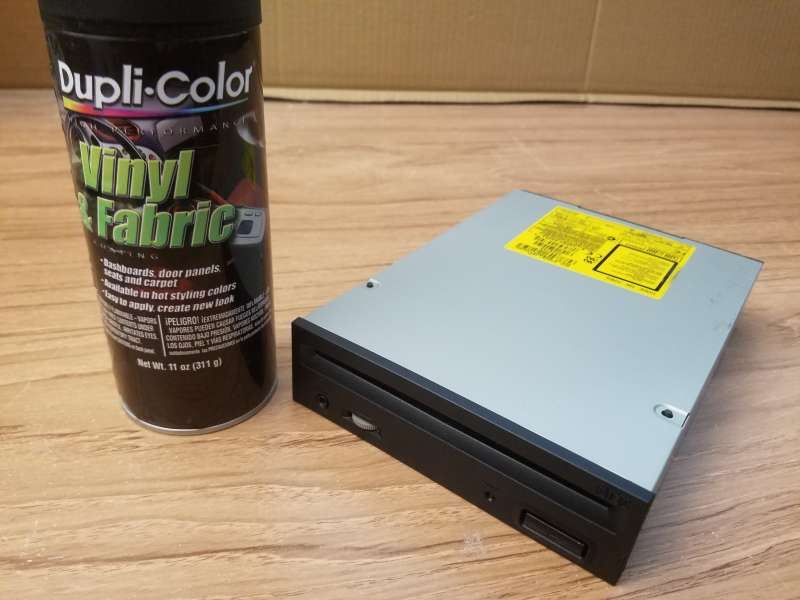
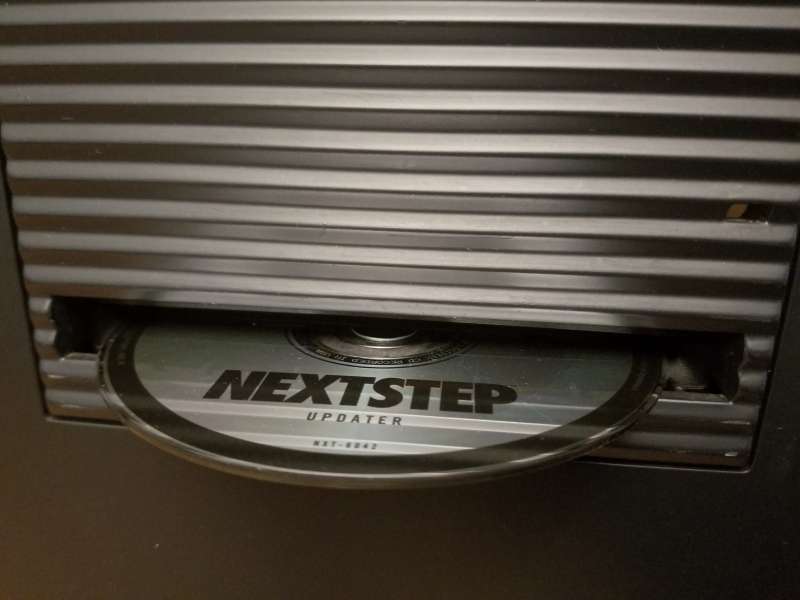
I updated a 25MHz 040 cube today by replacing the dead MO drive with a slot load CDROM. I painted the beige faceplate of the CDROM black to match the cube. I used the @idylukewild method of slipping paper between the felt and the faceplate (https://www.nextcomputers.org/forums/index.php?topic=524.msg3394#msg3394) to mask it off from the paint. Worked like a champ.
Title: Re: What have you done with your NeXT computer today?
Post by: cooltr6 on June 07, 2024, 02:01:57 AM
Post by: cooltr6 on June 07, 2024, 02:01:57 AM
What's been done with the NeXT today? Well, not today...but over a period of some days.
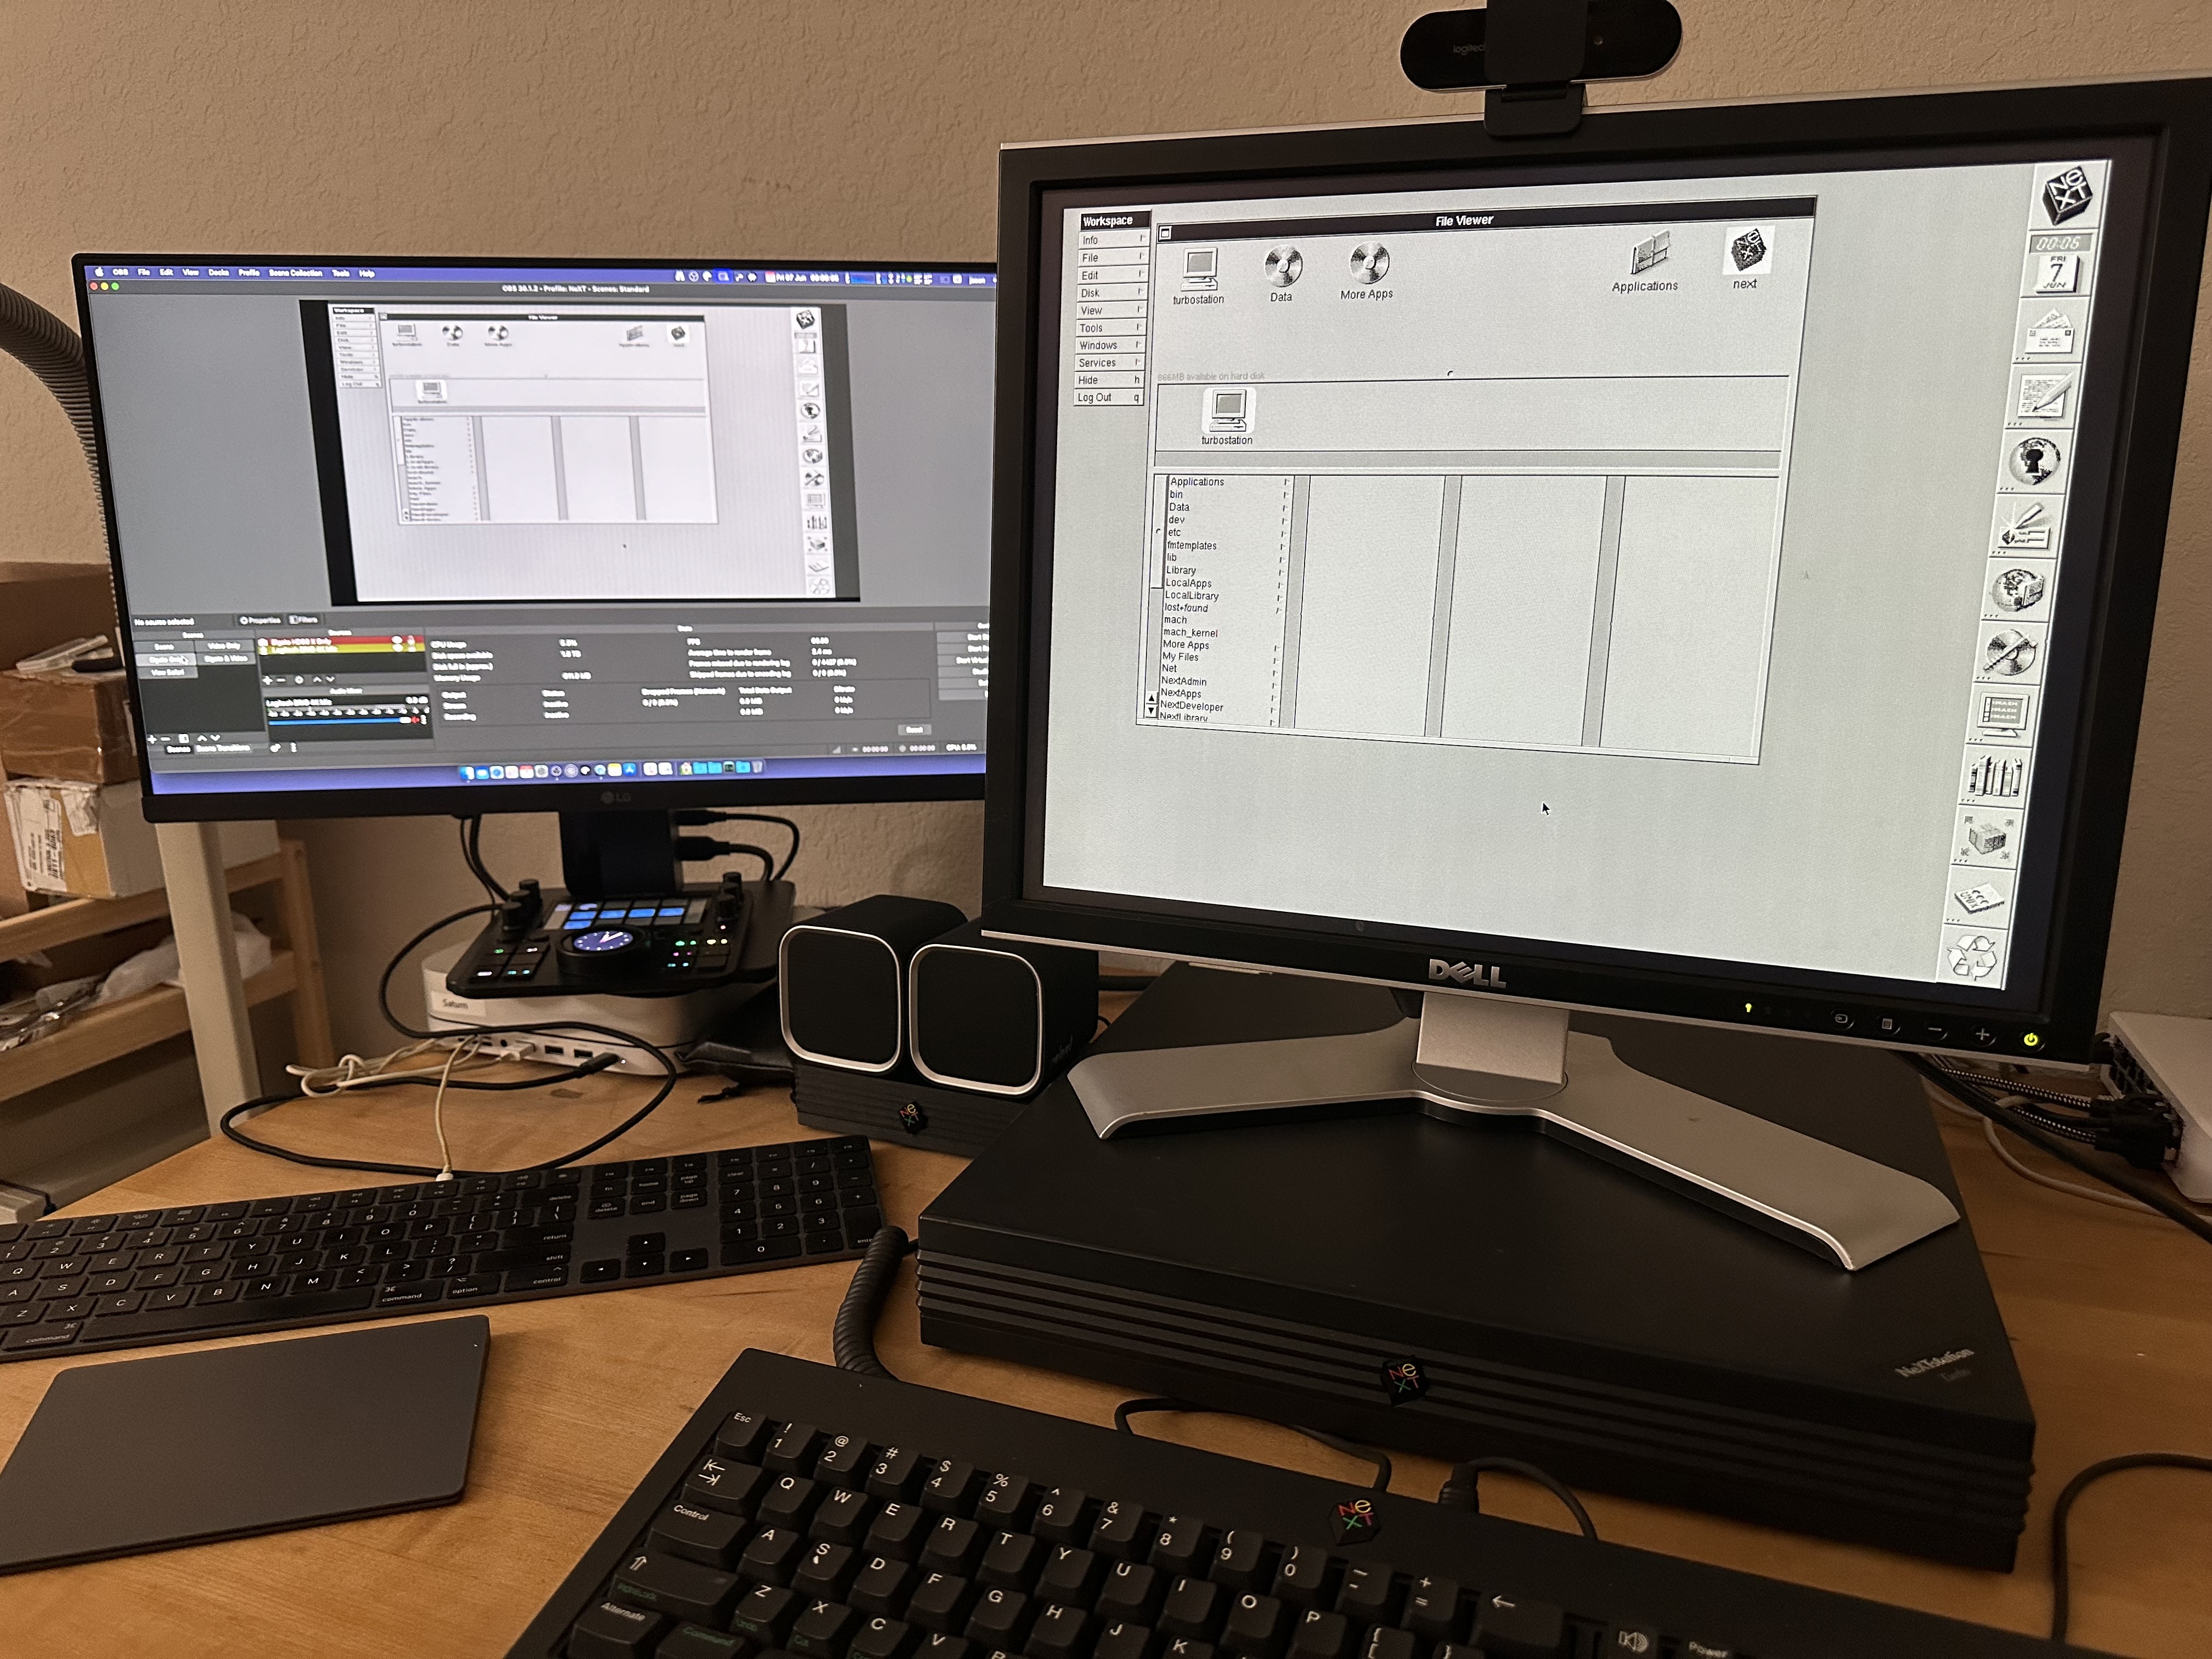
1. Put together a really neat way using some new age technology to capture video directly from a NeXT. While the Elgato HD60 X doesn't understand NeXT video output and the NeXT doesn't understand 1080p...with some adjustment and tinkering around, got an image that's good enough to do demo videos and publish them out to YouTube or wherever.
What was used to build this little gem:
• An M1 Mac mini, running macOS 14 and using OBS [Open Broadcaster Software, available at https://obsproject.com].
• A Satechi Mac mini hub with a Crucial 1TB NVMe Gaming SSD for extra storage - AND - extra ports.
[Satechi Mac mini hub - https://www.amazon.com/dp/B0CR1WWSGN?psc=1&ref=product_details]
[Crucial 1TB NVMe SSD: https://www.amazon.com/dp/B0CK39YR9V?psc=1&ref=product_details]
• A VGA to HDMI converter. This is very important, because these converters are one way only. There are HDMI to VGA converters out there, but they will not work.
[https://www.amazon.com/gp/product/B07K14NR8P/ref=ppx_yo_dt_b_search_asin_title?ie=UTF8&th=1]
• A VGA Y-cable, for connecting to the VGA to HDMI converter and the flat panel display. This cable gets plugged into the nuIO box or Dimension board with correct connectors.
[https://www.amazon.com/dp/B005H3I38G?ref=product_details&th=1]
• Optional - a Loupedeck CT or other type stream station. This is used with OBS to switch between different input sources, mute microphones and the sort.
I worked with Rob Blessin to set this very thing up...to help him bring his video production to the "next" level.
2. Made my nuIO box a little more NeXT genuine, just by adding a small jewel to the front. Wish there was a formed indent for it. ;-) Regardless of that, it looks really kool sitting proudly next to the Slab.
3. While not exactly NeXT work, it seems that the Slab that's on the table currently is going to become popular. This Slab came to me by way of eBay, being advertised as 'part of an estate sale'. When it arrived, there was something that caught my eye...an asset tag from MIT. This Slab was running NeXTSTEP 3.1 on an original Seagate ST3283N [a 247MB hard drive]. On that drive were some old research documents and home folders for quite a number of people. Named 'hickory.mit.edu'. That drive has been preserved and will be returned to the Slab soon...essentially brought back to its stock condition [except for the recapping job that was done]. When all is in readiness, it will be returned home, to be part of a permanent display. It'll be interesting to find out if any of the names on the home folders was the faculty member to which the computer was assigned. Exciting times!!
4. Also not directly my NeXT work...but I also worked with Rob Blessin to help with the setup of the VHS to Digital video capture device currently being used to immortalize the 30+ year old NeXT video tapes in his collection [along with other family related stuff as well]. A few takes with the first video with some tweaking...and the quality is wonderful. It's going to be a great addition to the community at large and for anyone who wants to learn more about our beloved Black hardware...and how NeXT really did change the world.
5. A small project for a member of another forum, that started on Adobe Illustrator 3 for NeXT and eventually got moved over to my modern Mac to complete. I don't know...there's something about using the older version of Illustrator...and even better on the NeXT.
Lots of little bits here and there...all the same, keeping the NeXT lights on and the fires burning. =)
Title: Re: What have you done with your NeXT computer today?
Post by: sappas on June 07, 2024, 08:30:28 AM
Post by: sappas on June 07, 2024, 08:30:28 AM
I received a N2000 printer who doesn't print maybe the big roller who take the paper sheet
Title: Re: What have you done with your NeXT computer today?
Post by: wlewisiii on June 07, 2024, 12:40:22 PM
Post by: wlewisiii on June 07, 2024, 12:40:22 PM
I need to get better at printing from apps in Previous out to the real world. This is probably best done by creating compatible spreadsheets, documents and databases or saving as pdf and then printing out of the host OS. That would allow me to do much more in NeXTStep.
Title: Re: What have you done with your NeXT computer today?
Post by: cooltr6 on June 08, 2024, 04:35:17 AM
Post by: cooltr6 on June 08, 2024, 04:35:17 AM
Today's escapades involve Cube #1 or as it will be known as 'blackbeauty'.
Some time back, I set my mind to installing a BlueSCSI device in this Cube. Of course, the mounting area is certainly larger than the printed sled. So, that had to be remedied. StarTech 5.25" to 3.5" mounting bracket to the rescue. [https://www.amazon.com/gp/product/B000HLZXH2/ref=ppx_yo_dt_b_search_asin_title?ie=UTF8&th=1] Removed a couple of the mount points that weren't needed a couple of screws and hey presto...BlueSCSI mounted on a 5.25" sled. After I did this, the Cube stayed on the shelf, it's back off and just there chillin'.
Another bit of work I was doing with the HP 712/60 prompted me to find out about SD Card extenders, since the idea of having to disassemble that beast each time for a card change was just not tenable. Off hand I don't remember who recommended it, but another Amazon purchase made...XtremeAmazing SD to SD Card Extension Extender Cable Adapter [https://www.amazon.com/gp/product/B086MWCTWG/ref=ppx_yo_dt_b_search_asin_title?ie=UTF8&psc=1]. However, I ended up finding another way to deal with the problem with the 712, so the purchase of the card extenders just sat in its box...waiting for today.
Finally I took the Cube off the shelf and pulled things apart. Two things were to happen -- first, was to have a drive access light that was visible, the other was to install the SD card extender. Same problem I had with the 712...disassembly to get the card out...and getting to the card is even more difficult with the Cube since the drive sled puts things almost up to the front bezel. This is working smarter, not harder...not being lazy...but I don't want to have to almost fully disassemble things to do card maintenance. 😁
Marked the spot where the light was to go. Since the drive bracket I installed was plastic...AND fell in the right place where the eject hole for the MO drive is...a mark made with a small screwdriver gave the location. A couple of drill bits later and there was the hole for the access light, perfectly centered. Wired that up to the BlueSCSI card and secured it to the frame. First part of the work completed. Next, installed the SD card extender. That was easy...fed it underneath the BlueSCSI sled and velcro'd the card holder to the top of the drive cage. Still have to pull the back panel off, but it's easy access to the card now.
Before I put everything together, of course ya gotta test. So the Turbo Mono came to the rescue for that. Threw the card I'm using in that system into the 'extended' card holder and pressed the Power key. After POST...as expected, just started right up with no issues. Whoever said you can't use a card extender with BlueSCSI...I got proof it works.
Put the drive sled back into the cage and secured everything in. Plugged the Cube in and fired that up. That test passed as well with flying colors. A successful run, means that the time had come to finally button up the Cube....but not quite yet. 😏
A couple of more things will happen before the screws on the back panel are torqued down. The first has been done, the nuIO board with Cube mounting bracket is in. Now I'm just waiting patiently for BuildDisk to be completed so that I can move the card to the Cube and give it its new persona.
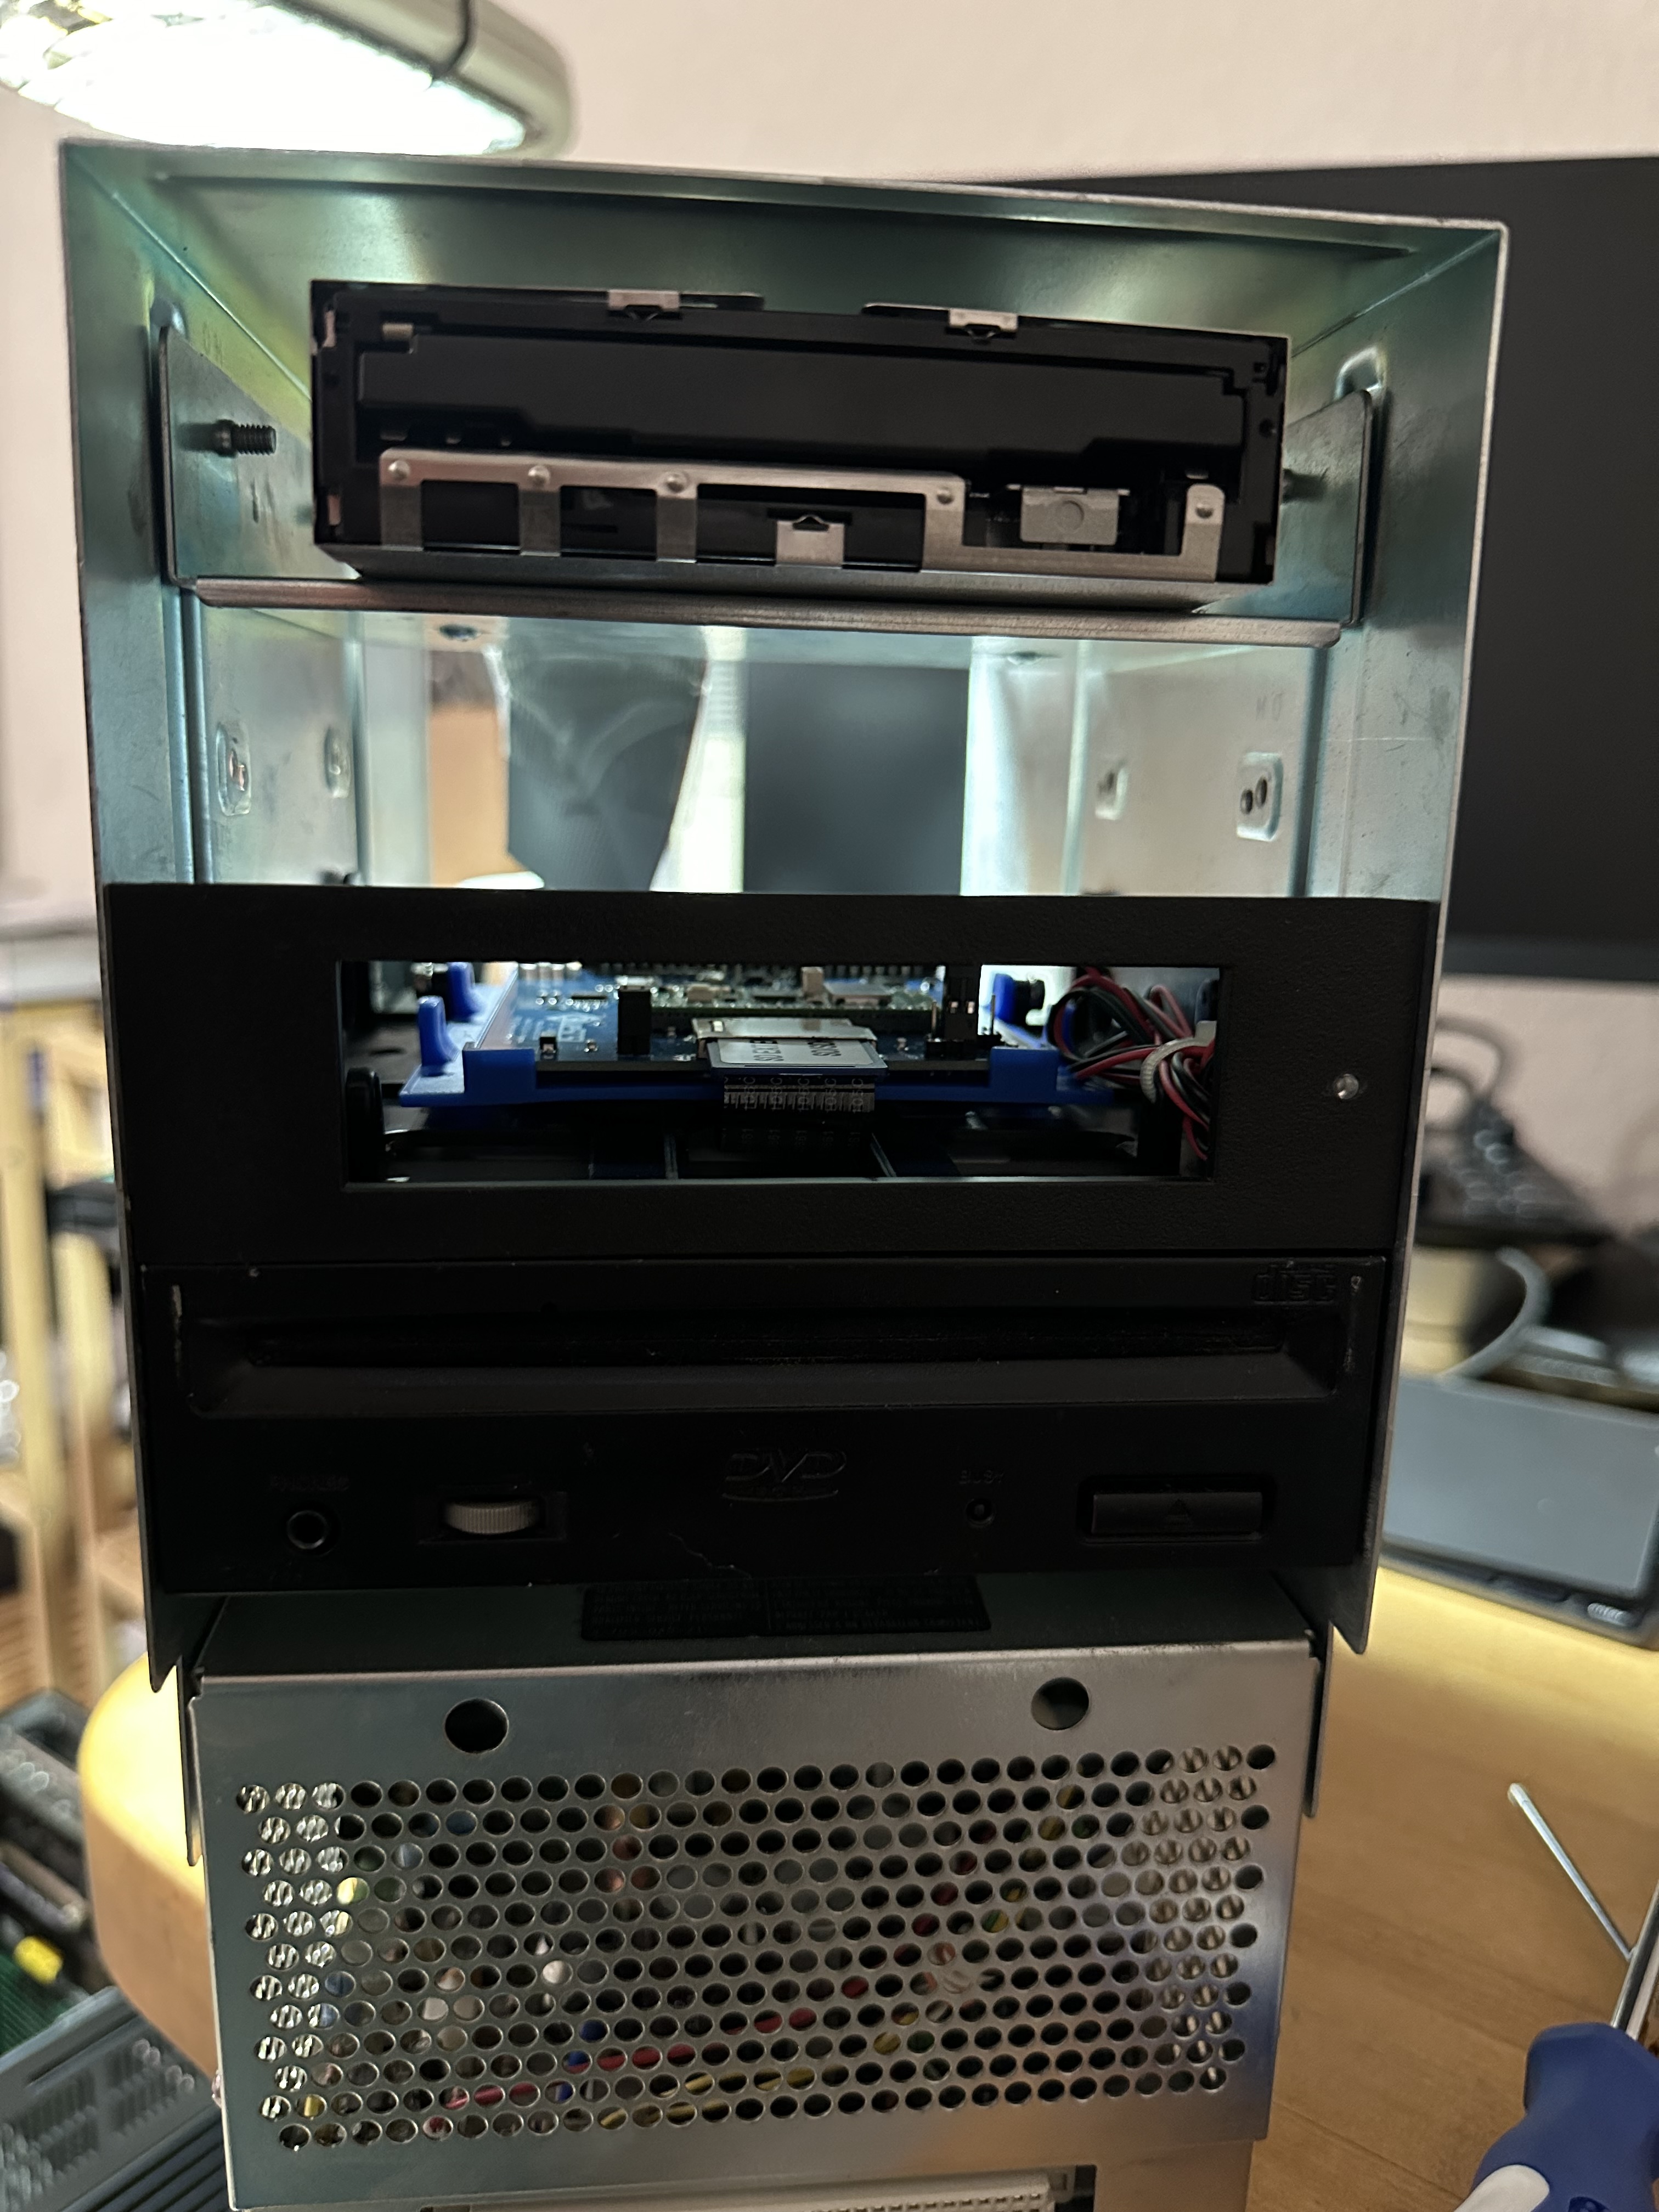
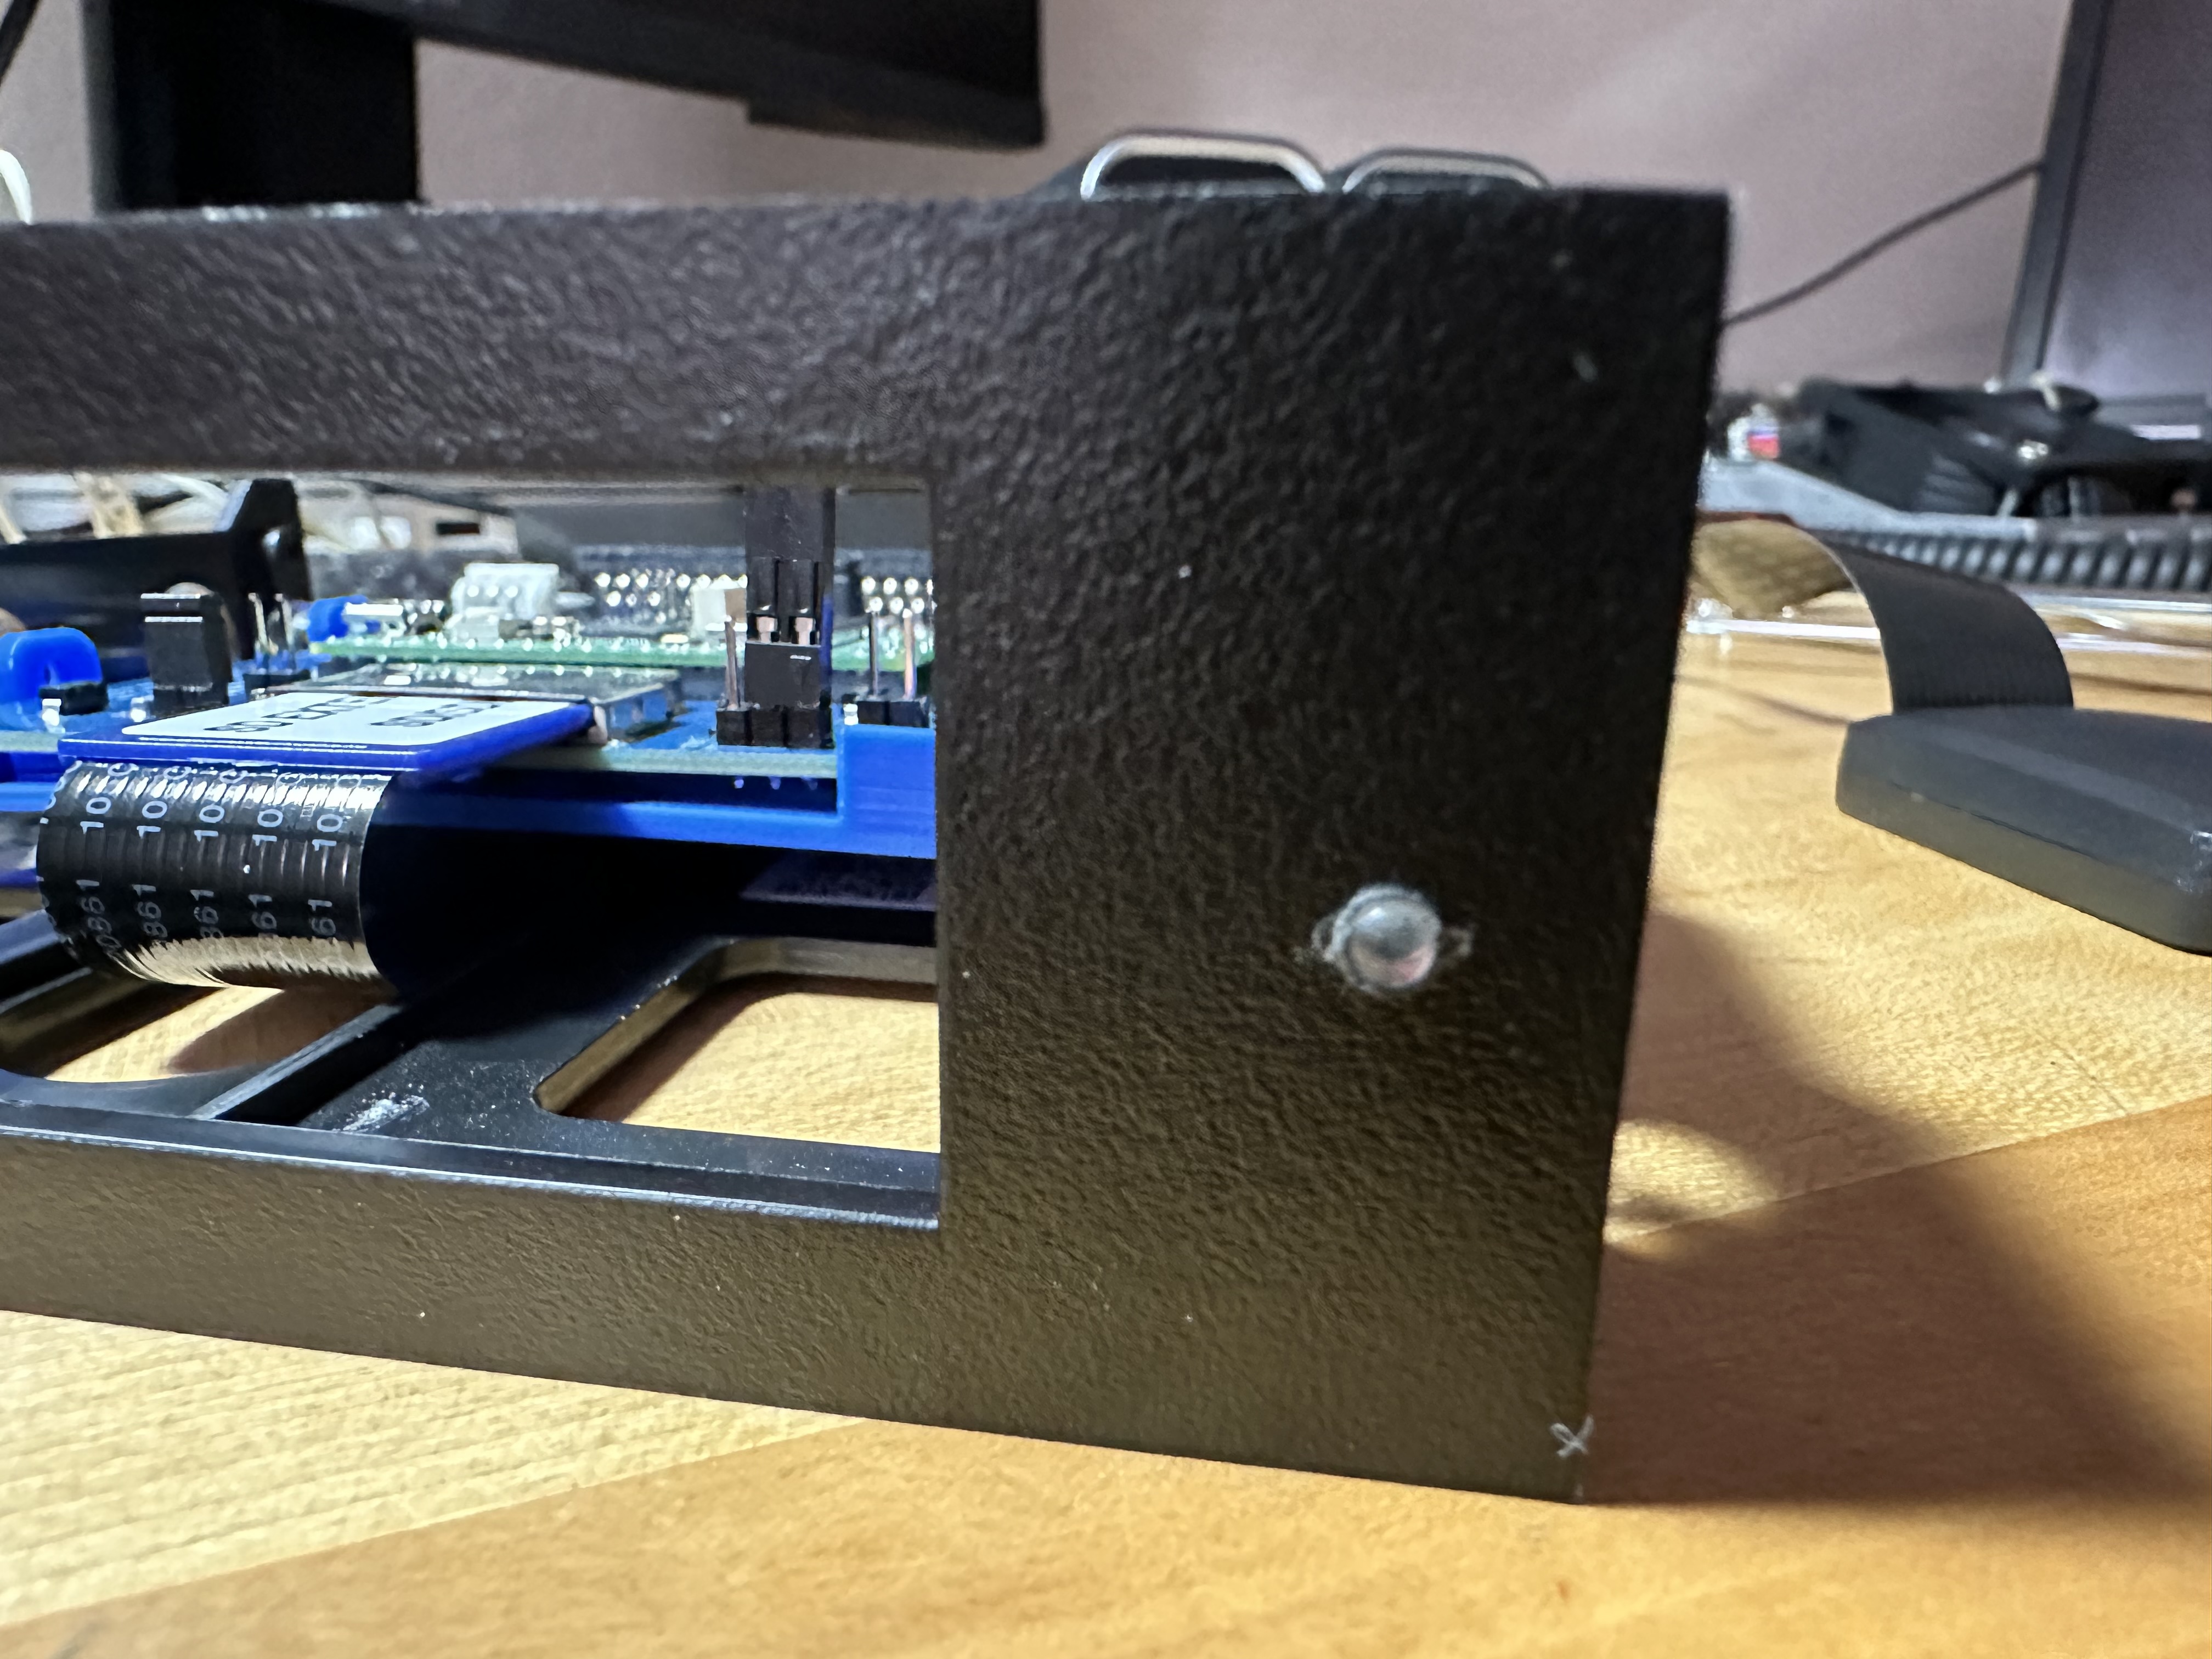
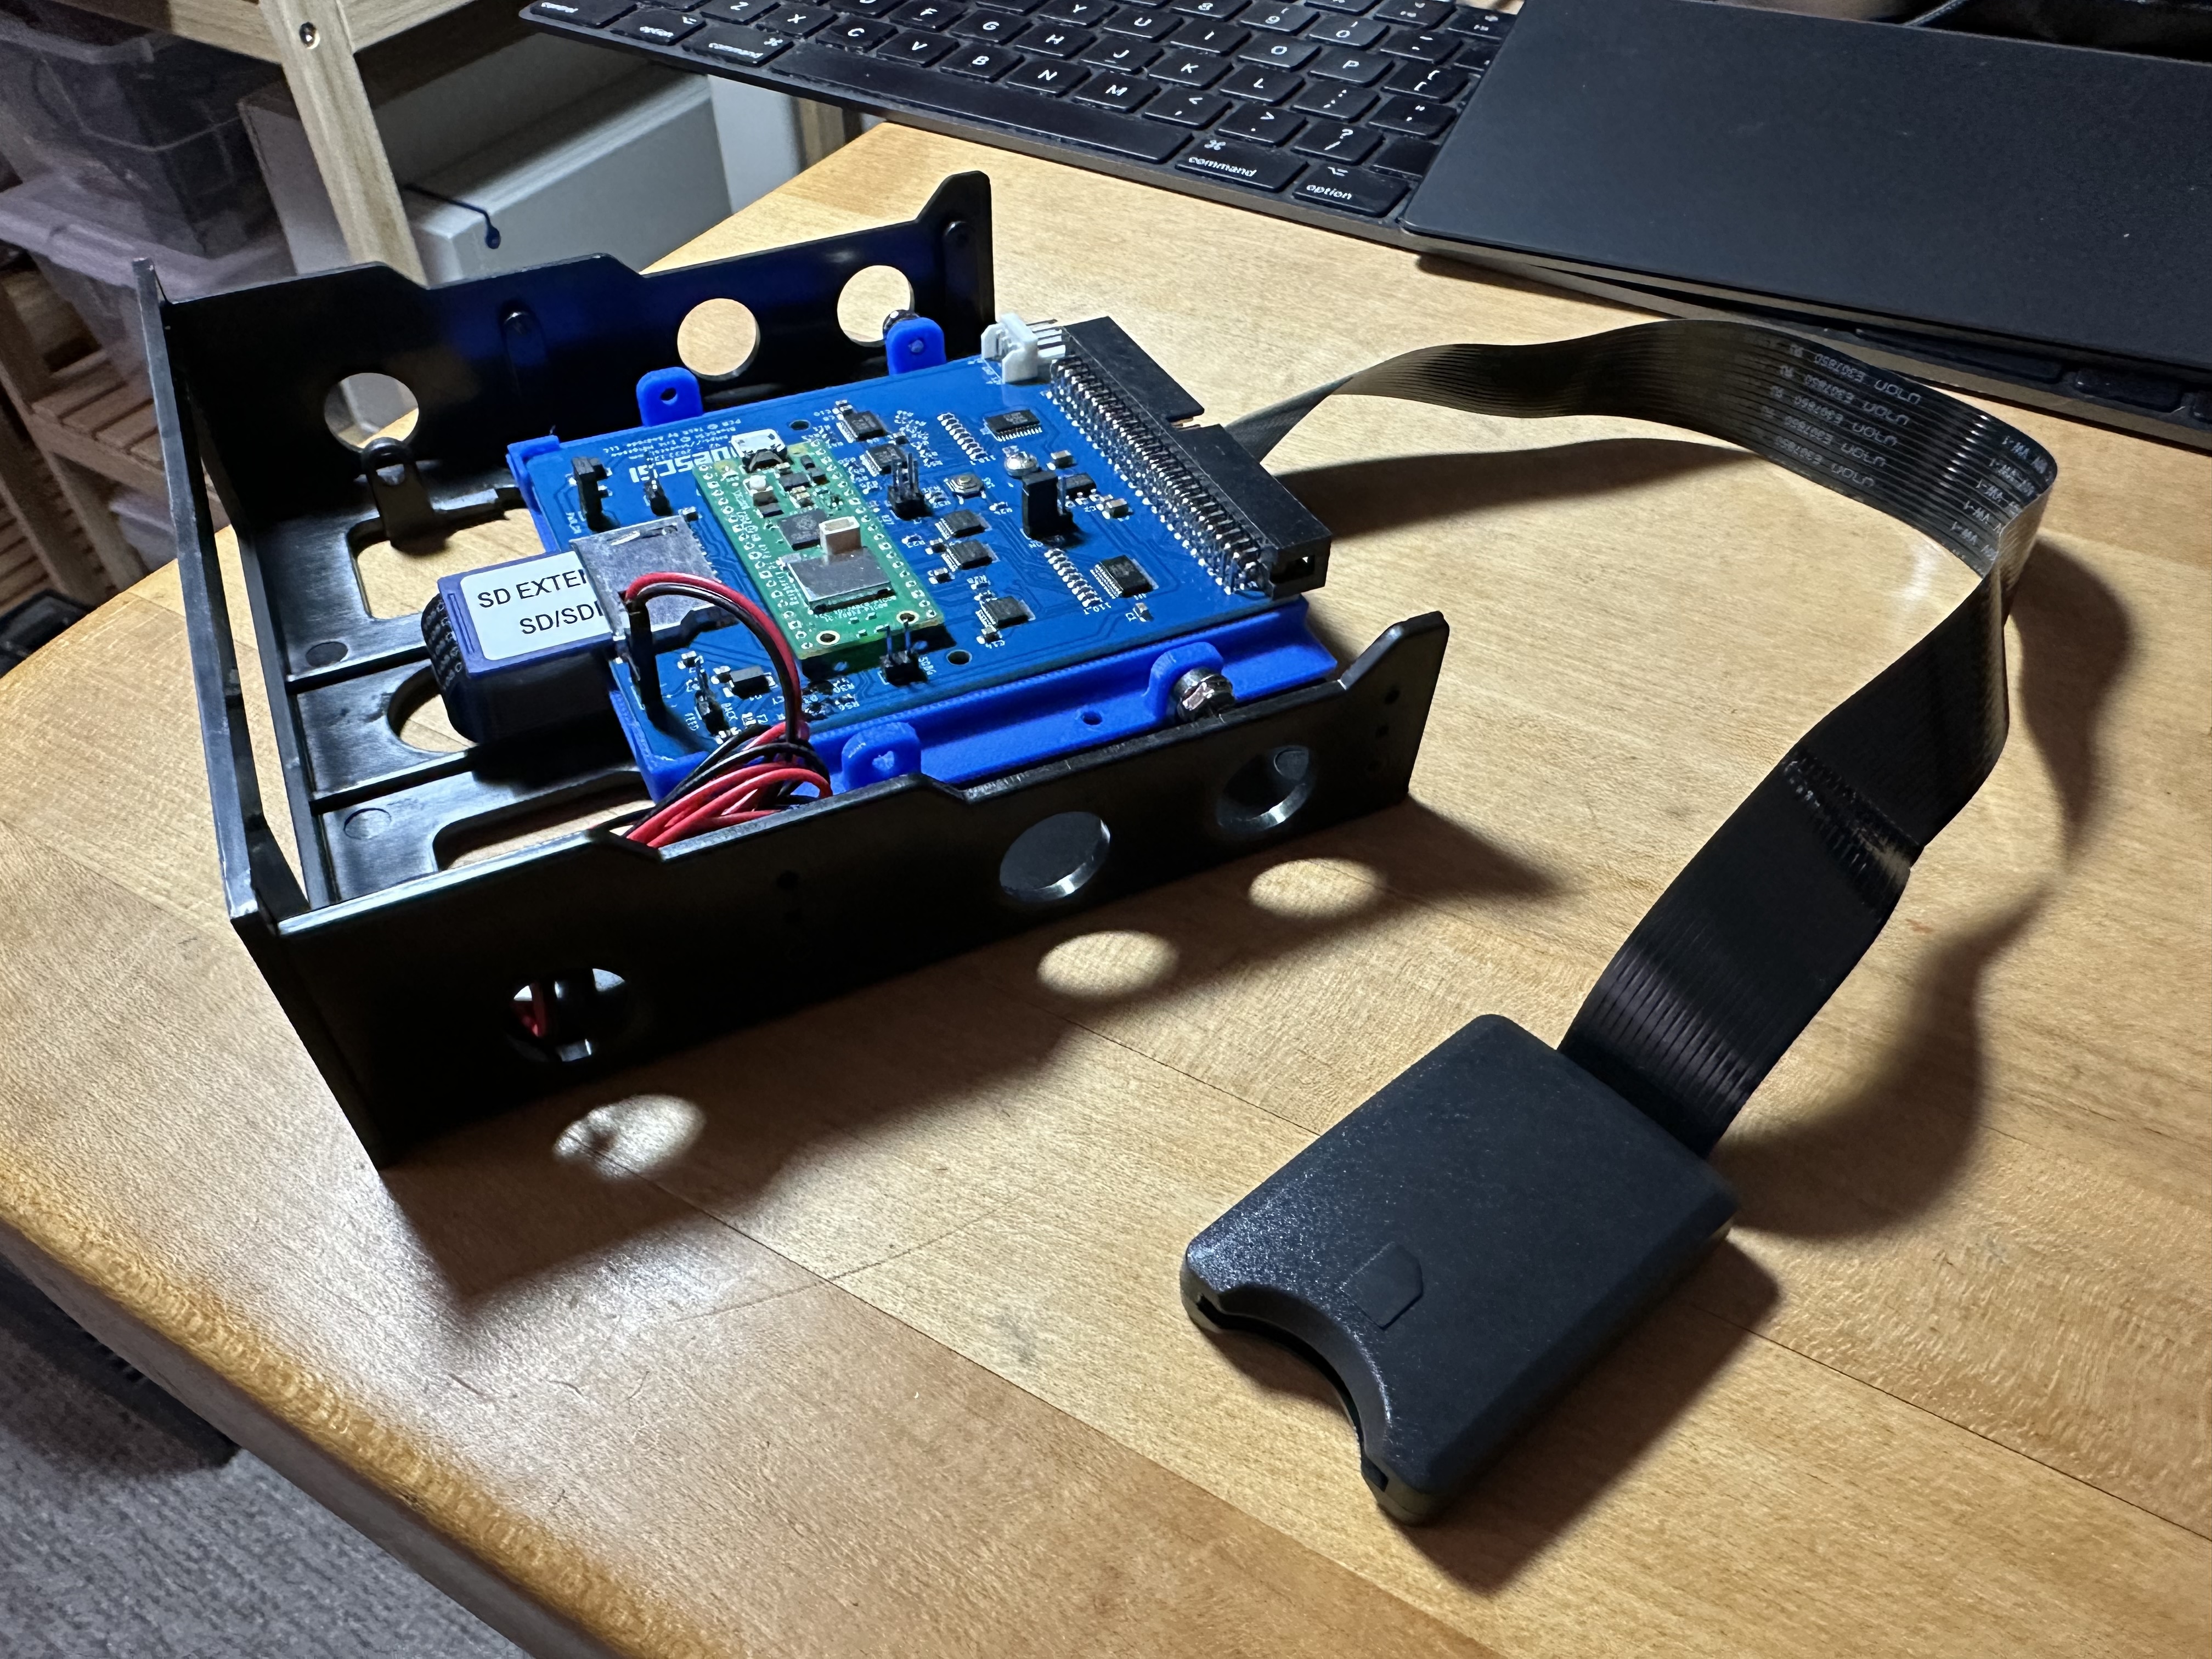
Title: Re: What have you done with your NeXT computer today?
Post by: cooltr6 on June 10, 2024, 04:27:49 AM
Post by: cooltr6 on June 10, 2024, 04:27:49 AM
Into the lands of adventure...
Just a short while ago, Cube #2 - known now as 'the_original', got the same BlueSCSI mounting bracket and drive light treatment that 'blackbeauty' received only the other day, along with 32MB of Siliconinsider's RAM. 'the_original' now has its persona and is known to all of the other Black equipment on the network. Since I don't have a Netinfo server, the local host database on each of the NeXT's is growing leaps and bounds. All NeXT/OPENSTEP systems know about one another now. They can hit the dedicated NFS server and all drives are exported, so they can be seen in Net.
I'm thinking this Cube might become the Netinfo server, but I'd rather not 'waste' a good Cube on such a thing. I put a post out in the Emulation/Virtualization section asking for help on how to build Previous on a Raspberry Pi, but no one has noted where the repo is, what pre-requisites need to be satisfied or how to build Previous on another OS. If this can be done, 'the_original' can be put to other uses.
So it is known, 'the_original' is the first piece of Black hardware I acquired [along with a MegaPixel display], back in 2001 from Allegheny College. Their computer club was selling it to raise funds. It was advertised as 'their campuses last NeXT mail server'. It's had a good life so far with me and it's only got better.
I also took some time while I had the Cube apart working on other things, to crack open the power supply. There is a lot of dust and crud from all of its time online...not to mention a scad of caps that need replacing. Since this Cube is sitting on the shelf right now, it's a good time to tear down the PSU, make a good list of caps and locations and get that posted somewhere...maybe even put together a Mouser cart for anyone who wants to dive in to recapping a PSU.
On the note of recapping, there were some 'in progress' recapping guides for the MegaPixel display [and I believe the sound board as well]. This is also a project that needs doing, since I have two displays and sound boards that will certainly be in need of the recap love. If a recap of 'the_original' MegaPixel display doesn't solve some of the problems going on with it, I'll salvage the sound board, recap and install that into one of the Sound Box recreations that has been done. At least put that to good use. =)
More to come as the days continue forward.
Title: Re: What have you done with your NeXT computer today?
Post by: cooltr6 on August 18, 2024, 09:58:09 PM
Post by: cooltr6 on August 18, 2024, 09:58:09 PM
Greetings folks. It's been a while since posting something here, but there's been a little bit going on to bring some fire back to this thread.
My attentions have been shifted from just 'doing something' to fixing things. There are a couple of MegaPixel displays that I have which were in need of some love. I've spent some time disassembling both of those displays, with the intent of recapping the driver and sound boards. Disassembly went along well, things were dirty [as expected after 30 years]. After some wrangling, both displays are in parts. The driver boards were cleaned up in preparation for recapping and the sound boards the same.
Unfortunately, I ran into the first problems with this little bit of project doing...first cap I went to remove from the first sound board...traces came up and pads disintegrated. The joys of electrolytic cap destruction. Had to enlist the services of someone who I trust to do the meticulous work of fixing traces and getting a 'sensitive' board back online. Thomas Andrews of Amiga of Rochester, who did work for me on the two Macintosh SE/30's I have to the rescue. He took care of fixing the broken traces and pads on one sound board, cleaning up both boards and recapping with ZERO electrolytic caps. That work was spotlighted in one of his live streams.
Using the recap guide put together by Brian Archer [barcher174] for the MegaPixel display, went through the list of caps to make sure all were still available. Some had EOL'd, so took on the task of locating same type caps. Got that list together, ran it past Brian...and with a stamp of approval, an order of caps is on the way for the two driver boards.
While all of that was going on, the display cases, stands and other parts were cleaned up. Both now haven't looked as good for a while [that I can remember].
I'll be putting together a Work Log with photos for the recapping and re-assembly of the MegaPixel displays.
Work has also been done for Rob Blessin. Keyboards and mice, being a thing...I have started doing some work on restoring ADB and non-ADB keyboards. Cleaning is time consuming, but therapeutic. Caps have been replaced [yup, there are caps in the keyboard and mouse]. From the first set of keyboards [4 in total] that Rob sent me, was able to get two fully functioning keyboards that look almost brand new. I'll be looking forward to doing some more of that work as Rob sends along things.
Further work has been done on the Blackhole GM SD Card. Cleaned up a lot of duplication on the current card. Was also able to reduce the 6-disk card down to a total of 4, opening up a couple SCSI ID's. The plan for the cards is to have three different versions, with NS 3.3, OS 4.2 and a combined card with both versions, along with a bunch of pre-loaded CD's and the 4-disk setup. Working on this as time permits. I am also waiting for a larger physical hard drive to help with sorting things out a bit more efficiently.
A lot more fun to come...stay tuned!
Title: Re: What have you done with your NeXT computer today?
Post by: Nitro on November 30, 2024, 01:37:06 PM
Post by: Nitro on November 30, 2024, 01:37:06 PM
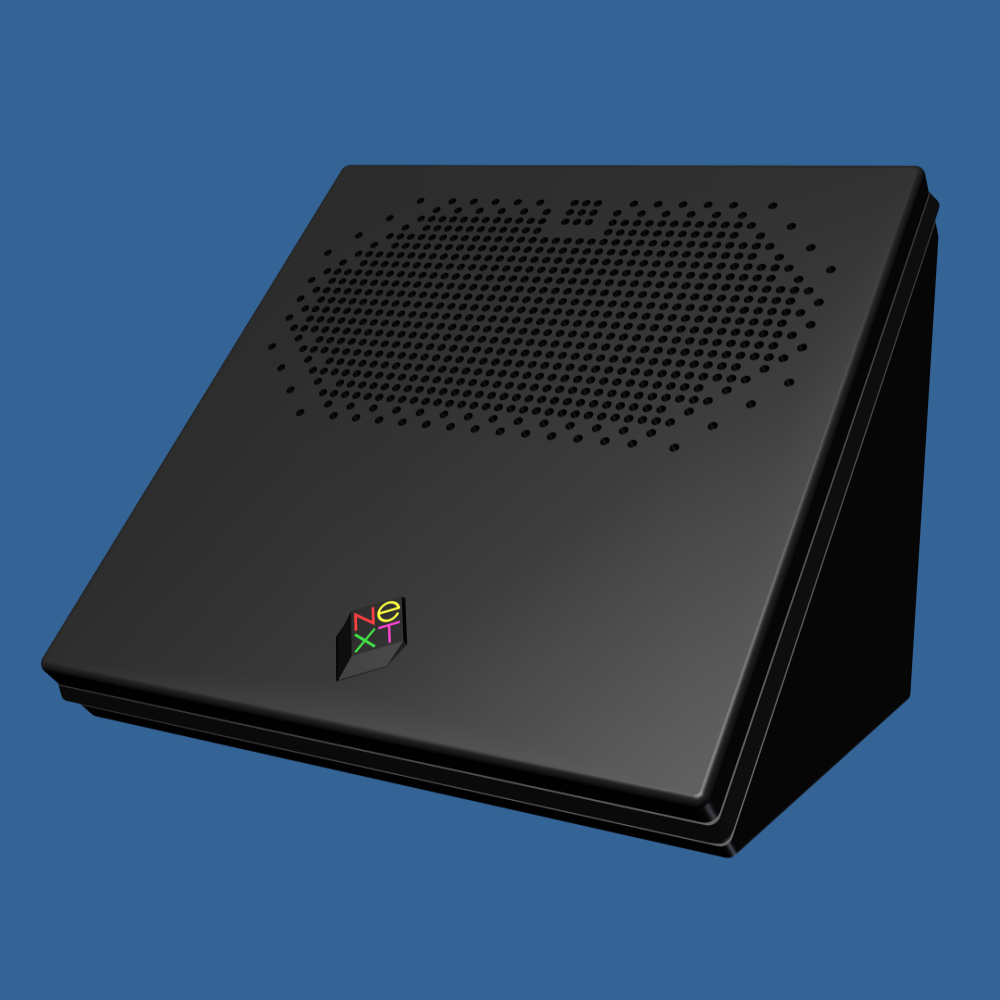
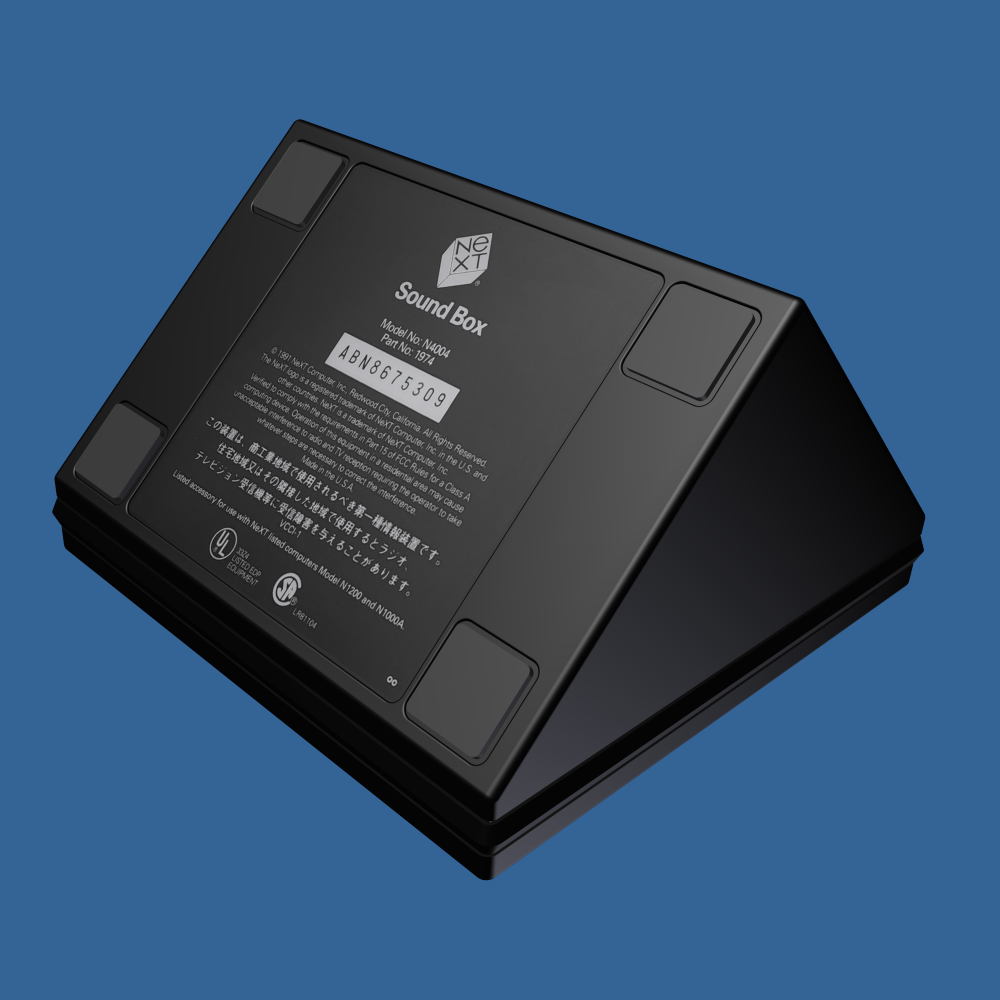
I started working on a 3D solid model of the NeXT Sound Box years ago, but finally started to make some progress recently. There's a long way to go yet but the shell, cover and inner speaker mount are pretty much done. I'm making different cutouts that can be suppressed as needed to support the original sound box PC board as well as Brian's board. A few different face plates will be added to include one with the microphone/speaker mounts built-in, and face plates with and without grill holes to test CNC drilling the holes vs 3D printing them. The modeling was done in Autodesk Inventor, and I was able to define the NeXT black paint color in the software. Inventor understands different materials so the rubber foot pads reflect light differently than the shell surface. Fun stuff.
Oh, and there may or may not be an Easter egg in one of the images. :)
Oh, and there may or may not be an Easter egg in one of the images. :)
Title: Re: What have you done with your NeXT computer today?
Post by: krazycat on December 03, 2024, 09:19:29 AM
Post by: krazycat on December 03, 2024, 09:19:29 AM
Quote from: Nitro on November 30, 2024, 01:37:06 PMI started working on a 3D solid model of the NeXT Sound Box years ago, but finally started to make some progress recently. There's a long way to go yet but the shell, cover and inner speaker mount are pretty much done. I'm making different cutouts that can be suppressed as needed to support the original sound box PC board as well as Brian's board. A few different face plates will be added to include one with the microphone/speaker mounts built-in, and face plates with and without grill holes to test CNC drilling the holes vs 3D printing them. The modeling was done in Autodesk Inventor, and I was able to define the NeXT black paint color in the software. Inventor understands different materials so the rubber foot pads reflect light differently than the shell surface. Fun stuff.
Very nice! Years ago I had an acquaintance make a 3D printing model of the original Soundbox, of which I also sent the STL files to Rob to make them available to the forum. But yours is much nicer and more refined!
Title: Re: What have you done with your NeXT computer today?
Post by: Nitro on December 03, 2024, 02:48:02 PM
Post by: Nitro on December 03, 2024, 02:48:02 PM
Quote from: krazycat on December 03, 2024, 09:19:29 AMVery nice! Years ago I had an acquaintance make a 3D printing model of the original Soundbox, of which I also sent the STL files to Rob to make them available to the forum. But yours is much nicer and more refined!
Thank you, I appreciate that. I spent a lot of years doing reverse-engineering and 3D modeling of parts at a time when few companies had solid models of their products available online. It's enjoyable to work on vintage hobby/maker stuff; I wish there was more time to do so.
Title: Re: What have you done with your NeXT computer today?
Post by: don_apple on December 18, 2024, 07:01:31 AM
Post by: don_apple on December 18, 2024, 07:01:31 AM
I did some "open-heart" surgery on my NeXTCube today and created a backup image of the harddisk using "Initiator mode" of a BlueSCSIv2:
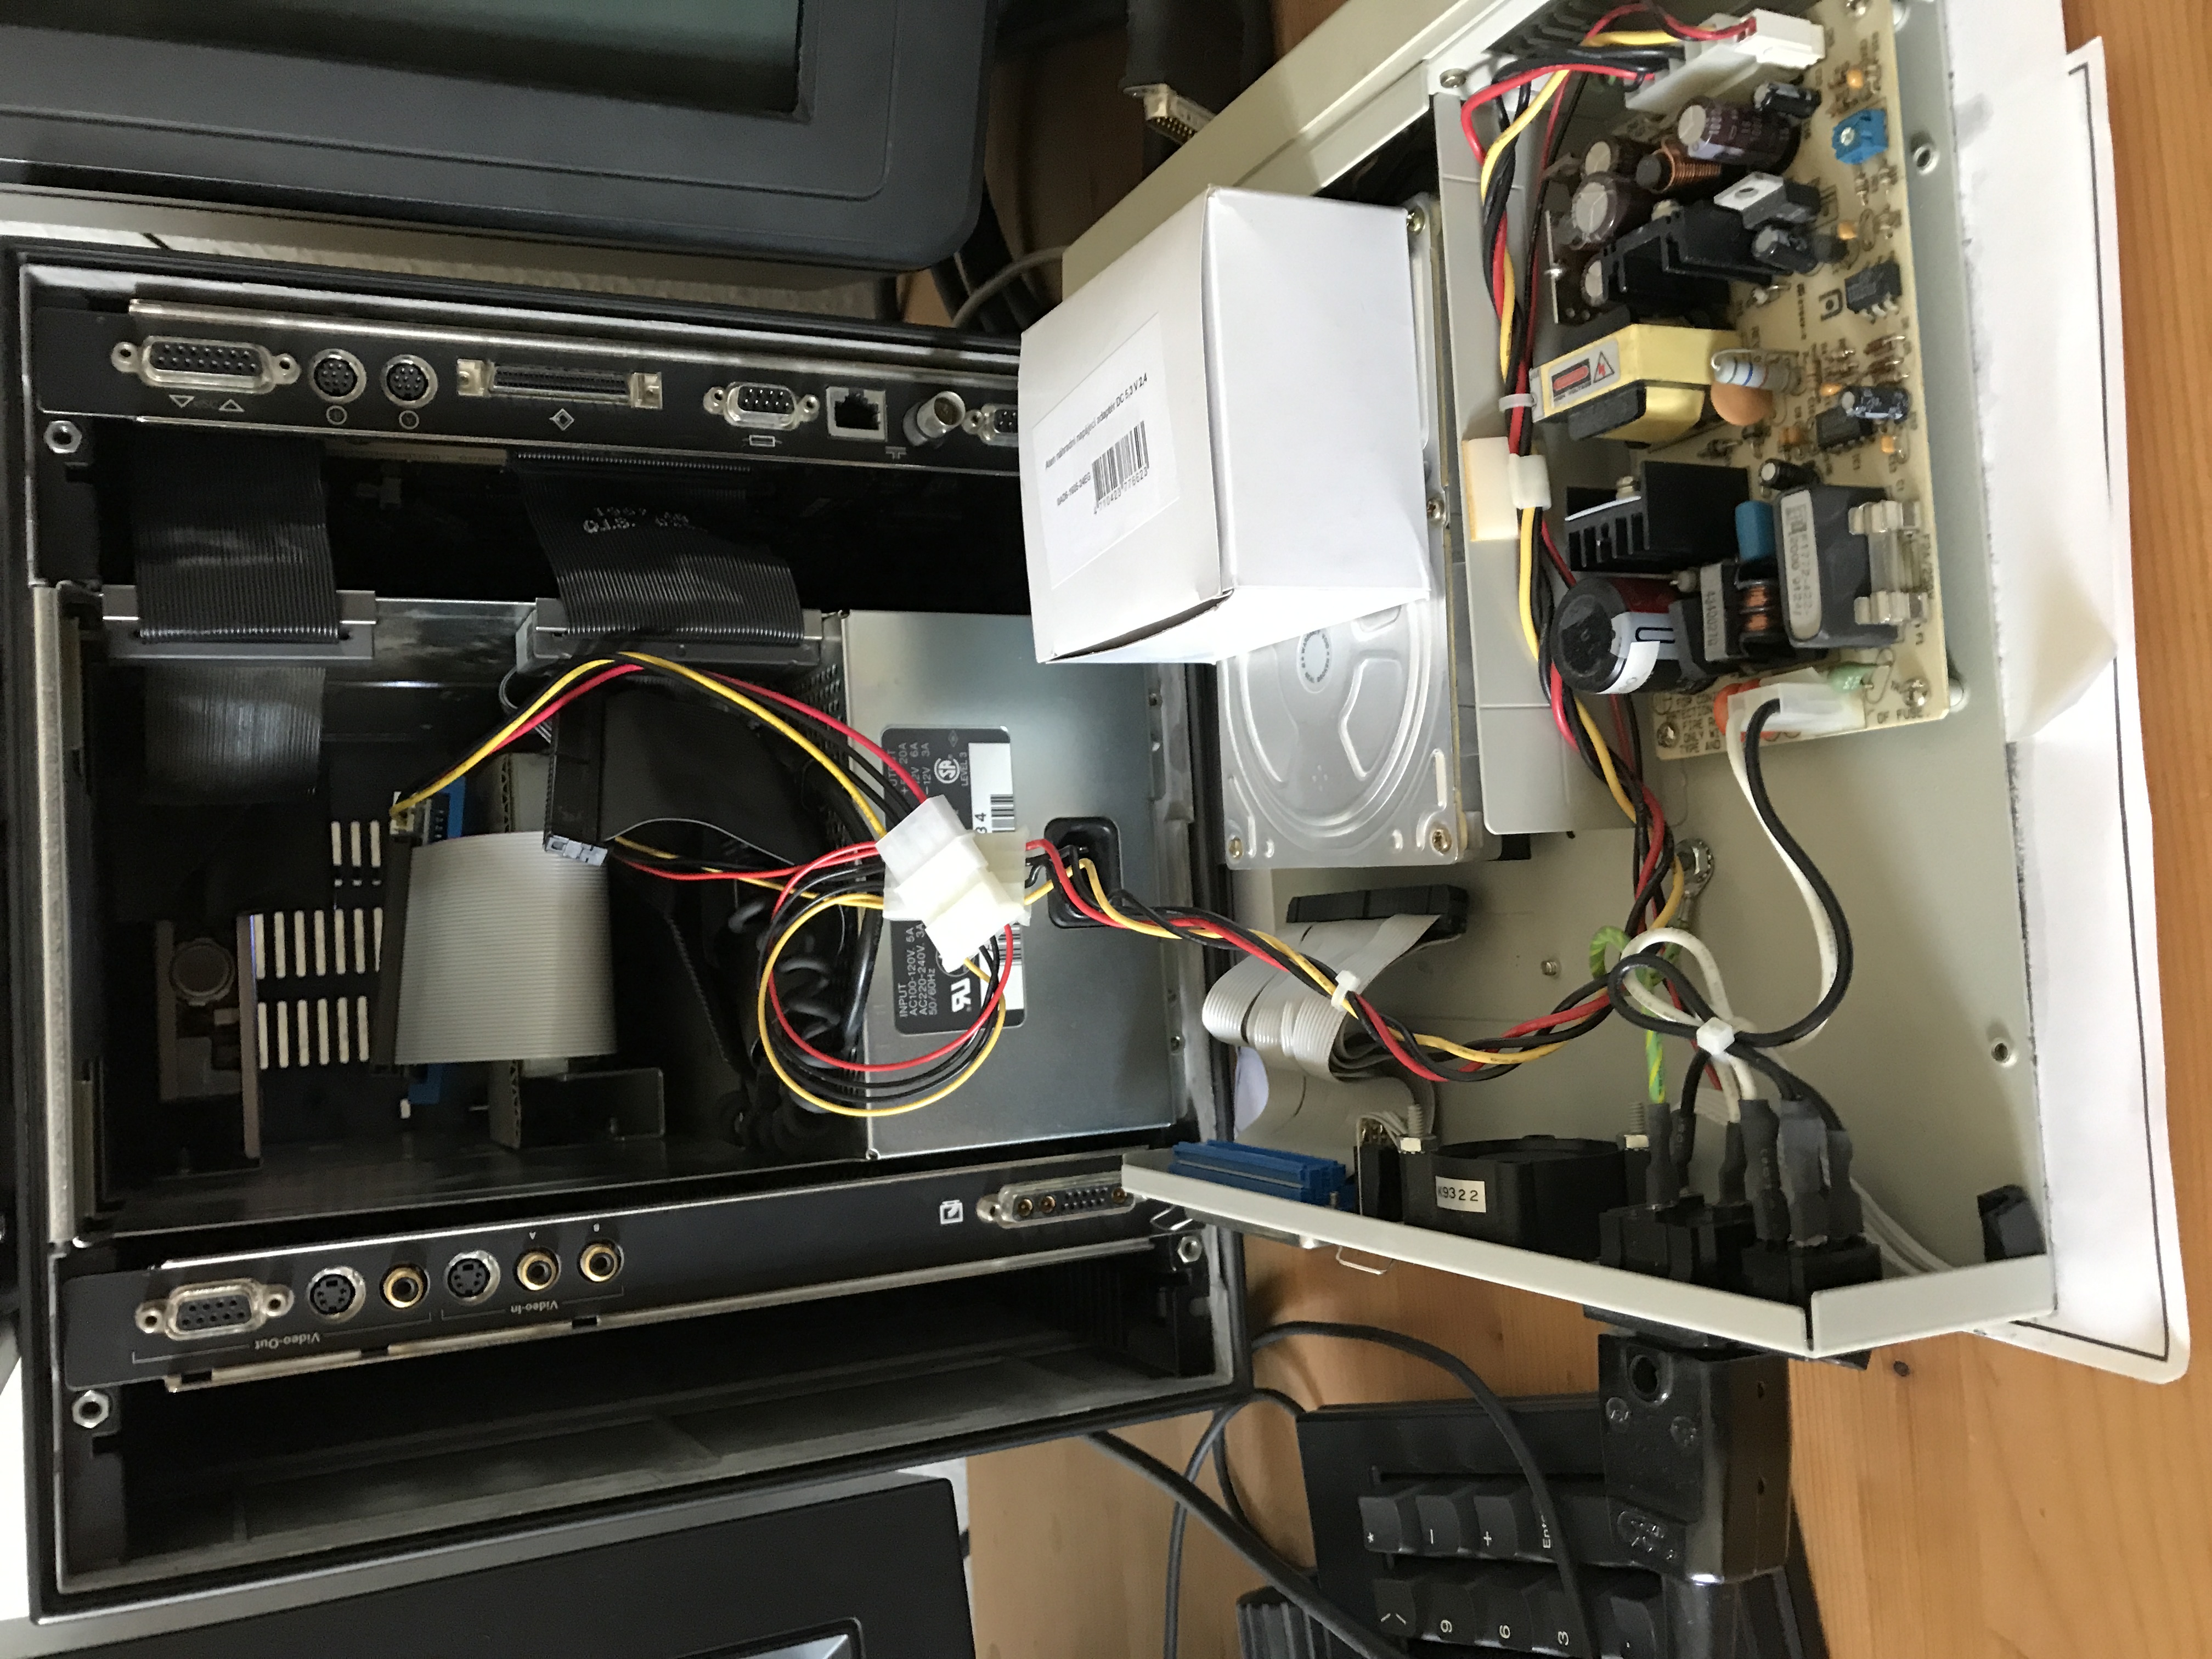
Used an old SCSI harddisk enclosure to power both the BlueSCSIv2 and the NeXTCube harddisk.
Transfered the created image from the BlueSCSIv2 to my Mac and atached it to a NeXTCube config in Previous, and it booted up like on the NextCube itself (just a bit faster :) ).
Used an old SCSI harddisk enclosure to power both the BlueSCSIv2 and the NeXTCube harddisk.
Transfered the created image from the BlueSCSIv2 to my Mac and atached it to a NeXTCube config in Previous, and it booted up like on the NextCube itself (just a bit faster :) ).
Title: Re: What have you done with your NeXT computer today?
Post by: blackbeauty on December 22, 2024, 04:42:03 AM
Post by: blackbeauty on December 22, 2024, 04:42:03 AM
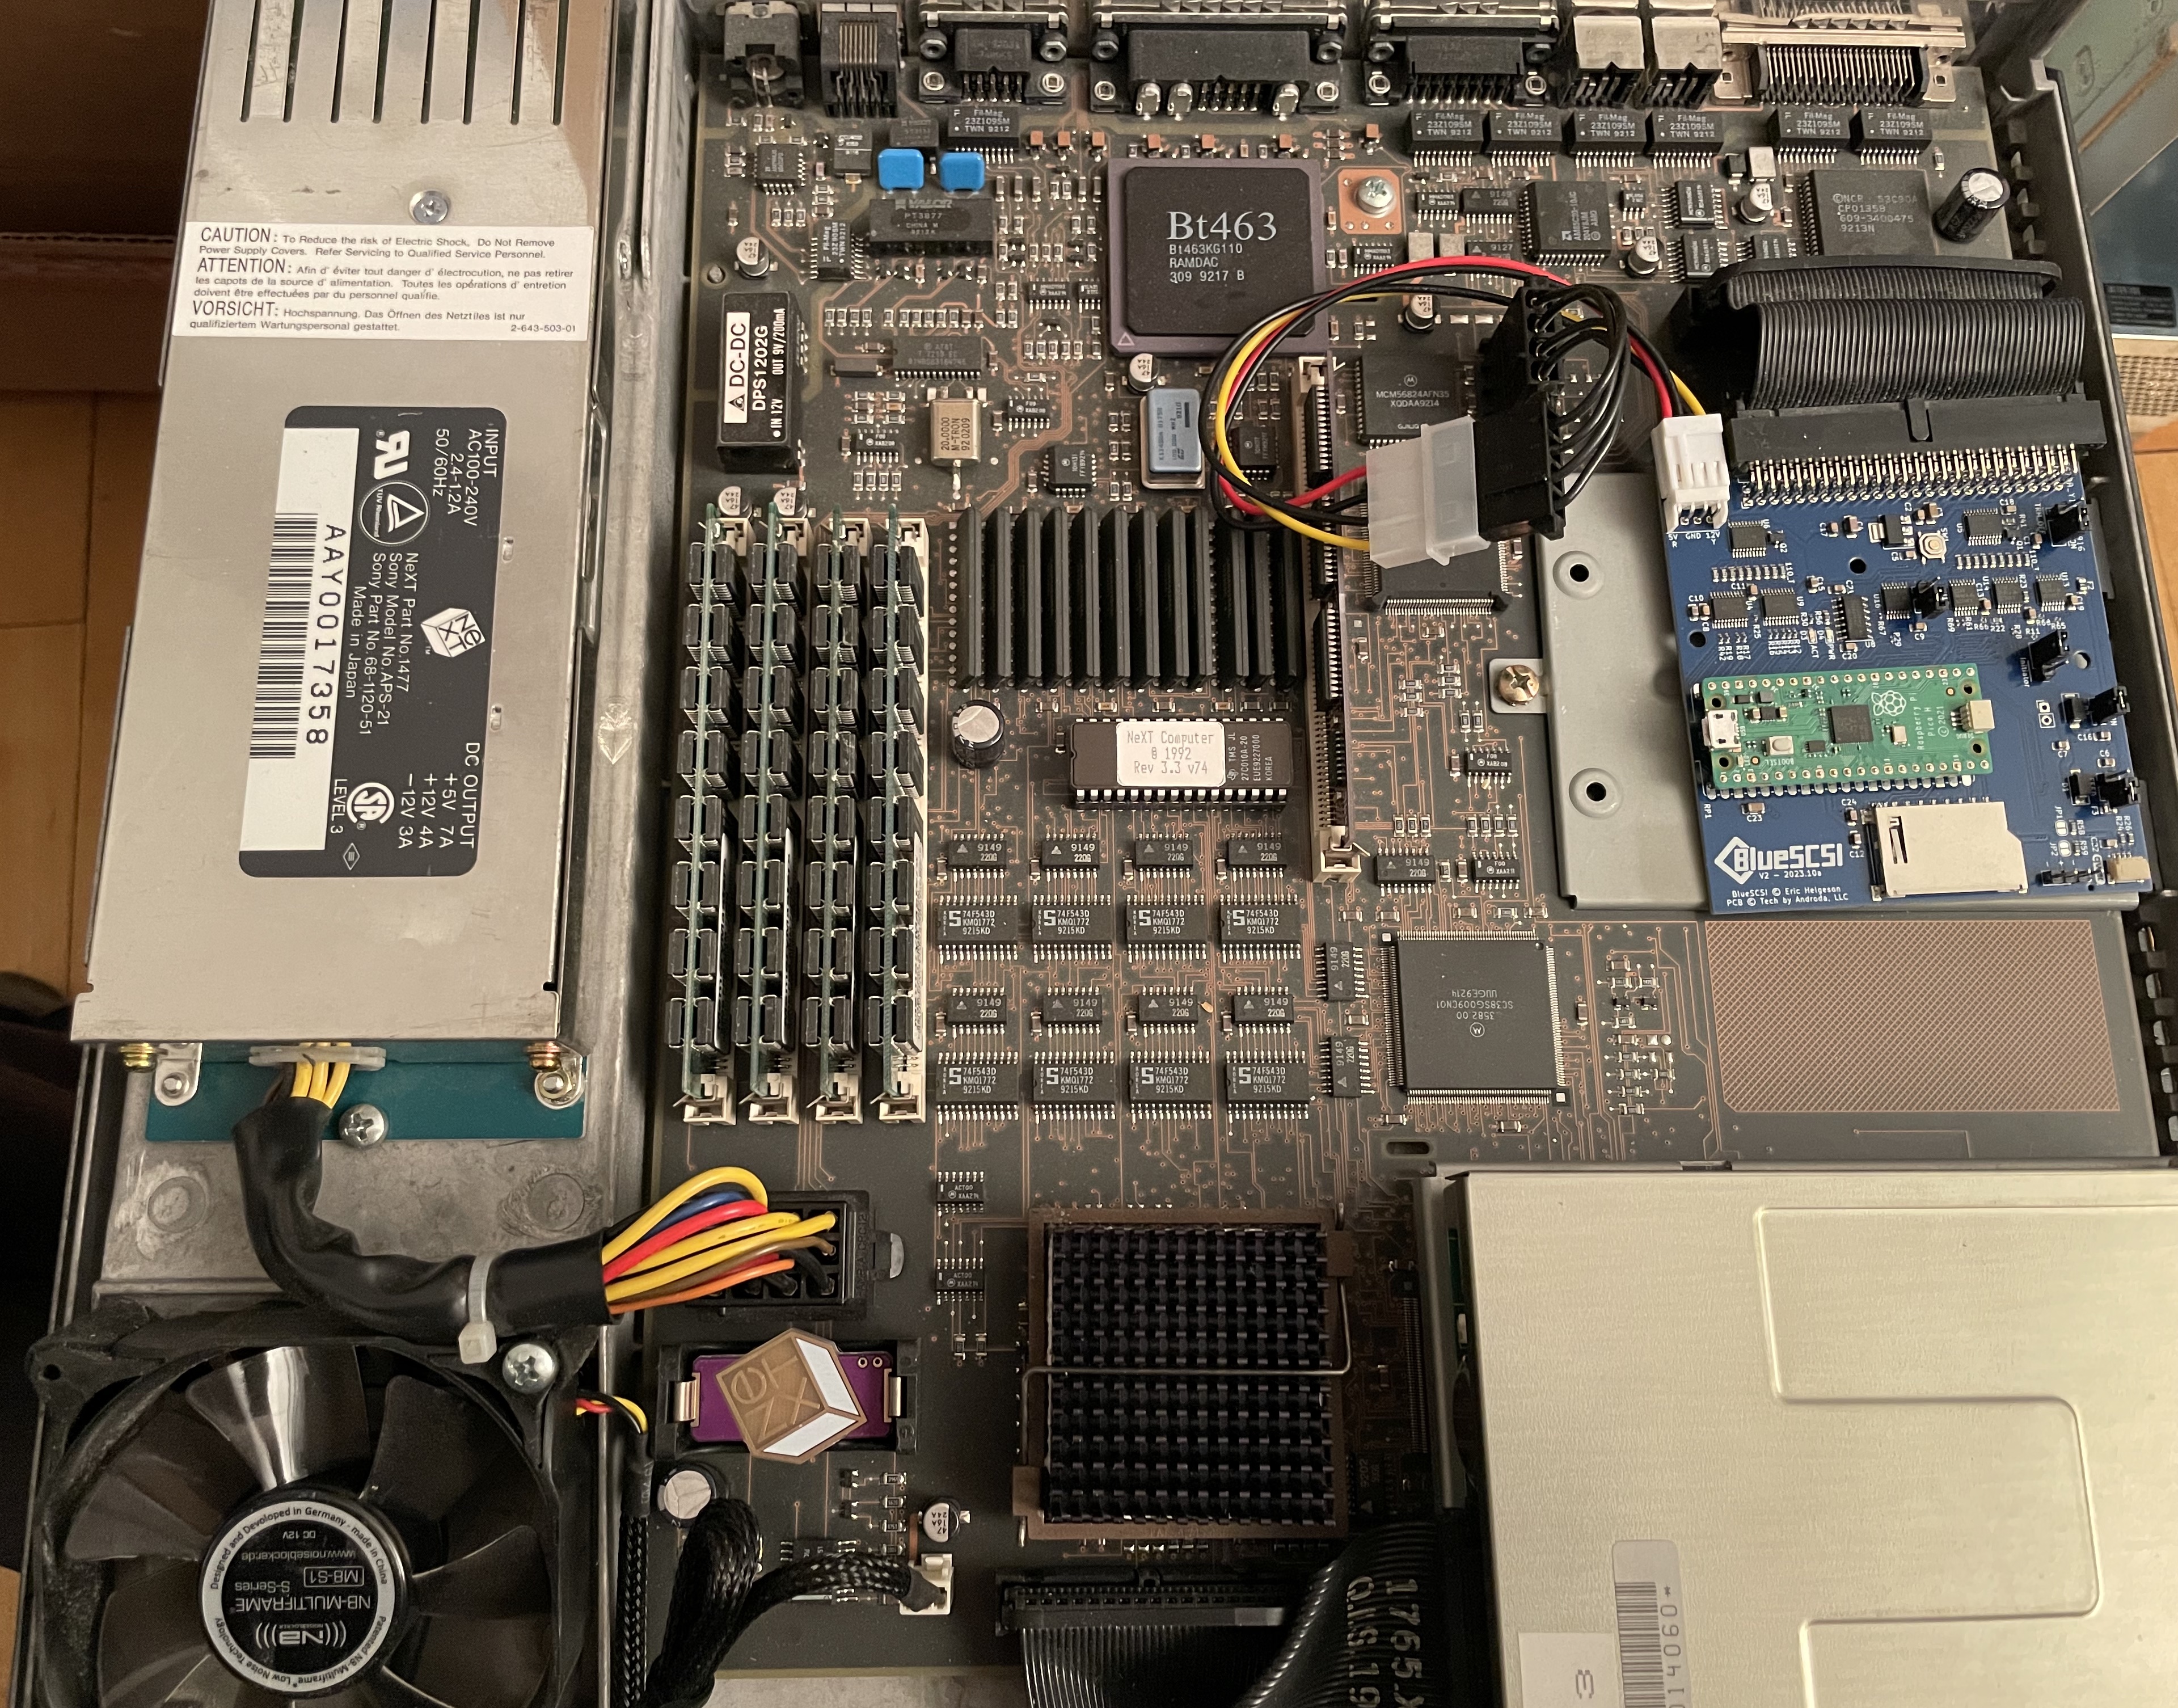
This is a nice thread that Nitro started, as it documents that the NeXT community is active and busy even after 30 years that NeXT abandoned its hardware business. So let me tell the story of this weekend's actions.
Yesterday, it was big upgrade day for my Turbo Color Station! When I bought it back in March 2009, it came with 16 megs of RAM, had ROM version 3.1 and the only non-original part was an Acard SCSI-IDE controller along with a 4 GB IDE flash card that worked beautifully and fast compared to our beloved spinning hard disks. Soon after I replaced the original fan with a very silent one from NoiseBlocker (M8 S1), which you can still buy 15 years later.
Apart from occasional usage, the slab was sitting more or less idly until the day, when I discovered that the IDE flash solution no longer worked. So far I couldn't find out whether it's the Acard controller or the flash memory, that's still something to explore. Tracking down these IDE flash cards, I noticed how much has happened even on the hardware side, and I decided to spend a noticeable upgrade. I heard there is a reliable NeXT hardware shop still with its lights on ;D
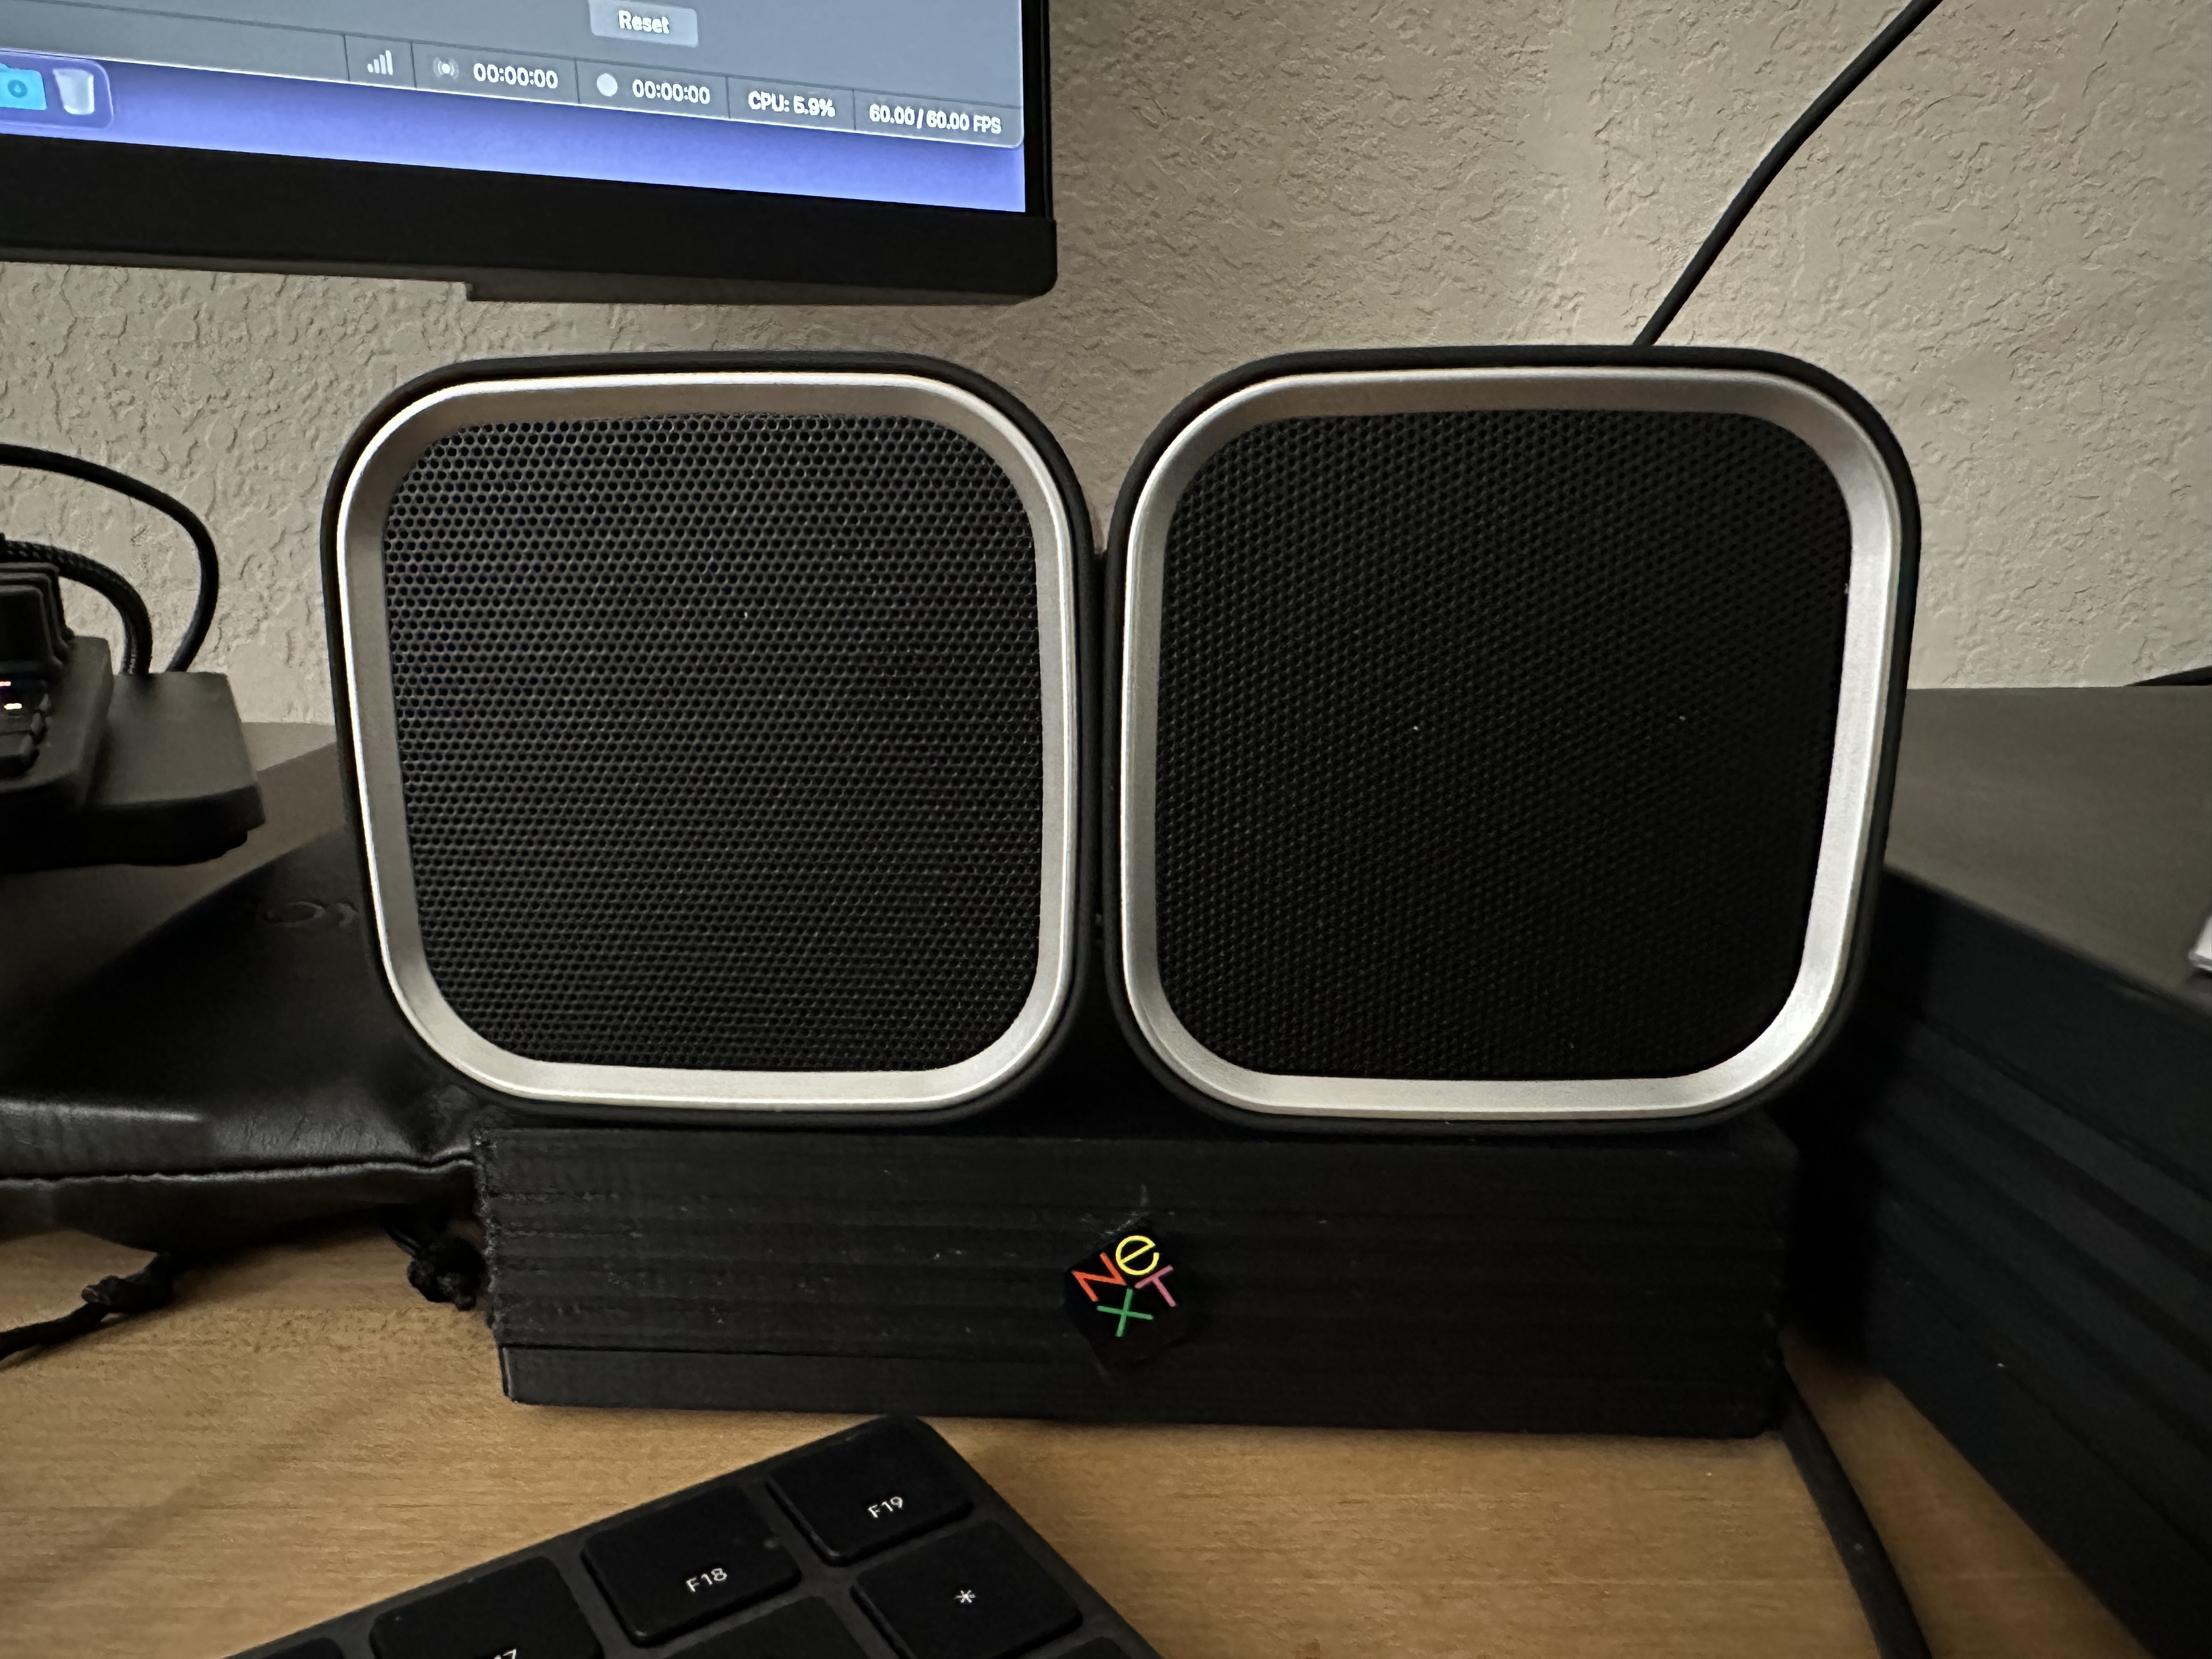
And, finally, Brian's NU I/O card housed in a stylish violet little package. The slab and the TurboCube ND sitting on it, will soon share connections to my trusty 2.1 speaker system from Cambridge Audio that is now also at least 15 years old. With the exception of the NU I/O everything in black of course, including the table^^
So the machine is maxed out now, wonderfully silent and will run OS 4.2. The only thing missing is a recapped board. Unfortunately, I have neither the skills nor the equipment to do any soldering. Does anybody know of a good, willing person in Germany, whom I can trust my Turbo board? I'm located near Frankfurt, if there happens to be someone in the Rhein-Main area.
Yesterday, it was big upgrade day for my Turbo Color Station! When I bought it back in March 2009, it came with 16 megs of RAM, had ROM version 3.1 and the only non-original part was an Acard SCSI-IDE controller along with a 4 GB IDE flash card that worked beautifully and fast compared to our beloved spinning hard disks. Soon after I replaced the original fan with a very silent one from NoiseBlocker (M8 S1), which you can still buy 15 years later.
Apart from occasional usage, the slab was sitting more or less idly until the day, when I discovered that the IDE flash solution no longer worked. So far I couldn't find out whether it's the Acard controller or the flash memory, that's still something to explore. Tracking down these IDE flash cards, I noticed how much has happened even on the hardware side, and I decided to spend a noticeable upgrade. I heard there is a reliable NeXT hardware shop still with its lights on ;D
- 128 MB RAM
- Rev. 3.3 (v74) ROM
- 96k DSP extension memory (kudos to those who made this possible!!)
- CR-2032 battery replacement
- BlueSCSI v2 card (currently without proper bezel underneath)
And, finally, Brian's NU I/O card housed in a stylish violet little package. The slab and the TurboCube ND sitting on it, will soon share connections to my trusty 2.1 speaker system from Cambridge Audio that is now also at least 15 years old. With the exception of the NU I/O everything in black of course, including the table^^
So the machine is maxed out now, wonderfully silent and will run OS 4.2. The only thing missing is a recapped board. Unfortunately, I have neither the skills nor the equipment to do any soldering. Does anybody know of a good, willing person in Germany, whom I can trust my Turbo board? I'm located near Frankfurt, if there happens to be someone in the Rhein-Main area.
Title: Re: What have you done with your NeXT computer today?
Post by: crimsonRE on February 08, 2025, 03:25:48 PM
Post by: crimsonRE on February 08, 2025, 03:25:48 PM
Oh, and there may or may not be an Easter egg in one of the images. :)
[/quote]
Well, I know what music YOU were listening to on at least one occasion while working on this, Nitro...well done, sir...
Title: Re: What have you done with your NeXT computer today?
Post by: Nitro on February 20, 2025, 09:46:22 PM
Post by: Nitro on February 20, 2025, 09:46:22 PM
I spent some time this evening recapping a parallel port Willem EPROM Programmer. I tried to program some NeXT v74 ROMs last weekend and I had errors writing to the chips. Some new caps from Mouser fixed the issue. I also picked up a cheap UV EPROM eraser and it worked great. The UV light was able to erase 7 EPROMS at once. We're at the peak of the NeXT project season so there will be more to report soon.
Title: Re: What have you done with your NeXT computer today?
Post by: chrismiami on March 28, 2025, 09:00:03 AM
Post by: chrismiami on March 28, 2025, 09:00:03 AM
Quote from: Nitro on April 27, 2024, 11:35:39 PMI contemplated wrapping the 47µF caps in masking tape and painting the polarity stripes black to match the originals. Is that weird?Steve would be proud!