Title: Yet another NeXT N2000 laser printer repair attempt
Post by: MindWalker on June 17, 2024, 11:17:19 AM
Post by: MindWalker on June 17, 2024, 11:17:19 AM
Hello!
About a month ago, I came across a NeXT N2000 laser printer on eBay (located in France). Living in europe, these do not pop up too often and after some chatting with the seller about postage options, I bought it! Yes, it was expensive, no warranty of it ever working, and surely it would need a lot of work... but I couldn't resist!
The seller described the printer as "Stored working years ago" and even had tested it as far as connecting to a NS machine where it detected the printer, showed correct status (no ink cartridge installed) and accepting jobs. Some life signs at least!
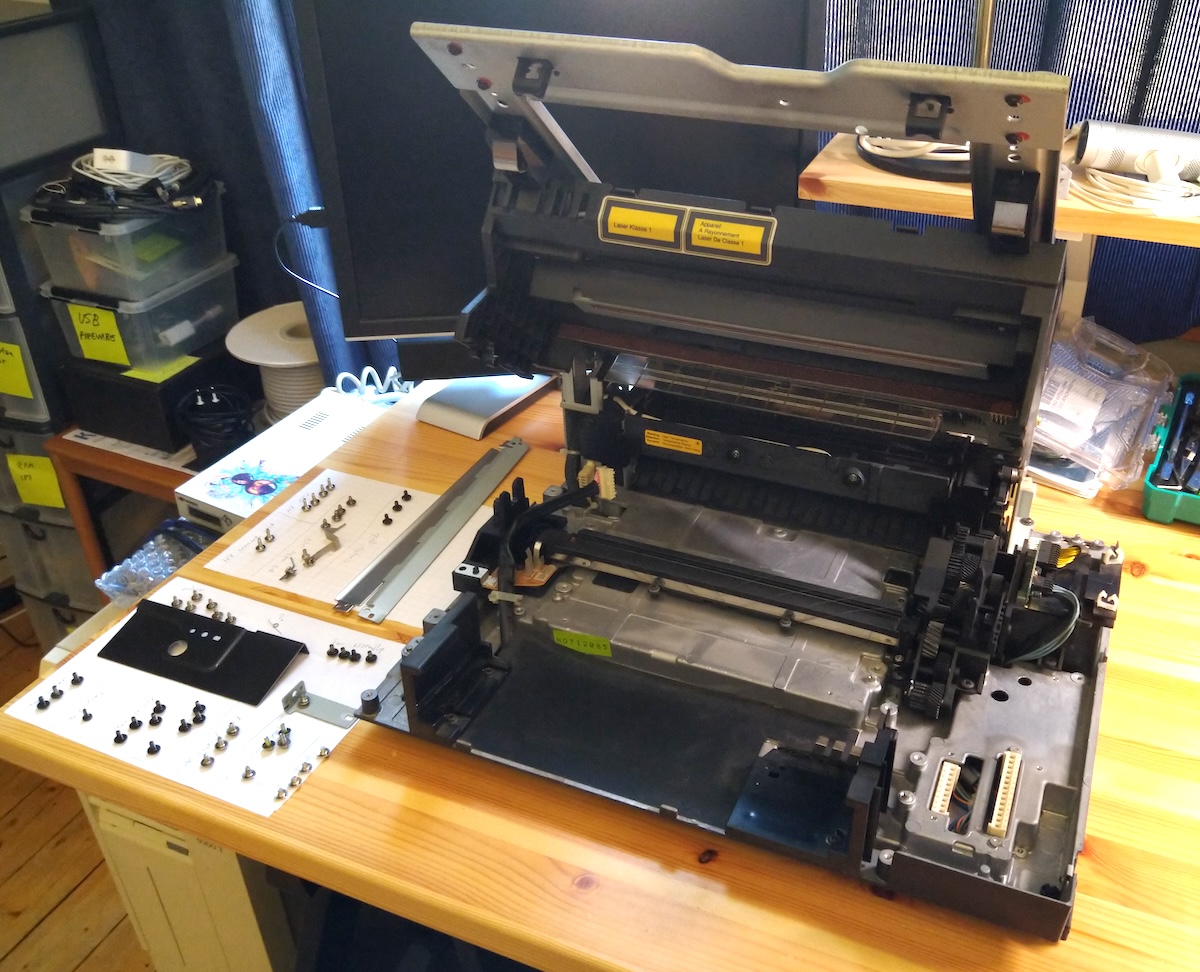
I received the parcel last week (it was packaged excellently and arrived safely). As I didn't have a cartridge yet, I started by taking the printer completely apart, as I was certain that this thing would not work out of the box.
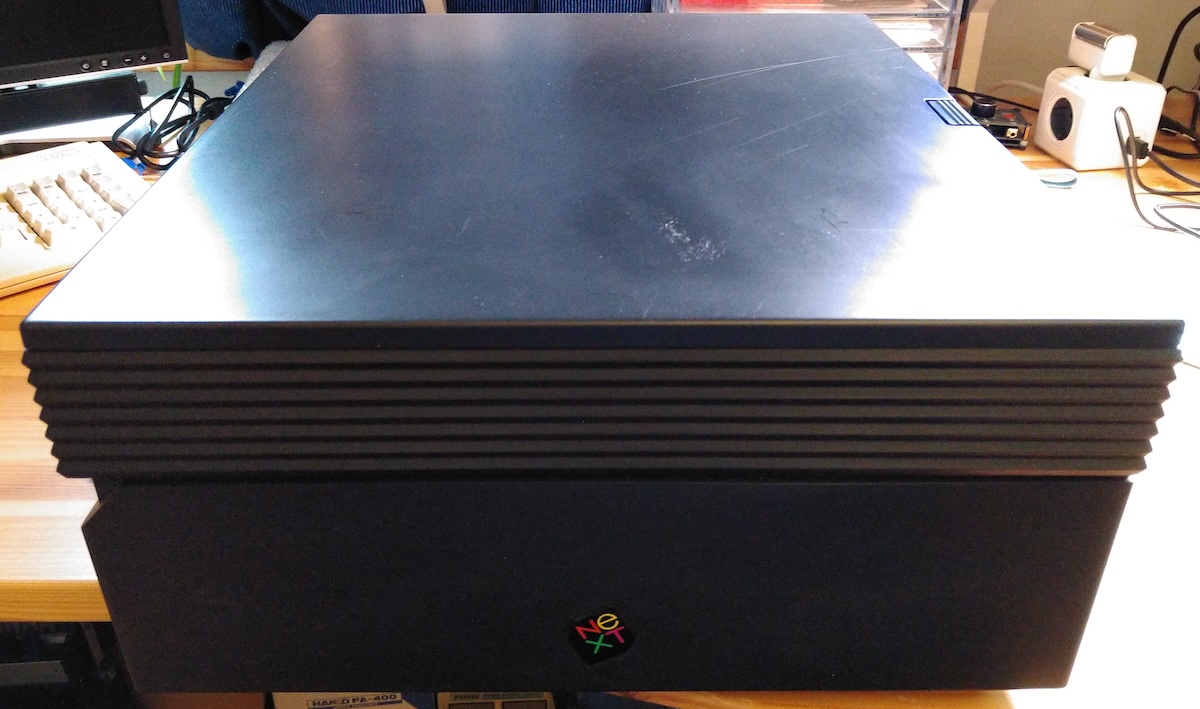
Looks pretty nice on the exterior! It came with the paper trays (not pictured here). It's serial number AAC 0010603 (July 1991)
I couldn't have done this without that service video that Rob posted (https://www.youtube.com/watch?v=6MwXQi3AvqI), it was perfect timing!
The printer was quite clean inside (very little ink dust) so I don't think it has been heavily used. Mechanically there was ever so slight oxidization on one or two screws, and a spot or two of rust in the metal chassis edges but otherwise looks pretty good. All gears look intact (haven't tried rotating anything in case it messes up something). Rubber parts look a bit dry, but appear to be intact (I'll soak them with rubber rejuvenation spray anyway) and not turning into goo.
I have looked at each module and ordered a bunch of new caps, as everything in this printer seems to be in dire need of replacing by now. There was already a pretty good list of caps in this excellent thread over vcfed.org: https://forum.vcfed.org/index.php?threads/next-400dpi-laser-printer-restoration.1242501 (https://forum.vcfed.org/index.php?threads/next-400dpi-laser-printer-restoration.1242501). I'll try to make a complete list of caps by module in here eventually.
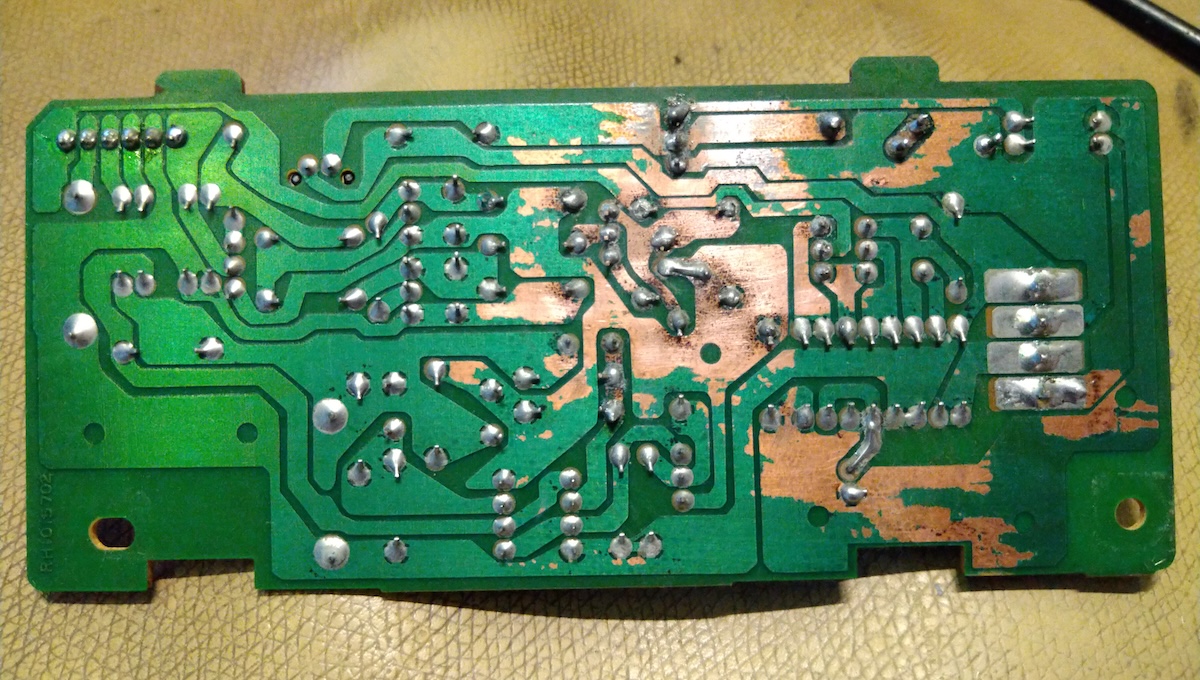
The "AC Controller unit" (as called by the service video) seems to have so far the most damage from leaking caps: a lot of corrosion on the solder mask:
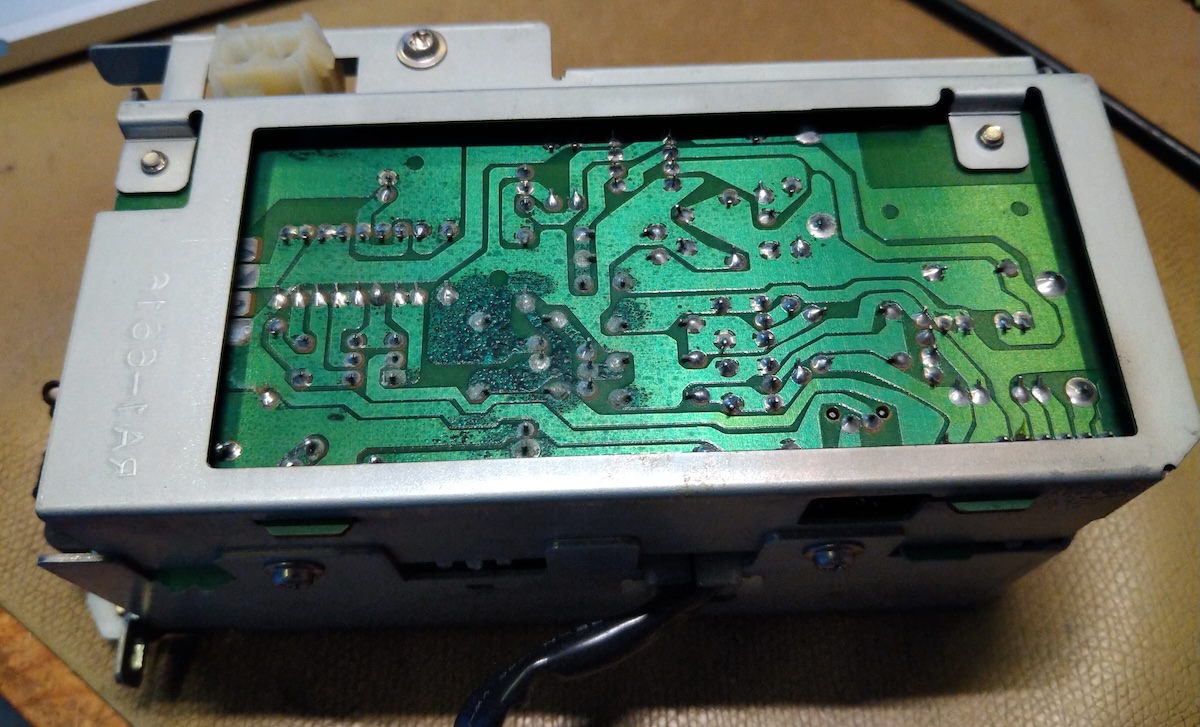
I removed the two caps, cleaned the board several times and scraped off most of the corroded solder mask. This is where I am at now:
I have ordered some UV-curable solder mask to cover the exposed copper, still need to scrape it some more. Two pads broke off (cap terminals, where the leakage had gone over to the other side of the board) but they were easy to jump over. None of the other components seem to have any corrosion and everything seems to have continuity - fortunately this is pretty simple board so while it looks pretty bad, I am not too worried about it for now.
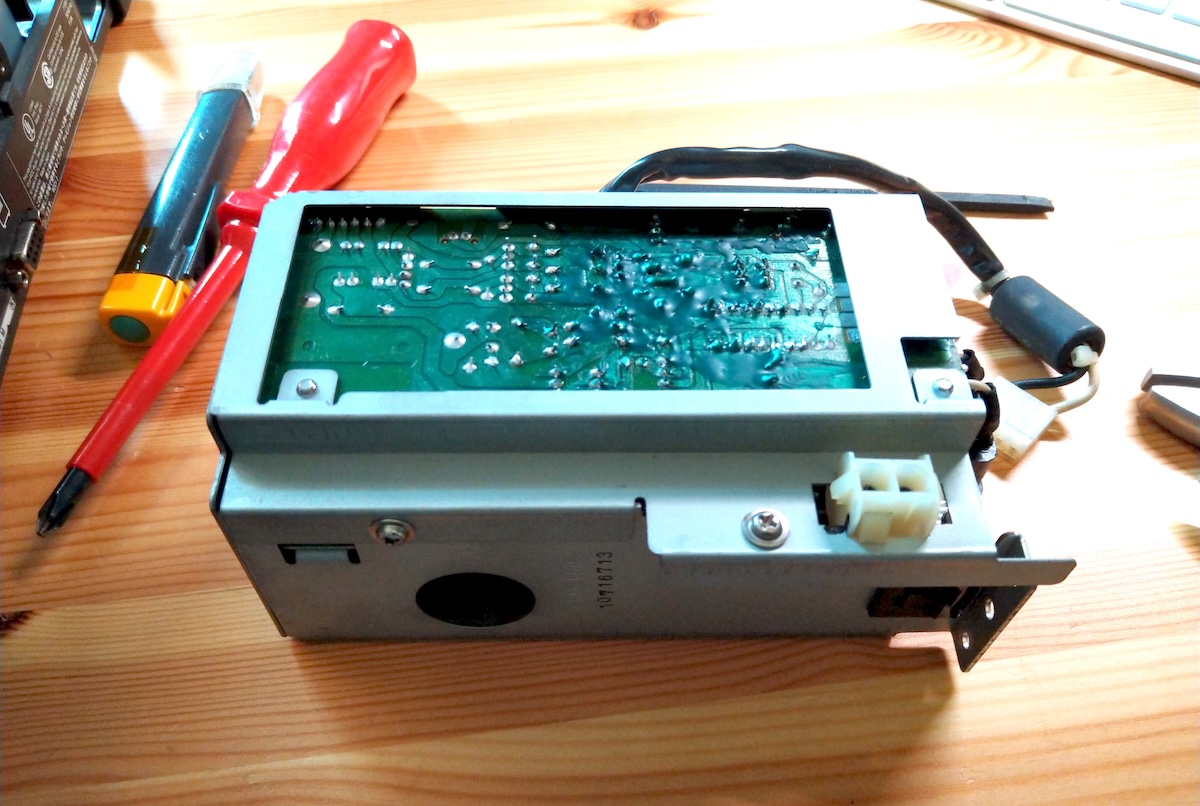
I had a look on the digital board (didn't remove it yet) at the bottom and there was corrosion on the capacitor legs as well:
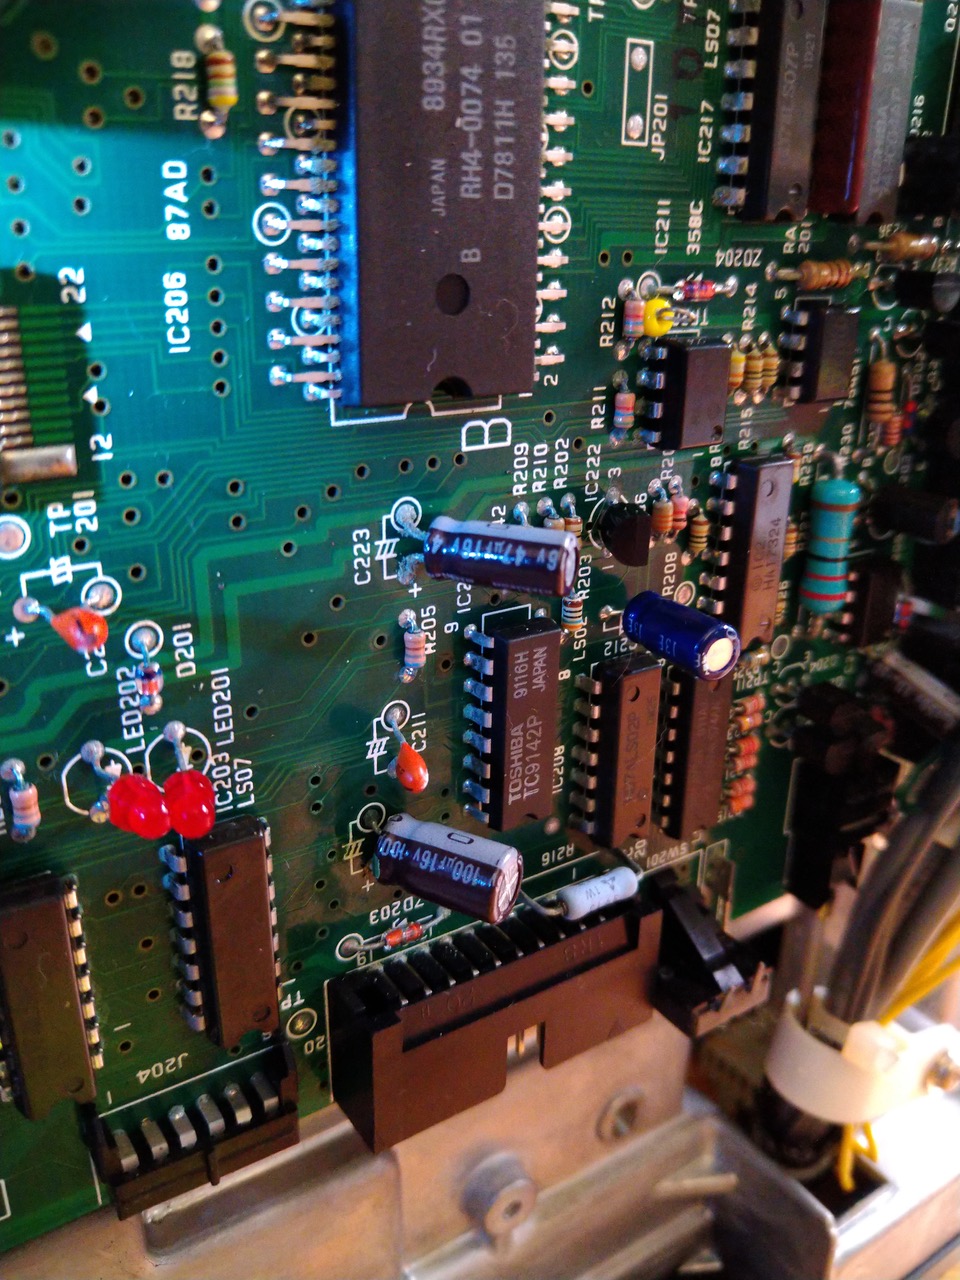
As this board lives upside down on the bottom of the printer, I am hoping that the cap juice hasn't been able to flow up to the board too much...
I should have a ton of new caps later this week and then I'll tackle on replacing them all. I am sure this will keep me busy for quite some time... :)
Couple of questions for the experts out there:
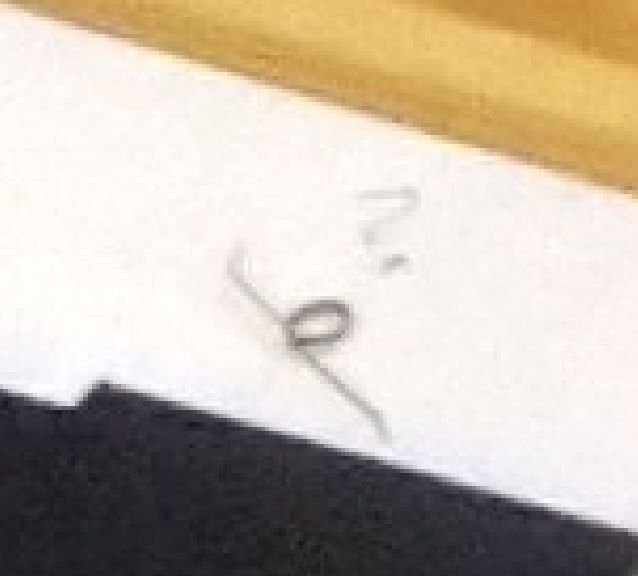
- When I opened the bottom cover, there was this small loose spring. Where might that be from? It's so small that I recon it's something do with the sensor arms?
- I bought a NOS Canon EP-S cartridge - the seller mentioned that HP 95A / 92295A cartridges would work, but I couldn't find one at the time, and I got the impression that the EP-S cartridge would be correct for the Canon engine the printer uses, is this compatible? (I have received but not opened the cartridge yet, it cost me 5 EUR so no harm done if it's incorrect).
- Is the N2000 usable with anything else than black hardware? It's described as RS232, but is the interface proprietary or would it work fe. on a white-hardware NeXTStep machine with a serial port? (I am kinda expecting that no). I do have a mono-NeXTStation to test with (seller included a thrid-party serial cable that should work).
- In the Canon service manual a test button on the digital board is mentioned, but I believe reading somewhere that in the N2000 it doesn't work. So there really is no way to test the printer other than connecting to a NS computer, setting it up and attempting to print? I see there are couple of LEDs on the boards as well.
- I've been reading about the mystical "PP" utility to get some more insights of the printer status. I couldn't locate it yet, but came across this which sounds interesting: https://ftp.nice.ch/pub/next/tools/printer/_npstatus.README.html (https://ftp.nice.ch/pub/next/tools/printer/_npstatus.README.html). (Also in https://ftp.nice.ch/pub/next/tools/printer/ there is a printer drive for Windows NT 4.0 (to connect to a N2000 in a network, shared by a NS computer), that sounds hardcore! The readme calls it a hack but would be interesting to see if it would work).
We'll see how this goes... 8)
About a month ago, I came across a NeXT N2000 laser printer on eBay (located in France). Living in europe, these do not pop up too often and after some chatting with the seller about postage options, I bought it! Yes, it was expensive, no warranty of it ever working, and surely it would need a lot of work... but I couldn't resist!
The seller described the printer as "Stored working years ago" and even had tested it as far as connecting to a NS machine where it detected the printer, showed correct status (no ink cartridge installed) and accepting jobs. Some life signs at least!
I received the parcel last week (it was packaged excellently and arrived safely). As I didn't have a cartridge yet, I started by taking the printer completely apart, as I was certain that this thing would not work out of the box.
Looks pretty nice on the exterior! It came with the paper trays (not pictured here). It's serial number AAC 0010603 (July 1991)
I couldn't have done this without that service video that Rob posted (https://www.youtube.com/watch?v=6MwXQi3AvqI), it was perfect timing!
The printer was quite clean inside (very little ink dust) so I don't think it has been heavily used. Mechanically there was ever so slight oxidization on one or two screws, and a spot or two of rust in the metal chassis edges but otherwise looks pretty good. All gears look intact (haven't tried rotating anything in case it messes up something). Rubber parts look a bit dry, but appear to be intact (I'll soak them with rubber rejuvenation spray anyway) and not turning into goo.
I have looked at each module and ordered a bunch of new caps, as everything in this printer seems to be in dire need of replacing by now. There was already a pretty good list of caps in this excellent thread over vcfed.org: https://forum.vcfed.org/index.php?threads/next-400dpi-laser-printer-restoration.1242501 (https://forum.vcfed.org/index.php?threads/next-400dpi-laser-printer-restoration.1242501). I'll try to make a complete list of caps by module in here eventually.
The "AC Controller unit" (as called by the service video) seems to have so far the most damage from leaking caps: a lot of corrosion on the solder mask:
I removed the two caps, cleaned the board several times and scraped off most of the corroded solder mask. This is where I am at now:
I have ordered some UV-curable solder mask to cover the exposed copper, still need to scrape it some more. Two pads broke off (cap terminals, where the leakage had gone over to the other side of the board) but they were easy to jump over. None of the other components seem to have any corrosion and everything seems to have continuity - fortunately this is pretty simple board so while it looks pretty bad, I am not too worried about it for now.
I had a look on the digital board (didn't remove it yet) at the bottom and there was corrosion on the capacitor legs as well:
As this board lives upside down on the bottom of the printer, I am hoping that the cap juice hasn't been able to flow up to the board too much...
I should have a ton of new caps later this week and then I'll tackle on replacing them all. I am sure this will keep me busy for quite some time... :)
Couple of questions for the experts out there:
- When I opened the bottom cover, there was this small loose spring. Where might that be from? It's so small that I recon it's something do with the sensor arms?
- I bought a NOS Canon EP-S cartridge - the seller mentioned that HP 95A / 92295A cartridges would work, but I couldn't find one at the time, and I got the impression that the EP-S cartridge would be correct for the Canon engine the printer uses, is this compatible? (I have received but not opened the cartridge yet, it cost me 5 EUR so no harm done if it's incorrect).
- Is the N2000 usable with anything else than black hardware? It's described as RS232, but is the interface proprietary or would it work fe. on a white-hardware NeXTStep machine with a serial port? (I am kinda expecting that no). I do have a mono-NeXTStation to test with (seller included a thrid-party serial cable that should work).
- In the Canon service manual a test button on the digital board is mentioned, but I believe reading somewhere that in the N2000 it doesn't work. So there really is no way to test the printer other than connecting to a NS computer, setting it up and attempting to print? I see there are couple of LEDs on the boards as well.
- I've been reading about the mystical "PP" utility to get some more insights of the printer status. I couldn't locate it yet, but came across this which sounds interesting: https://ftp.nice.ch/pub/next/tools/printer/_npstatus.README.html (https://ftp.nice.ch/pub/next/tools/printer/_npstatus.README.html). (Also in https://ftp.nice.ch/pub/next/tools/printer/ there is a printer drive for Windows NT 4.0 (to connect to a N2000 in a network, shared by a NS computer), that sounds hardcore! The readme calls it a hack but would be interesting to see if it would work).
We'll see how this goes... 8)
Title: Re: Yet another NeXT N2000 laser printer repair attempt
Post by: paolo.bertolo on June 18, 2024, 07:14:43 AM
Post by: paolo.bertolo on June 18, 2024, 07:14:43 AM
I recently managed to restore such a printer with complete success, until the point it just failed again for apparently no reason (there's a thread in this forum, in case you are interested). Still working on it, I hope you can have better luck.
Whatever, for sure you need to replace all the capacitors. In my unit, only the small ones were dead, though. All the big boys still perfectly sealed and perfectly within the specs.
Personally, I am not a big fan of recapping just for the sake of it. But if you want to rule out any cap related issue, surely go for it.
Mind, though, that some of them are hard to source in the right size.
In mixed order:
- the NeXT LaserPrinter only works with black hardware. The main unit drives the printer via software, including the power management.
- as for the small spring (how small?) I need to check, but in general is not nice to see such a component loose, it means someone already tried to disassemble it...
- Cartdrige: you need to check for HP LaserWriter II compatible units, still plenty of them out there on eBay and similar. Likely, though, all of them very old, so aim at regenerated ones, if available.
- The utility PP: yes, it gives you a little more insight, but it won't tell you what is at fault, will just throw generic error messages.
- Unfortunately, the documentation about the data protocol used by the printer has not been scanned, so it's indeed like shooting in the dark.
Hopefully, after recapping your printer will be fine. I link here below a couple of videos showing how the printer should operate. I recorded them before it went dead mute.
In case the printer does not spring back life, PP will suggest an error with the fuser unit. But I do recommend not to touch it (literally), as it is the only part of the printer for which there's no spare and most likely it is not at fault, it's just that it doesn't get powered up (PSU failure).
Once everything will hopefully be up and running, though, you will have to replace or (like in my case) refurbish the intake rollers, otherwise the printer will always get jammed (see the other thread).
Good luck!
https://www.youtube.com/watch?v=wi3IGaftjschttps://www.youtube.com/watch?v=IiNabliKIlc
Title: Re: Yet another NeXT N2000 laser printer repair attempt
Post by: MindWalker on June 18, 2024, 11:10:59 AM
Post by: MindWalker on June 18, 2024, 11:10:59 AM
Thanks Paolo. I've been reading thru all the other N2000 threads, it sure has been insightful.
I am trying to learn away from "recapping everything first thing" as I know it's not always needed. It's partly an OCD-thing :) Now that I have the instructions on taking the printer apart, it won't be *that* bad to revisit the modules later if needed, which helps.
I got the shipment with new caps. I just did the high voltage power supply (the long box at the front with the adjust knob on top) and there was no visible leakage at all and the caps measured just fine, so it appears to differ heavily from board to board. But as I had it open on the desk and the very same series of caps are in so bad shape on the other boards it seems justified...
I didn't find suitable replacements for the two big 200V caps in the other power supply and I do expect them to be ok (need to have visual check closer though) so I'll surely leave those in place for now. There were some other values that I couldn't get (I did buy something close enough), I'll need to check those one by one and perhaps just leave the originals in place if they look and measure fine.
The spring is very small (you can see it next to the screws on the second picture, on the sheet at front of the desk).
Title: Re: Yet another NeXT N2000 laser printer repair attempt
Post by: paolo.bertolo on June 19, 2024, 07:56:42 AM
Post by: paolo.bertolo on June 19, 2024, 07:56:42 AM
In my case the big caps in the PSU are still perfect. BTW, be careful, the voltage there is indeed high and it takes some 10 minutes for the capacitors to discharge.
As for the spring, at a quick glance I could see this one with a shape similar to the one in your picture.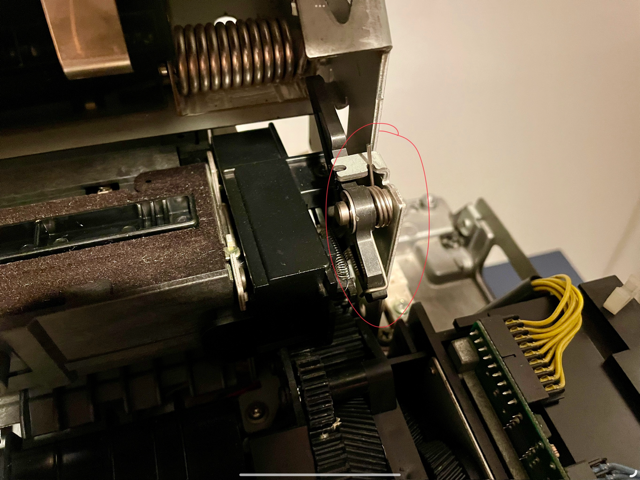
As for the spring, at a quick glance I could see this one with a shape similar to the one in your picture.
Title: Re: Yet another NeXT N2000 laser printer repair attempt
Post by: MindWalker on June 19, 2024, 11:22:25 AM
Post by: MindWalker on June 19, 2024, 11:22:25 AM
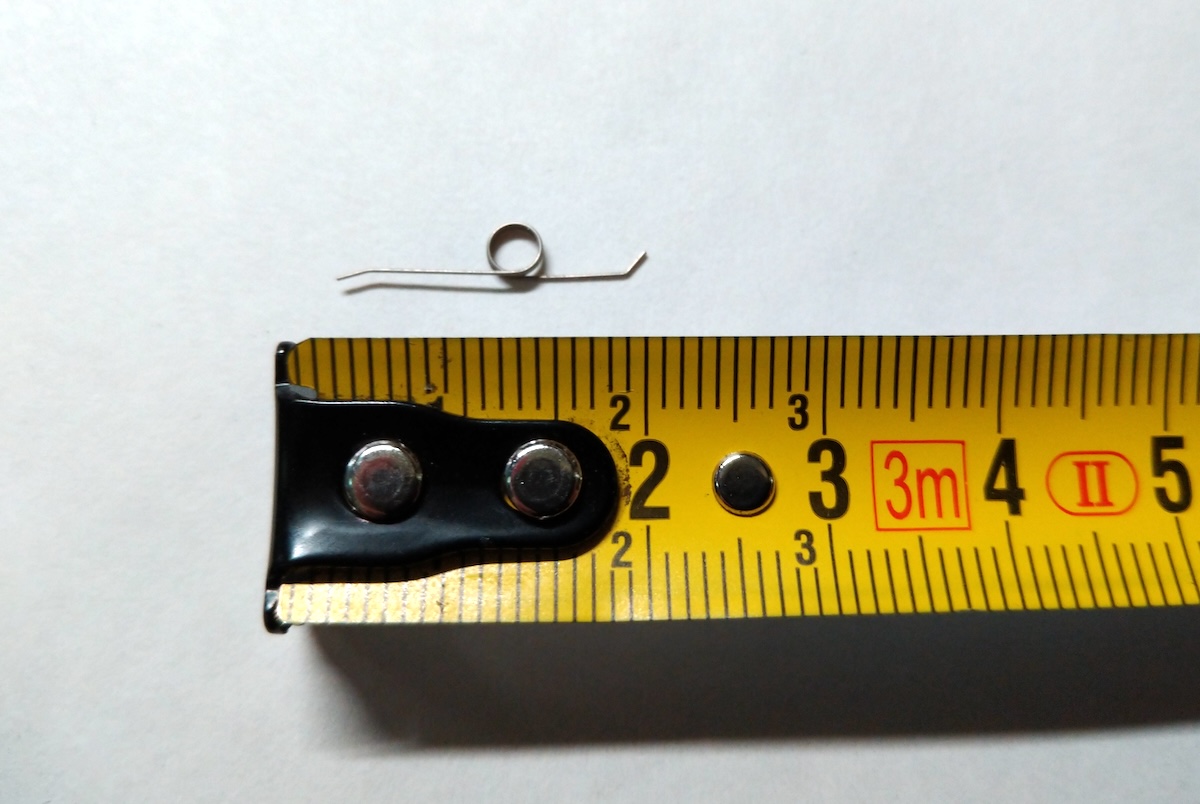
The spring I am looking for is smaller, only about 2cm in length. I was thinking that perhaps it's from a previously removed cartridge, as some of those have spring-loaded flaps? (I still haven't opened the cartridge so I don't know if these have those)
I cleaned the corroded board some more with a fiber-glass pen (why didn't I think of that before), need to take one more session and re-flow some of the solder joints near the damage but it's looking better :)
I cleaned the corroded board some more with a fiber-glass pen (why didn't I think of that before), need to take one more session and re-flow some of the solder joints near the damage but it's looking better :)
Title: Re: Yet another NeXT N2000 laser printer repair attempt
Post by: MindWalker on June 23, 2024, 11:31:32 AM
Post by: MindWalker on June 23, 2024, 11:31:32 AM
Little progress...
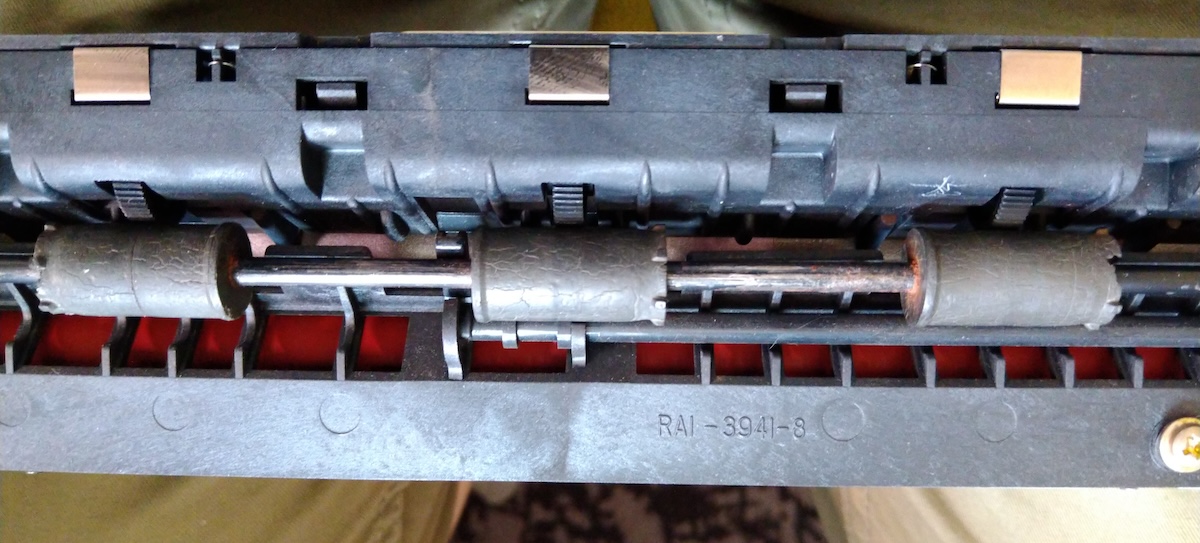
I have now recapped the "low voltage power supply" plus inspected and cleaned most of the mechanics. Also got my hands dirty for the first time as the long pad that presses against the main intake roller has turned into goo.
The silver-edged piece here, it's leaving marks on the two grey rollers at the sides:
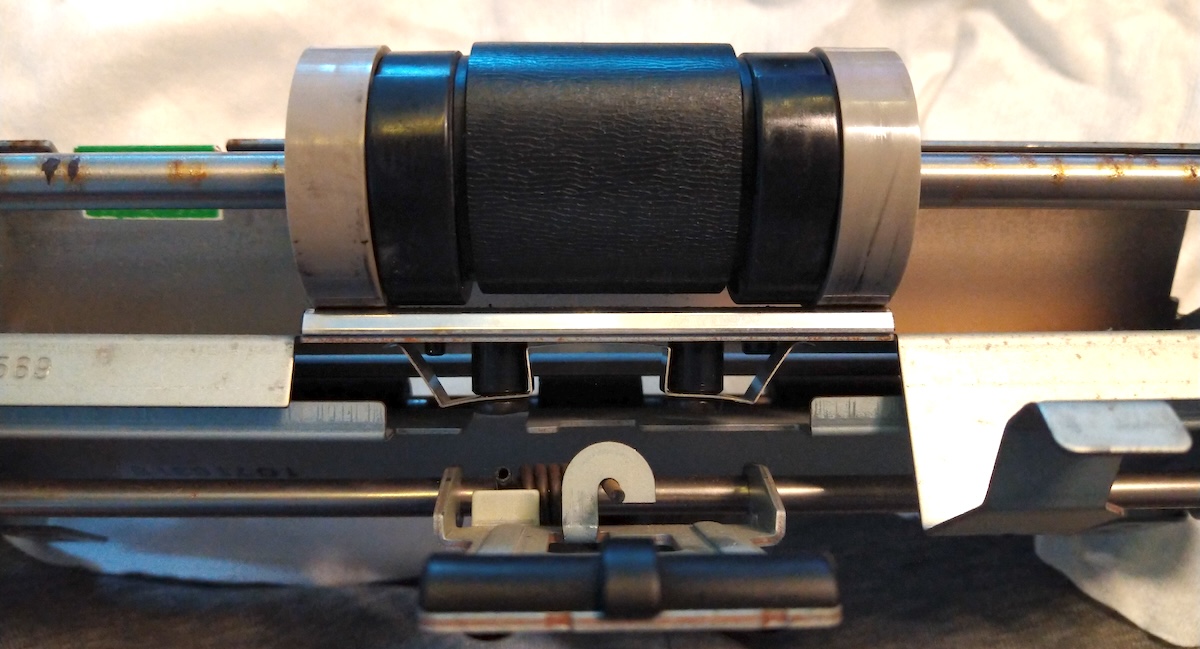
What's the correct name for this part and was this something that was available as a spare somewhere? I did manage to remove the old pad, it measures about 10mm x 80mm with 2mm thickness. How about cutting a piece of cork there perhaps? EDIT: found it, "RF1-1145-000 Separation Pad for HP LaserJet II" I presume!
The main roller got a spray of rubber rejuvenetor for now.
There are some spots of rust on the axis that the main roller mounts (seen on the pic above), but as those are not pressed against anything, it shouldn't matter.
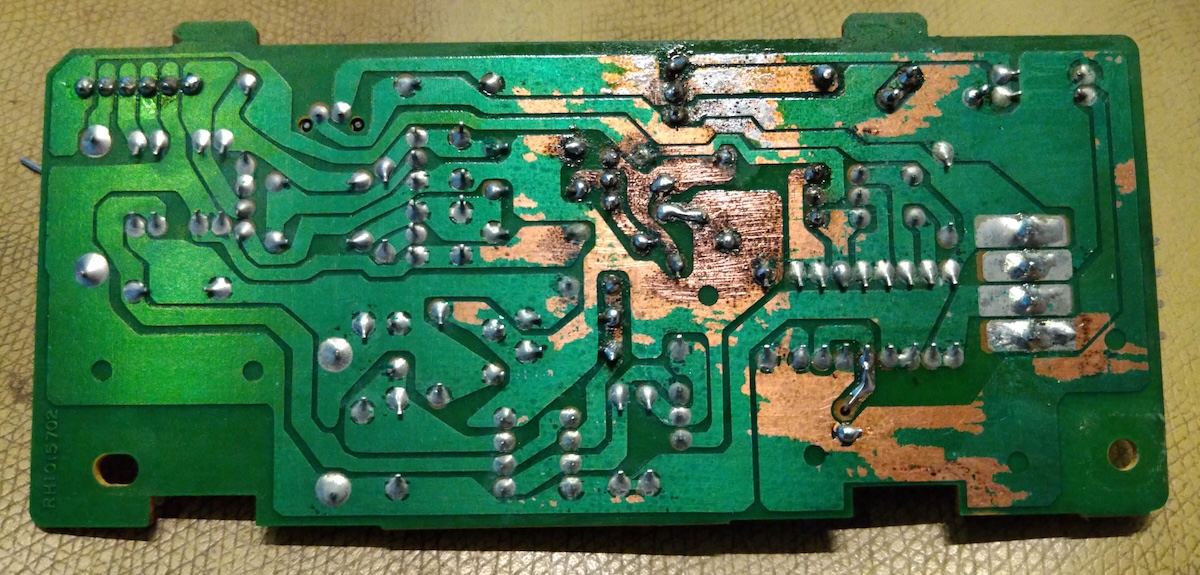
I started working on the large board on the bottom ("DC controller board" by the service video), which seems to have the worst leakage as most of the cap had green corrosion on the legs: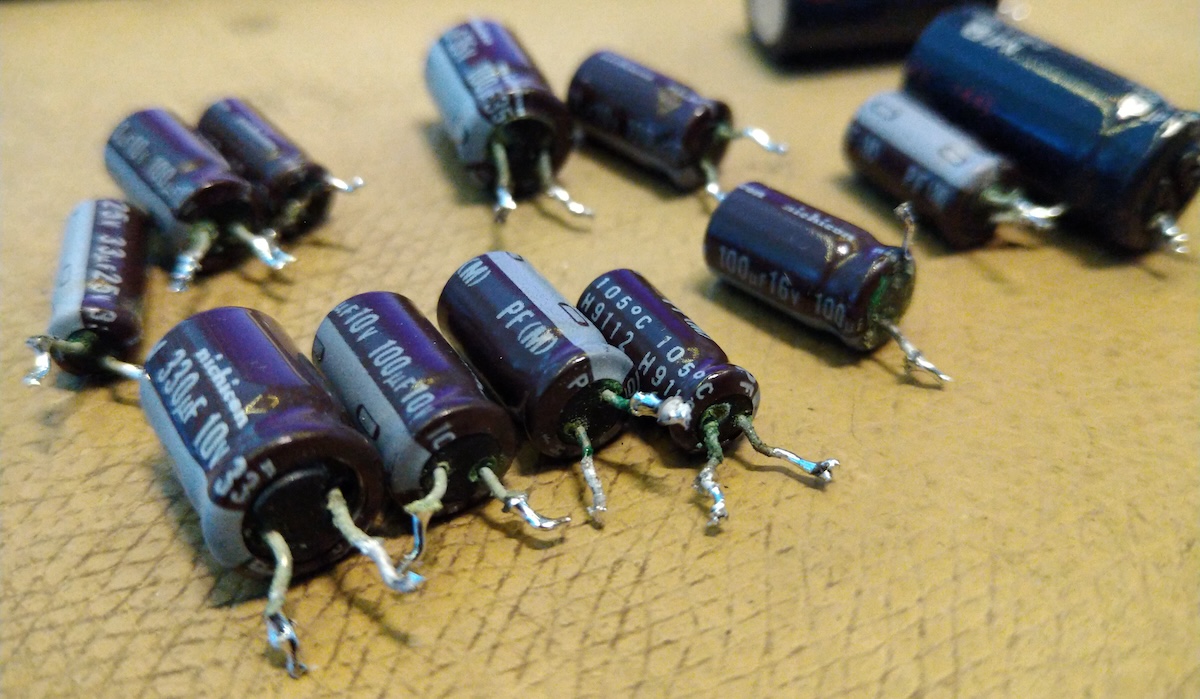
I was somewhat demoralized by the leakage and how much there was gunk and surface corrosion on near-by components, but after removing the caps, cleaning the board with vinegar and washing the board it does look pretty decent now, even looks like mostly all pads survived. I'll let the board dry and continue later.
I have now recapped the "low voltage power supply" plus inspected and cleaned most of the mechanics. Also got my hands dirty for the first time as the long pad that presses against the main intake roller has turned into goo.
The silver-edged piece here, it's leaving marks on the two grey rollers at the sides:
What's the correct name for this part and was this something that was available as a spare somewhere? I did manage to remove the old pad, it measures about 10mm x 80mm with 2mm thickness. How about cutting a piece of cork there perhaps? EDIT: found it, "RF1-1145-000 Separation Pad for HP LaserJet II" I presume!
The main roller got a spray of rubber rejuvenetor for now.
There are some spots of rust on the axis that the main roller mounts (seen on the pic above), but as those are not pressed against anything, it shouldn't matter.
I started working on the large board on the bottom ("DC controller board" by the service video), which seems to have the worst leakage as most of the cap had green corrosion on the legs:
I was somewhat demoralized by the leakage and how much there was gunk and surface corrosion on near-by components, but after removing the caps, cleaning the board with vinegar and washing the board it does look pretty decent now, even looks like mostly all pads survived. I'll let the board dry and continue later.
Title: Re: Yet another NeXT N2000 laser printer repair attempt
Post by: MindWalker on June 30, 2024, 11:08:44 AM
Post by: MindWalker on June 30, 2024, 11:08:44 AM
Well, I've got some good news and some bad news...
I got the new solder mask + UV-light and put in a new coat (probably a bit too thick one) onto the one PCB that was eaten away.
Winding the service video back and forth I started assembling the printer. It took about 1,5 hours but finally I had the printer mostly back together again.
I had another look and the output rollers do look a bit dried out, perhaps worth replacing at some point:
I opened the NOS Canon EP-S cartridge that I had bought, not being quite sure if that was correct part but at least it fits and I did get something out of it... (although not quite what I hoped for)
Very carefully plugging in the printer and my mono-NS, I was happy to see that there were lifesigns as the computer booted and the printer made some noises! Also the printer appeared in the printer manager.
However I was both out of plain A4 paper, and the fact that the separation pad was now my custom one (made from a piece of rubber stick-on feet that happened to fit the case, and was at least not dripping off like the original was) it didn't quite manage to pull the paper in. With the flip-side of an A4 and manually pushing it in (timing it correctly) I was eventually able to get a page printed!
But... it was all black :o
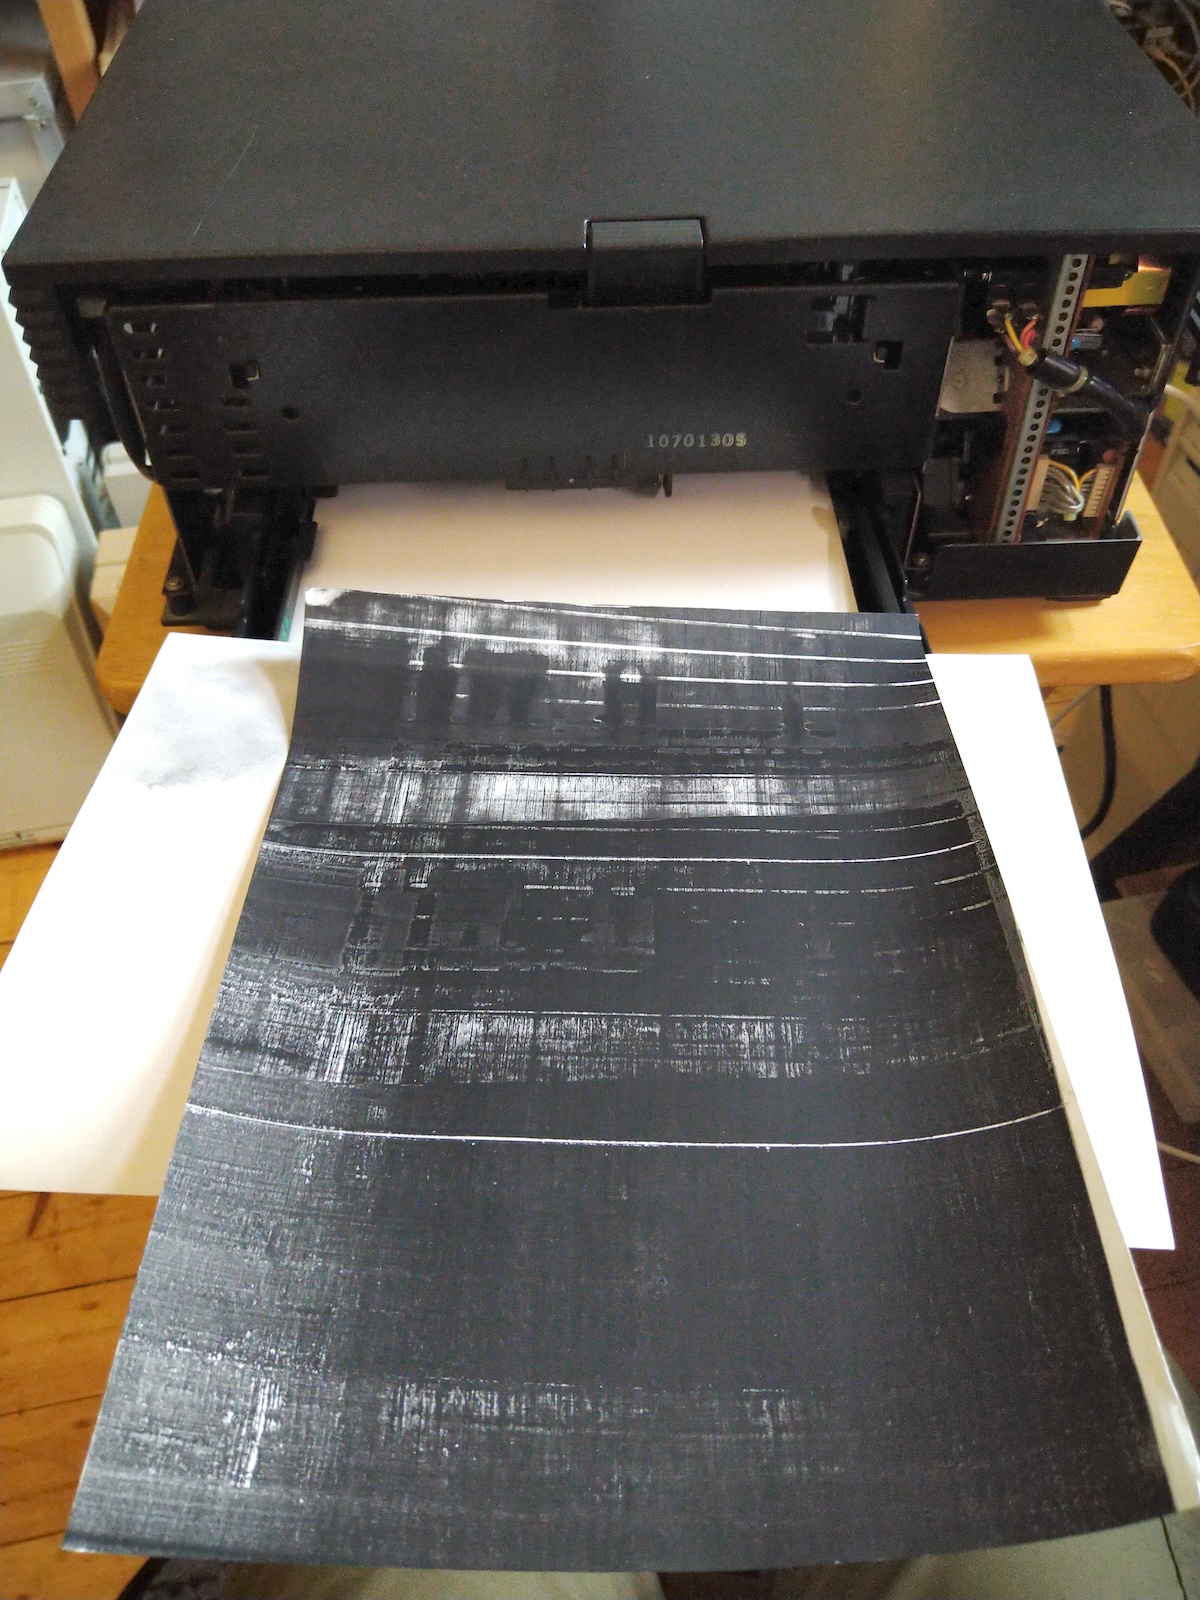
It's so black that I can't tell if there is the actual print-job (the print manager test print) or if it's just black.
Also the drum inside the cartridge is now mostly covered in ink:
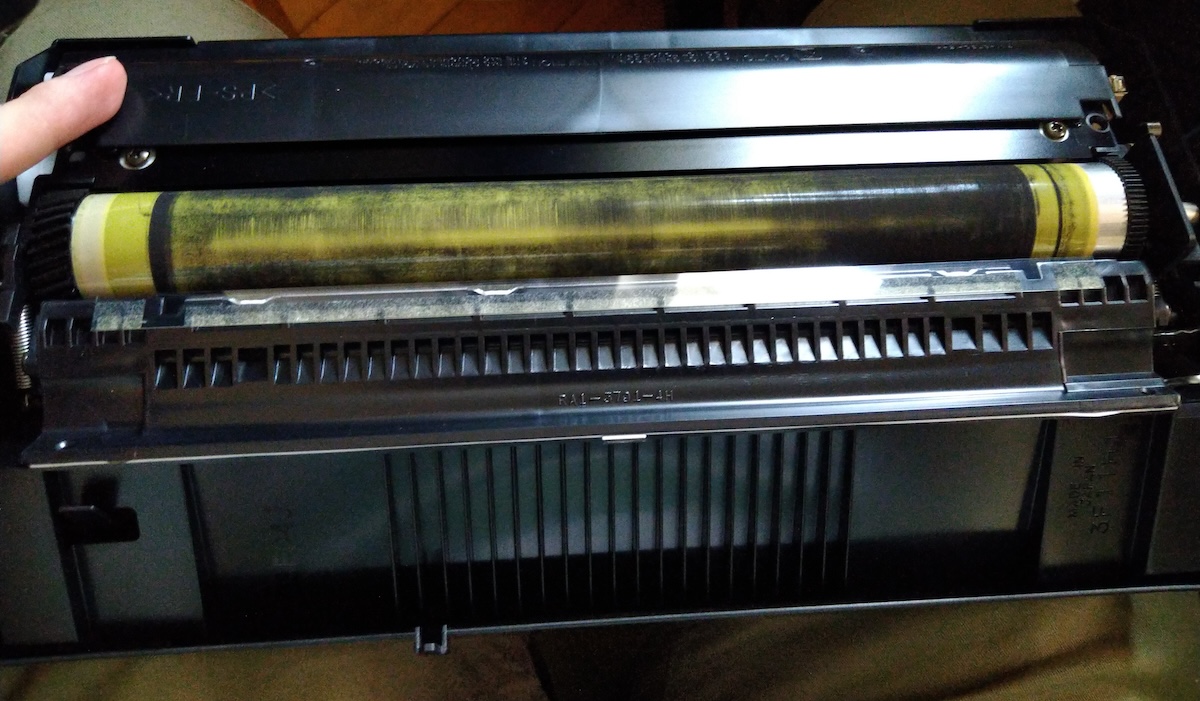
... which I don't think is good. I can wipe it out though. Is this a symptom of a failed wiper inside the cartridge?
One issue I noticed earlier is that the optical cable's (that plugs into the PCB at the bottom of the printer) socket has one of the two locking tabs broken off. The connector did plug in, but I am wondering if it came loose later while I was assembling the printer and turning it over and moving the cables. Not sure if that could cause the black pages though?
Having no more clean paper (and making a mess with the cartridge as I took it out for while) I couldn't test it further, but at least the printer is electronically alive, and mechanically it mostly works, except for the pick-up issue (not too surprising). I got two pages manually feeded in and printerd (both were mostly identical, as is mostly black).
Tip 1: If you are working on the printer and it's not completely assembled, manually activate the exit door sensor lever, otherwise you'll get just page jam errors (and no attempts at warming up even).
Tip 2: At first I thought I'd need to restart the computer everytime a print failed. But I found out that deleting the test page form the print queue (GUI), and using "nppower off" & "nppower on" commands (CLI) I could reset the printer without needing to restart the computer. You need to wait for the cooling-down period (15-30 sec) and it might give errors but repeating a couple of times will get the printer back to accepting jobs.
Tip 2: Don't turn the old ink cartridges sideways, it will make a mess. Don't ask how I know...
I got the new solder mask + UV-light and put in a new coat (probably a bit too thick one) onto the one PCB that was eaten away.
Winding the service video back and forth I started assembling the printer. It took about 1,5 hours but finally I had the printer mostly back together again.
I had another look and the output rollers do look a bit dried out, perhaps worth replacing at some point:
I opened the NOS Canon EP-S cartridge that I had bought, not being quite sure if that was correct part but at least it fits and I did get something out of it... (although not quite what I hoped for)
Very carefully plugging in the printer and my mono-NS, I was happy to see that there were lifesigns as the computer booted and the printer made some noises! Also the printer appeared in the printer manager.
However I was both out of plain A4 paper, and the fact that the separation pad was now my custom one (made from a piece of rubber stick-on feet that happened to fit the case, and was at least not dripping off like the original was) it didn't quite manage to pull the paper in. With the flip-side of an A4 and manually pushing it in (timing it correctly) I was eventually able to get a page printed!
But... it was all black :o
It's so black that I can't tell if there is the actual print-job (the print manager test print) or if it's just black.
Also the drum inside the cartridge is now mostly covered in ink:
... which I don't think is good. I can wipe it out though. Is this a symptom of a failed wiper inside the cartridge?
One issue I noticed earlier is that the optical cable's (that plugs into the PCB at the bottom of the printer) socket has one of the two locking tabs broken off. The connector did plug in, but I am wondering if it came loose later while I was assembling the printer and turning it over and moving the cables. Not sure if that could cause the black pages though?
Having no more clean paper (and making a mess with the cartridge as I took it out for while) I couldn't test it further, but at least the printer is electronically alive, and mechanically it mostly works, except for the pick-up issue (not too surprising). I got two pages manually feeded in and printerd (both were mostly identical, as is mostly black).
Tip 1: If you are working on the printer and it's not completely assembled, manually activate the exit door sensor lever, otherwise you'll get just page jam errors (and no attempts at warming up even).
Tip 2: At first I thought I'd need to restart the computer everytime a print failed. But I found out that deleting the test page form the print queue (GUI), and using "nppower off" & "nppower on" commands (CLI) I could reset the printer without needing to restart the computer. You need to wait for the cooling-down period (15-30 sec) and it might give errors but repeating a couple of times will get the printer back to accepting jobs.
Tip 2: Don't turn the old ink cartridges sideways, it will make a mess. Don't ask how I know...
Title: Re: Yet another NeXT N2000 laser printer repair attempt
Post by: Rob Blessin Black Hole on July 02, 2024, 06:00:55 PM
Post by: Rob Blessin Black Hole on July 02, 2024, 06:00:55 PM
Hello MindWalker and NeXT Community:
Excellent Work so I'll include a link to my Service Video so it shows up in the thread and I think you find these guides useful including the original Laser Printer Service guide
https://www.nextcomputers.org/NeXTfiles/Docs/Hardware/NeXT_Laser_Printer_N2000/
Image defects troubleshooting section starts at 6-10 should help with diagnosis
If any of your boards or components are to far gone ,
I have NeXT Laser Printer replacement spares I will sell them from $10 to $50 each depending on what you need, pricing is not set in stone mainly interested in helping you and others out :)
I sell new old stock intake rollers $15
New Cans of Rubber Rejuvenater $14.95 , I have to ship these ground.
I send PayPal invoices for payment. Really nice job on this for sure ....
I'm going to read it tonight !
https://www.youtube.com/watch?v=6MwXQi3AvqI
Title: Re: Yet another NeXT N2000 laser printer repair attempt
Post by: MindWalker on July 06, 2024, 05:37:08 PM
Post by: MindWalker on July 06, 2024, 05:37:08 PM
Thanks Rob. Those documents surely do help, I've been reading thru most of them.
Finally I had time for another look on the printer... For good news, the optical cable was indeed loose (as one of the two clips has broken) so I am hoping that it would be the cause for the completely black page, I guess that would make sense (at least that's what ChatGPT suggested). I have now secured it with a blob of hot glue.
I am pretty sure that the ink cartridge that I have has a bad seal inside as it keeps leaking ink dust, even by just moving the cartridge without tilting it, I can't even put it into printer without releasing puffs of ink everywhere, not nice >:( I'll need to get another cartridge before I can do any more testing.
Also as the paper intake is still not good, I can't do much more until I get new parts (cartridge and paper transport) so it might take some time for another update on this printer... But I am kinda thinking that there is still a slim chance that this might actually work... maybe.
I am wondering if the test button on the DC controller board (on the bottom), which according to some other thread didn't work, would actually produce that test page (vertical stripes), IF connected to a NeXTStation that has first enabled the printer (during boot). The button on my printer was oxidized (cleaned but still no continuity so it's busted) - it might be worth taking the PCB out and installing a header and connect a temporary cable and button (to access it without having the bottom plate open) and test that. Not having to use the computer to send test pages (and to empty the queue when the page jams) would make troubleshooting the paper path easier (if I eventually get that far).
Title: Re: Yet another NeXT N2000 laser printer repair attempt
Post by: MindWalker on July 21, 2024, 08:41:03 AM
Post by: MindWalker on July 21, 2024, 08:41:03 AM
Progress! ;D
With another NOS ink cartrdige, hot-glued-in-place optical cable and manually feeding the pages into the printer:
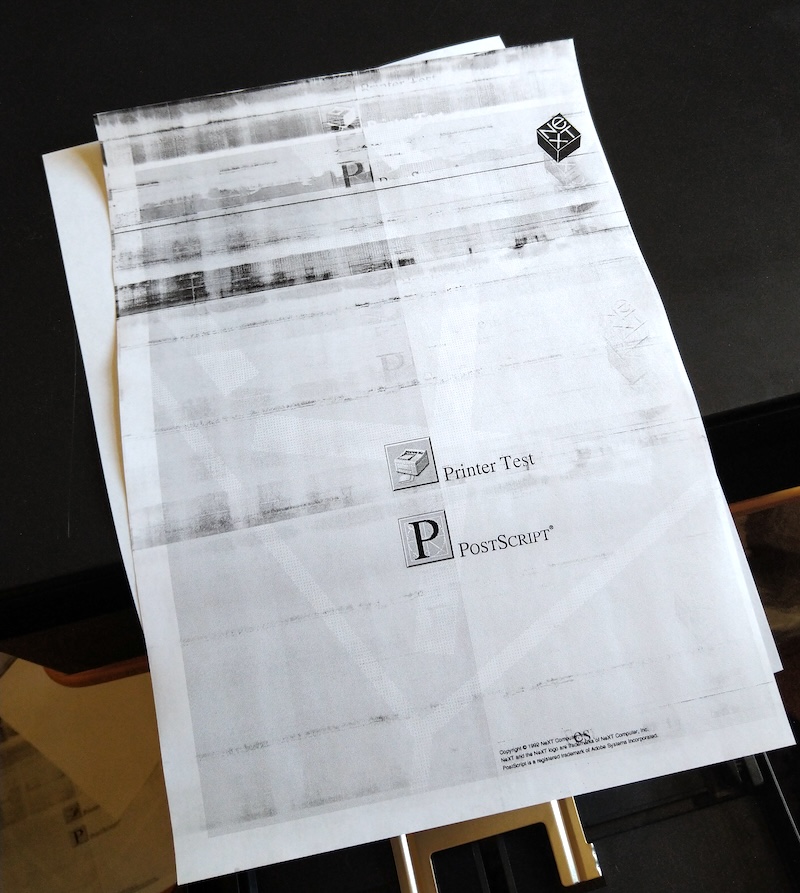
So there is life! The pages still have mess (mostly on the) top of the page but that seemed to ease with every page, and now as the new cartridge doesn't seem to be leaking ink dust, I might need to clean the paper path yet again and it might be good. I only printed a couple of pages as it's still a pain to manually feed in the pages at the right time to make it proceed with the prints.
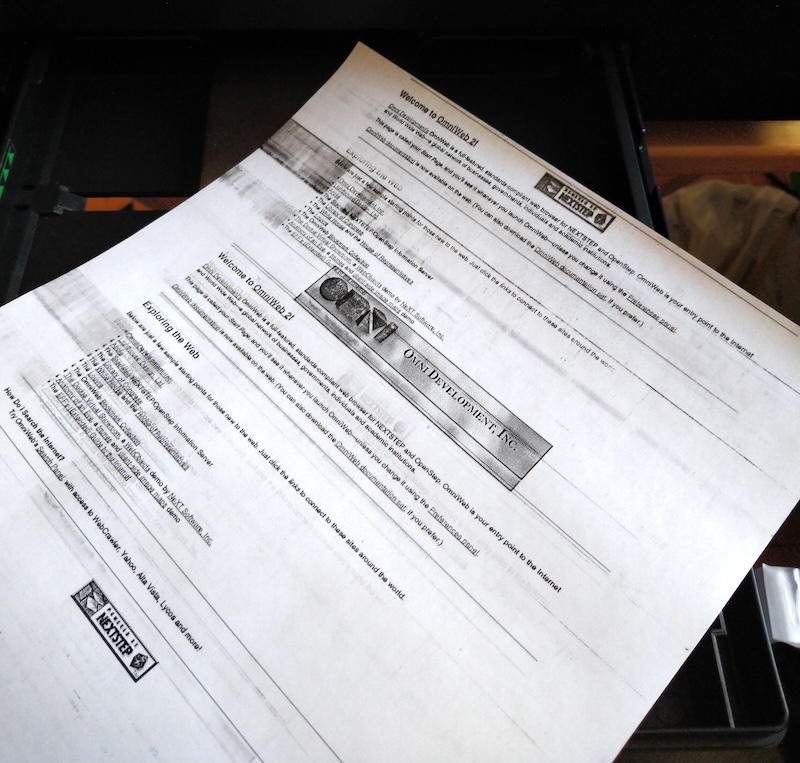
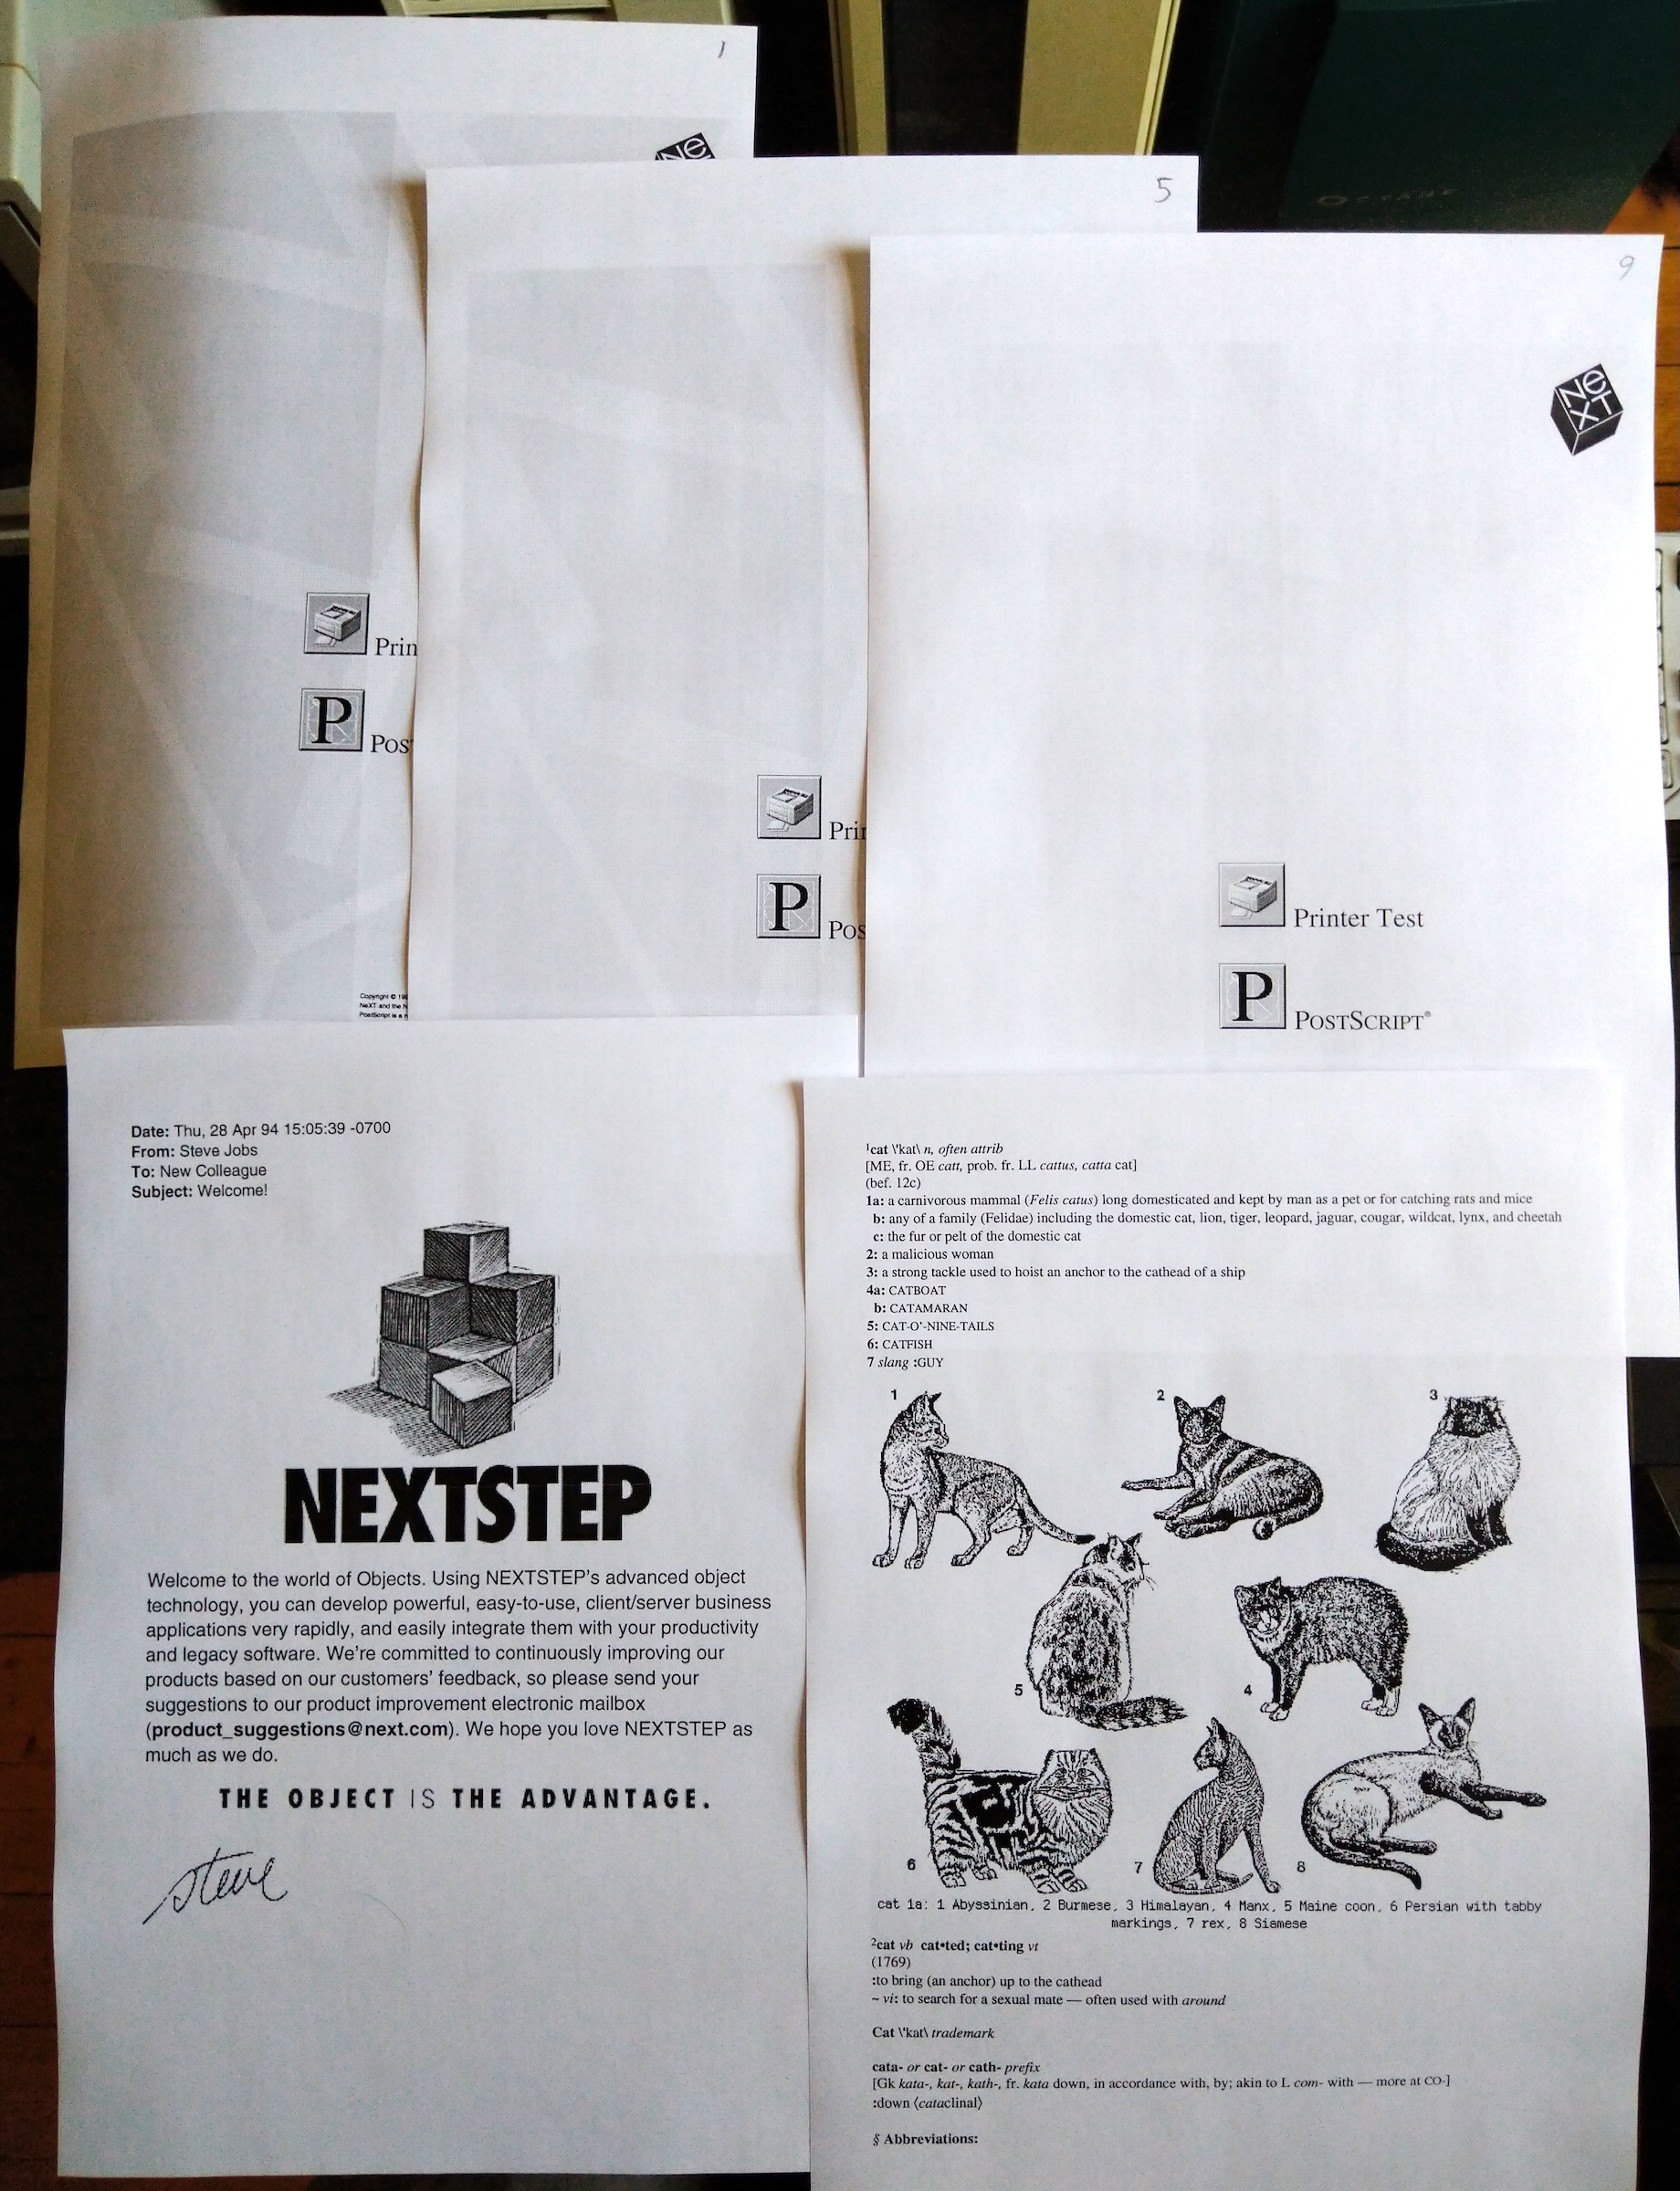
Another familiar looking page I used as a test page...
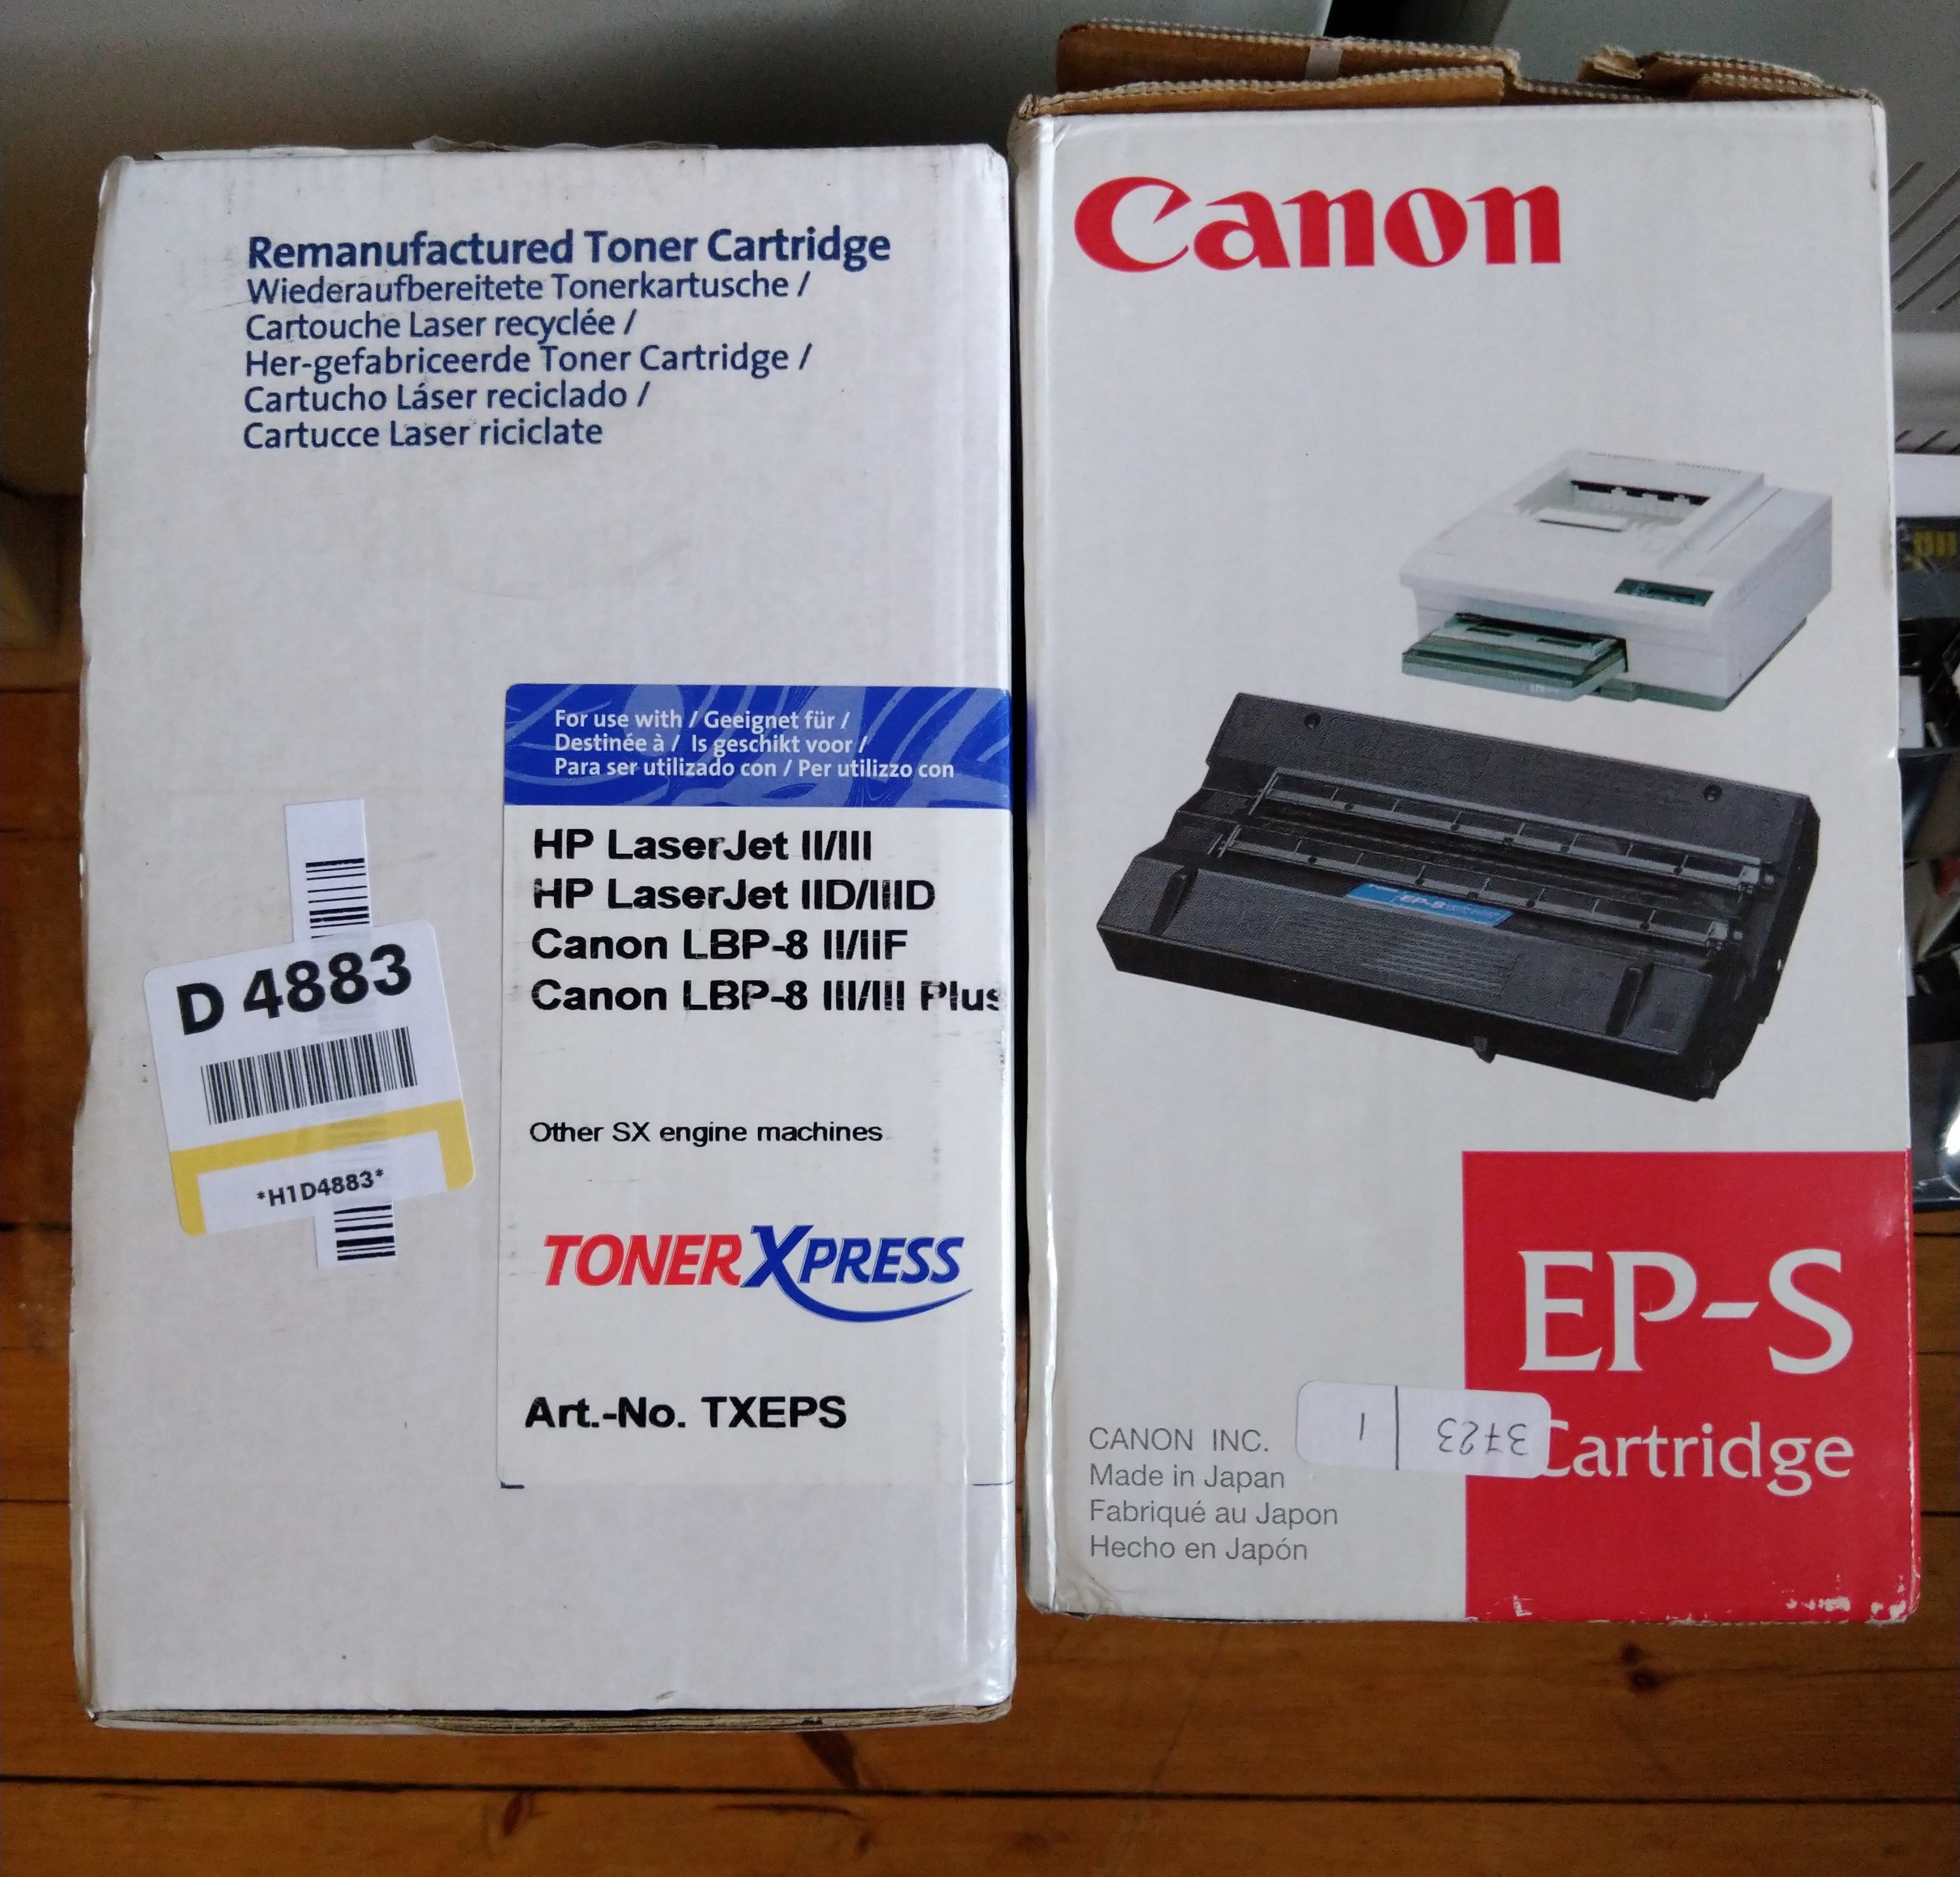
The new working cartridge on the left, the leaking NOS Canon one on the right. With proper measures I might eventually have a look into the Canon cartridge to see if there's something to be done with the ink leak. I believe the full-page black was still mostly due to the loose optical cable.
I can't find any date codes on either box, but the ToneXpress looks slightly newer and perhaps the fact that it says "Remanufactured" was a good sign indeed...
New parts for the paper intake are on the way so hopefully once I got those and get the paper path working and clean, this might actually work!
With another NOS ink cartrdige, hot-glued-in-place optical cable and manually feeding the pages into the printer:
So there is life! The pages still have mess (mostly on the) top of the page but that seemed to ease with every page, and now as the new cartridge doesn't seem to be leaking ink dust, I might need to clean the paper path yet again and it might be good. I only printed a couple of pages as it's still a pain to manually feed in the pages at the right time to make it proceed with the prints.
Another familiar looking page I used as a test page...
The new working cartridge on the left, the leaking NOS Canon one on the right. With proper measures I might eventually have a look into the Canon cartridge to see if there's something to be done with the ink leak. I believe the full-page black was still mostly due to the loose optical cable.
I can't find any date codes on either box, but the ToneXpress looks slightly newer and perhaps the fact that it says "Remanufactured" was a good sign indeed...
New parts for the paper intake are on the way so hopefully once I got those and get the paper path working and clean, this might actually work!
Title: Re: Yet another NeXT N2000 laser printer repair attempt
Post by: MindWalker on August 11, 2024, 10:40:30 AM
Post by: MindWalker on August 11, 2024, 10:40:30 AM
It's taking some time but progress is being made...
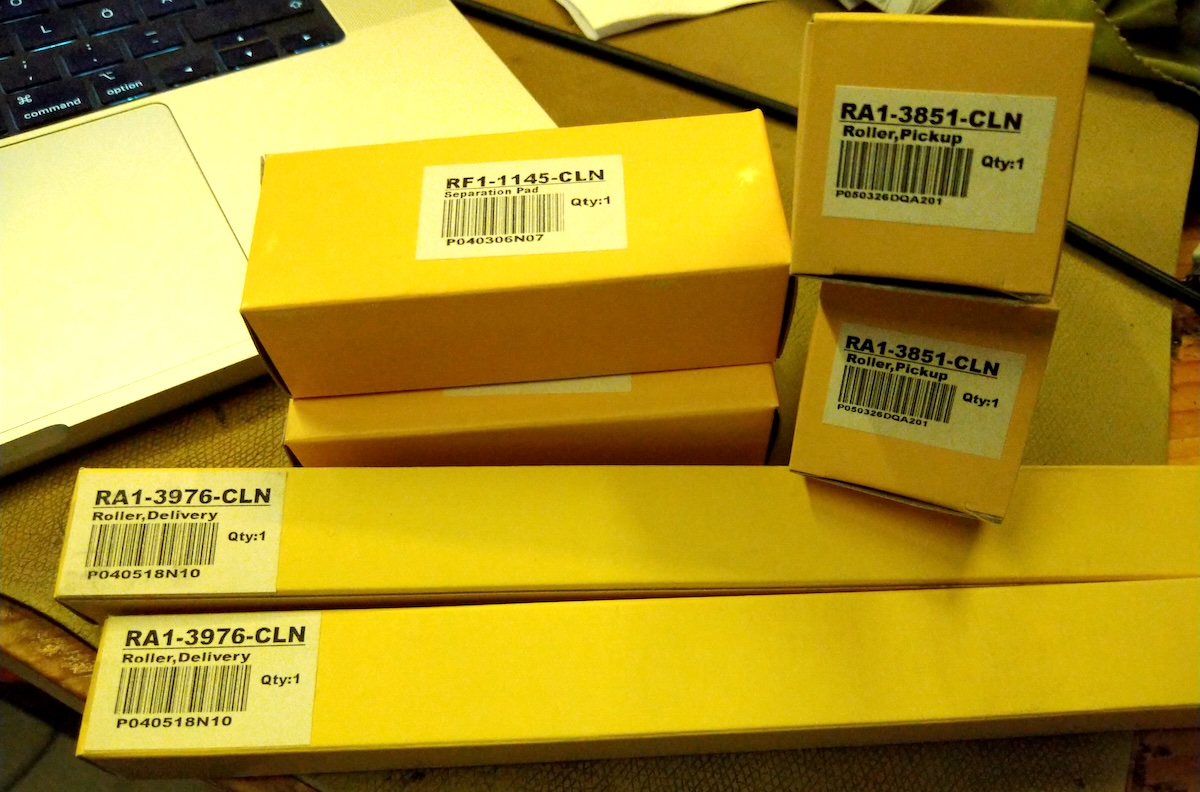
Thanks to @cooltr6 I now have new pickup-roller, separation pad and delivery roller (two of each as why not for the same shipping costs). I can't acccess the printer for couple of days now, but I have the pickup mechanism with me so I can at least install the new PU-roller and separation pad (so hopefully I don't have to manually inject pages anymore).
Thanks to @cooltr6 I now have new pickup-roller, separation pad and delivery roller (two of each as why not for the same shipping costs). I can't acccess the printer for couple of days now, but I have the pickup mechanism with me so I can at least install the new PU-roller and separation pad (so hopefully I don't have to manually inject pages anymore).
Title: Re: Yet another NeXT N2000 laser printer repair attempt
Post by: paolo.bertolo on August 12, 2024, 12:51:54 AM
Post by: paolo.bertolo on August 12, 2024, 12:51:54 AM
Hello, I am glad you managed to restore your printer to working conditions. Congratulations!
As you might have read in a parallel thread on this forum, I also got to the same point with my unit, just to see it going dead mute after a few hours staying powered up and a handful of prints.
So far, all attempts to fix it again have been totally fruitless.
Yesterday, however, as I was just about to reassemble and store it away, I run one last check and I may have found something unusual.
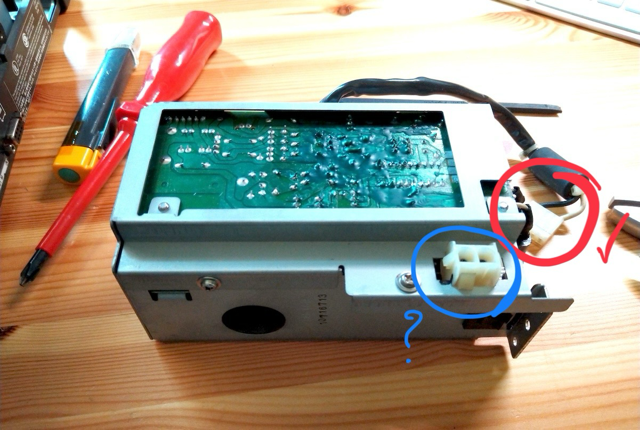
If I take out the AC PSU alone and connect it to the mains, I have tension at both circled outlet. The red circled one is just connected immediately downstream the AC filters, so it's always hot, but the blue circled one should be controlled by the relay and by the triac. In my unit, though, it's always hot. I guess it shouldn't be.
Would you be able to run this simple test on your unit and confirm if the blue one is always hot or not?
That would be very useful, thanks in advance for your support.
- Update -
No need. Thanks
As you might have read in a parallel thread on this forum, I also got to the same point with my unit, just to see it going dead mute after a few hours staying powered up and a handful of prints.
So far, all attempts to fix it again have been totally fruitless.
Yesterday, however, as I was just about to reassemble and store it away, I run one last check and I may have found something unusual.
If I take out the AC PSU alone and connect it to the mains, I have tension at both circled outlet. The red circled one is just connected immediately downstream the AC filters, so it's always hot, but the blue circled one should be controlled by the relay and by the triac. In my unit, though, it's always hot. I guess it shouldn't be.
Would you be able to run this simple test on your unit and confirm if the blue one is always hot or not?
That would be very useful, thanks in advance for your support.
- Update -
No need. Thanks
Title: Re: Yet another NeXT N2000 laser printer repair attempt
Post by: MindWalker on August 25, 2024, 11:49:21 AM
Post by: MindWalker on August 25, 2024, 11:49:21 AM
@paolo.bertolo: I hope you can get yours working!
Ok, finally an update on my printer... Having replaced the intake roller, I now finally had a chance to work on the printer again. I went to replace the delivery roller (although that worked fine previously). I was lazy and did not remove the whole delivery unit (as it's somewhat tricky to get out) but I managed to replace it from outside.
New delivery roller on top:
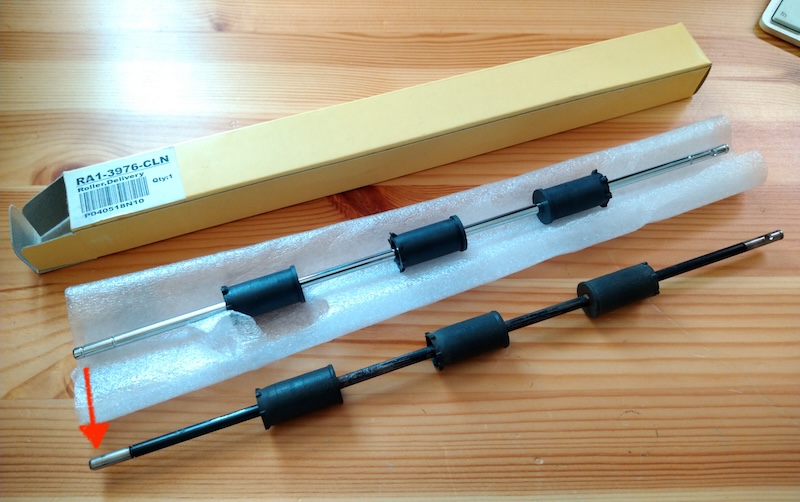
The new part has an extra groove for another locking ring that's not present (red arrow) in the N2000 (at first I did wonder if I had lost one).
New roller in place:
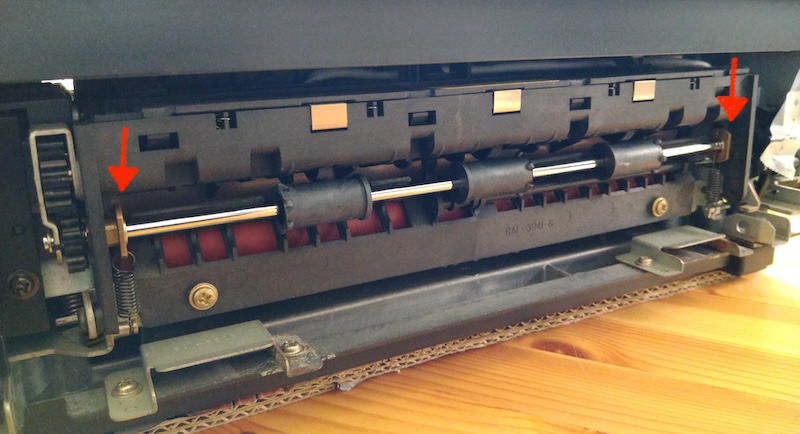
Can somebody confirm if the marked parts are correctly in place? I was somewhat unsure and although this seems like a correct orientation, I do have some issue with the delivery now (read on...). None of my previous photos show these edges, doh...
Anyway, the main thing is that THE PRINTER (95%) WORKS NOW!! ;D

The paper pick-up works well now; I printed several pages and it didn't fail to grab a single page. I tried inserting some blank pages on the manual intake (AND selecting manual on print settings) on top of the paper cassette but it still used the paper cassette, I am not sure why?
There are still some lines in the prints (mainly one dark stripe on the top of every page), some ghosting and now with the new delivery roller the page doesn't come all the way out: the final 1-2cm of the page stays in (and if not pulled off manually the printer will complain about a paper jam).
I guess I need to take the delivery unit fully out yet again, and still do some final cleaning around the paper path, but I am happy to see that mostly everything is now working as it should.
Ok, finally an update on my printer... Having replaced the intake roller, I now finally had a chance to work on the printer again. I went to replace the delivery roller (although that worked fine previously). I was lazy and did not remove the whole delivery unit (as it's somewhat tricky to get out) but I managed to replace it from outside.
New delivery roller on top:
The new part has an extra groove for another locking ring that's not present (red arrow) in the N2000 (at first I did wonder if I had lost one).
New roller in place:
Can somebody confirm if the marked parts are correctly in place? I was somewhat unsure and although this seems like a correct orientation, I do have some issue with the delivery now (read on...). None of my previous photos show these edges, doh...
Anyway, the main thing is that THE PRINTER (95%) WORKS NOW!! ;D
The paper pick-up works well now; I printed several pages and it didn't fail to grab a single page. I tried inserting some blank pages on the manual intake (AND selecting manual on print settings) on top of the paper cassette but it still used the paper cassette, I am not sure why?
There are still some lines in the prints (mainly one dark stripe on the top of every page), some ghosting and now with the new delivery roller the page doesn't come all the way out: the final 1-2cm of the page stays in (and if not pulled off manually the printer will complain about a paper jam).
I guess I need to take the delivery unit fully out yet again, and still do some final cleaning around the paper path, but I am happy to see that mostly everything is now working as it should.
Title: Re: Yet another NeXT N2000 laser printer repair attempt
Post by: user341 on August 25, 2024, 02:59:33 PM
Post by: user341 on August 25, 2024, 02:59:33 PM
Wow what great progress, congrats!
Title: Re: Yet another NeXT N2000 laser printer repair attempt
Post by: MindWalker on September 15, 2024, 11:03:43 AM
Post by: MindWalker on September 15, 2024, 11:03:43 AM
Not much to report, but I have now assembled the printer (as I'll need my bench space soon for something else and I wanted to get the remaining parts and screws back in before I loose them).
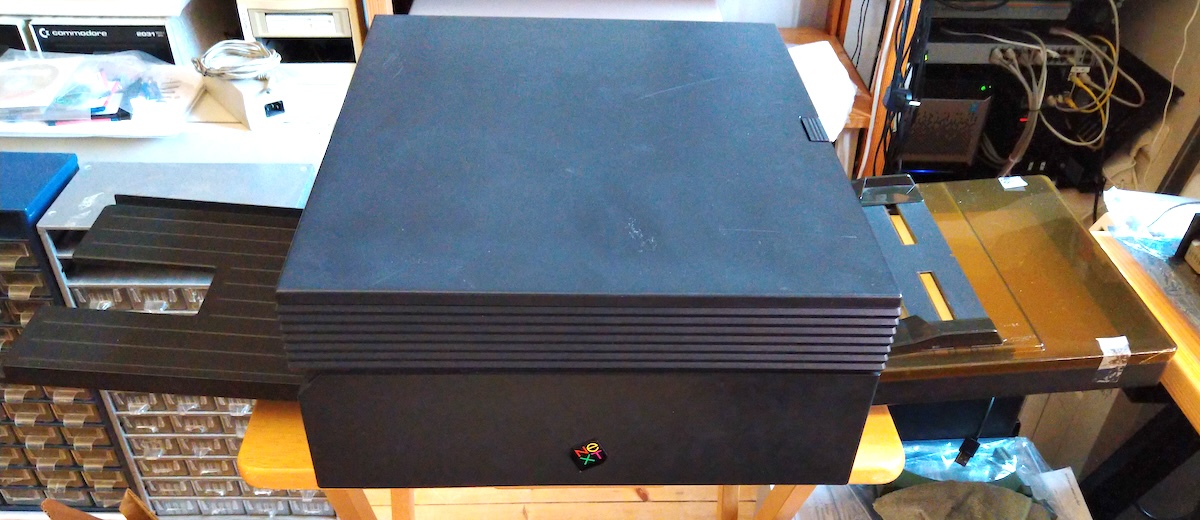
It is a pretty thing :) And it still works after fiddling with it, lol.
I tried further cleaning on the cartridge and the fuser unit, but there are still some stripes and slight ghosting on the pages, but it's good enough for now.
While looking at the fixing assembly, I noticed that this gear seems to have at least one tooth broken off so I believe this is the culprit for not-quite-getting-the-page-out:
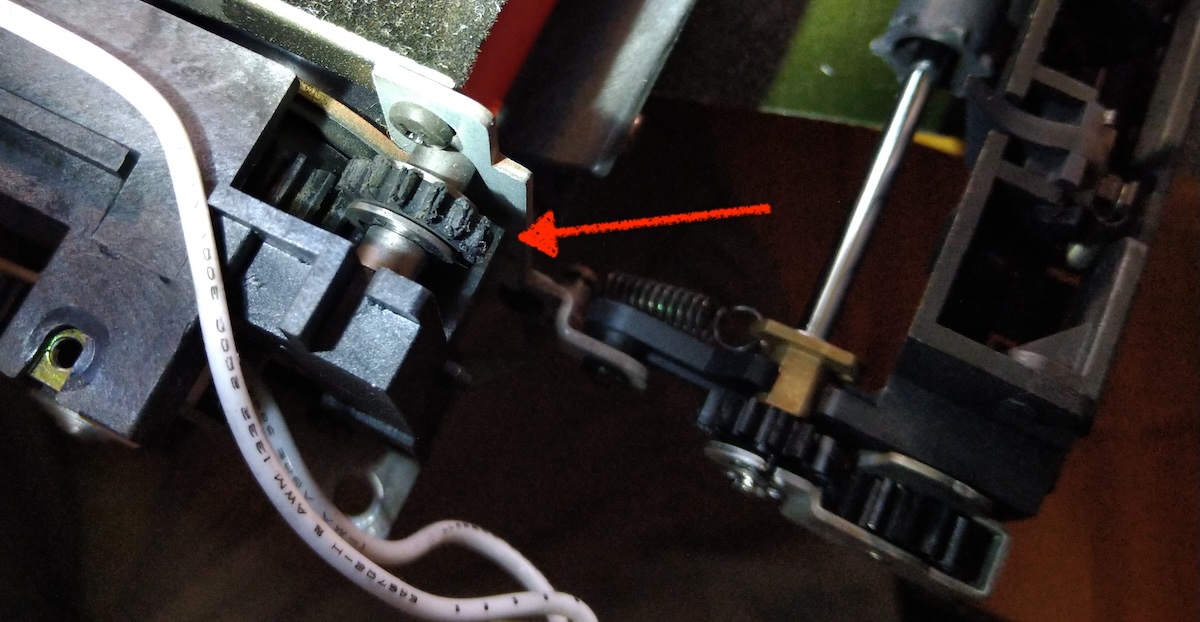
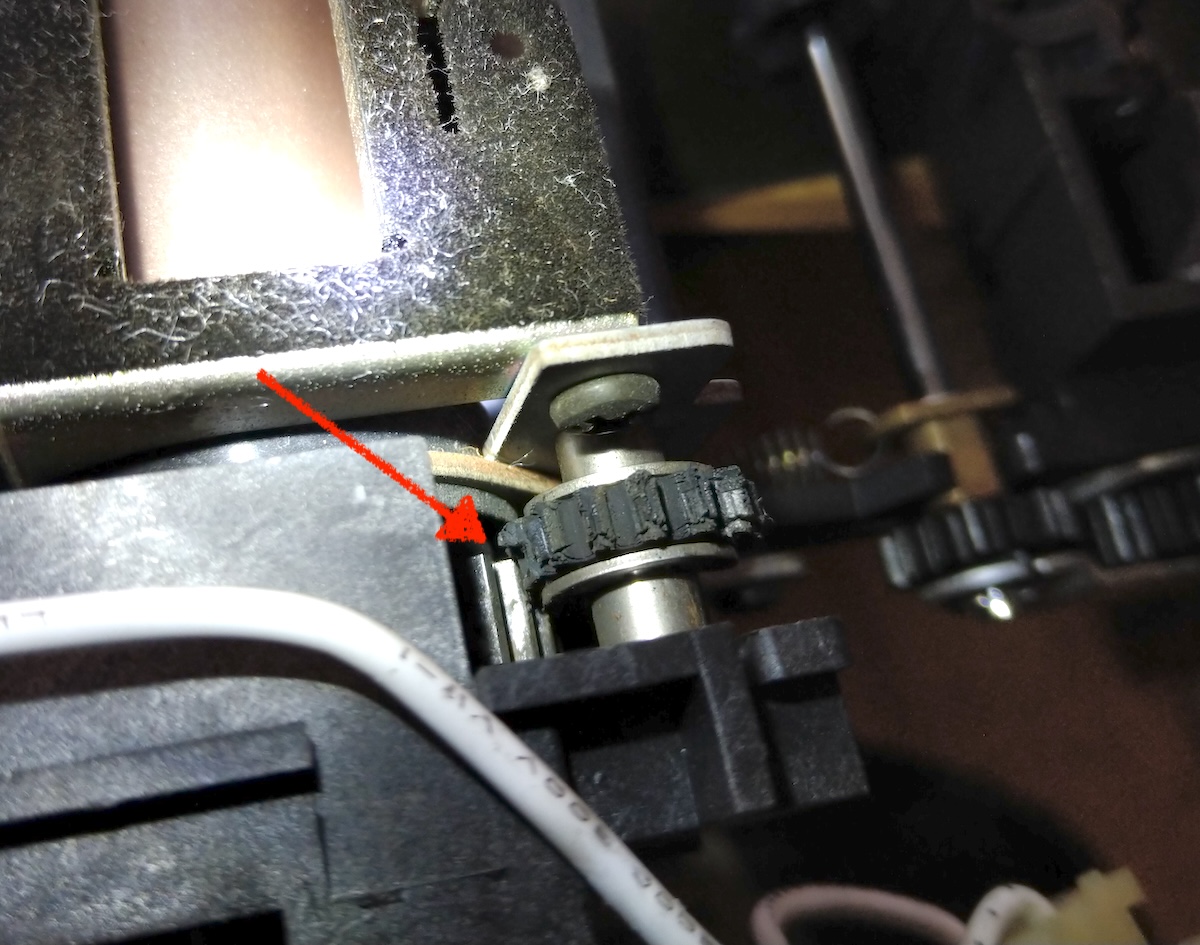
Can anybody confirm what's the part number for this gear? I remember reading something about a gear that usually crumbles on the output, and this would fit the description... Also I wonder why the gear looks like it sit only half-way onto the bigger gear?
It is a pretty thing :) And it still works after fiddling with it, lol.
I tried further cleaning on the cartridge and the fuser unit, but there are still some stripes and slight ghosting on the pages, but it's good enough for now.
While looking at the fixing assembly, I noticed that this gear seems to have at least one tooth broken off so I believe this is the culprit for not-quite-getting-the-page-out:
Can anybody confirm what's the part number for this gear? I remember reading something about a gear that usually crumbles on the output, and this would fit the description... Also I wonder why the gear looks like it sit only half-way onto the bigger gear?
Title: Re: Yet another NeXT N2000 laser printer repair attempt
Post by: spitfire on September 16, 2024, 02:24:26 PM
Post by: spitfire on September 16, 2024, 02:24:26 PM
I don't know which gears those are exactly. But I bought a number of gears in my laser printer repair purchase. Check my thread and look at the website mentioned. They may have the gear you're looking for.
Title: Re: Yet another NeXT N2000 laser printer repair attempt
Post by: Nitro on September 16, 2024, 04:14:16 PM
Post by: Nitro on September 16, 2024, 04:14:16 PM
Quote from: MindWalker on September 15, 2024, 11:03:43 AMCan anybody confirm what's the part number for this gear? I remember reading something about a gear that usually crumbles on the output, and this would fit the description... Also I wonder why the gear looks like it sit only half-way onto the bigger gear?
Randy Rencsok had a picture of the gear on his website back in the day, but unfortunately it doesn't have the original part number.
https://web.archive.org/web/20010811155428/http://www.channelu.com/Turbo/N2000/index.html (https://web.archive.org/web/20010811155428/http://www.channelu.com/Turbo/N2000/index.html)
Could this be the part?
https://secure.partsmart-corp.com/fuser-parts/hp-laserjet-hpii-rs1-0132-000-fuser-gear-14t (https://secure.partsmart-corp.com/fuser-parts/hp-laserjet-hpii-rs1-0132-000-fuser-gear-14t)
The gear could probably be 3D printed if a replacement can't be found.
Title: Re: Yet another NeXT N2000 laser printer repair attempt
Post by: MindWalker on September 17, 2024, 10:14:39 AM
Post by: MindWalker on September 17, 2024, 10:14:39 AM
Thanks! After some reading; yes I believe it is that 14 teeth gear, the original one is slim (as mine) but several places suggest replacing it with a thicker one for better durability.
I'll try first getting it bought, modeling gears is a bit tricky and this gear sits very close to the hot fuser area and might need to be a special type to withstand the heat.
I'll try first getting it bought, modeling gears is a bit tricky and this gear sits very close to the hot fuser area and might need to be a special type to withstand the heat.
Title: Re: Yet another NeXT N2000 laser printer repair attempt
Post by: MindWalker on October 20, 2024, 08:40:34 AM
Post by: MindWalker on October 20, 2024, 08:40:34 AM
Progress has been slow, but there has been some...
I ordered the new 14T expeller gear, and now the pages come out all the way. The old gear was very dried out and crumbling and had cracked (old gear on the left, two new ones on the right):
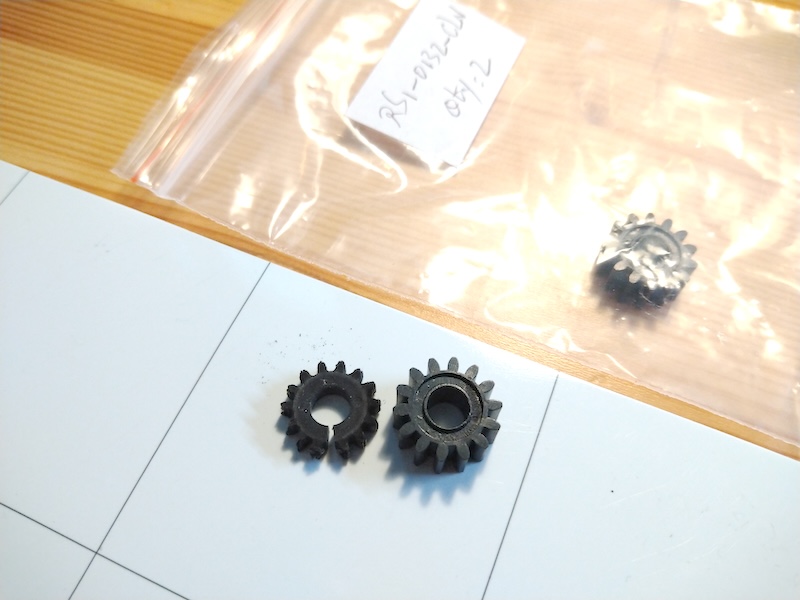
The new gear is thicker than the old one, but fits and appears to be an OK replacement. The replacement is described in this document (https://nextcomputers.org/NeXTfiles/Docs/Hardware/NeXT_Laser_Printer_N2000/NeXT_Laser_Printer_Service.pdf), although I strongly suggest using the video disassembly guide instead, I think some of the disassembly steps described in that PDF are unnecessary. (With patience you can remove the fuser assembly from the back without removing the side-cover and none of the internals).
I had a look on some free online gear-STL generators and with these values seem to produce something very similar to the new parts (in mm): Spur Gear, Module: 0.8, Pressure angle: 20, Number of teeth: 14, Gear length: 6.7, Circular hole radius: 3. I did not try to 3D-print these, but these look about right. Not sure how 3D-printed materials would hold that close to the hot fuser assembly...
There is still some dirt on the printouts, mainly one or two horizontal lines on the top-half of all pages (and sometimes slight repeating on the right edge, see below the NeXT logo):
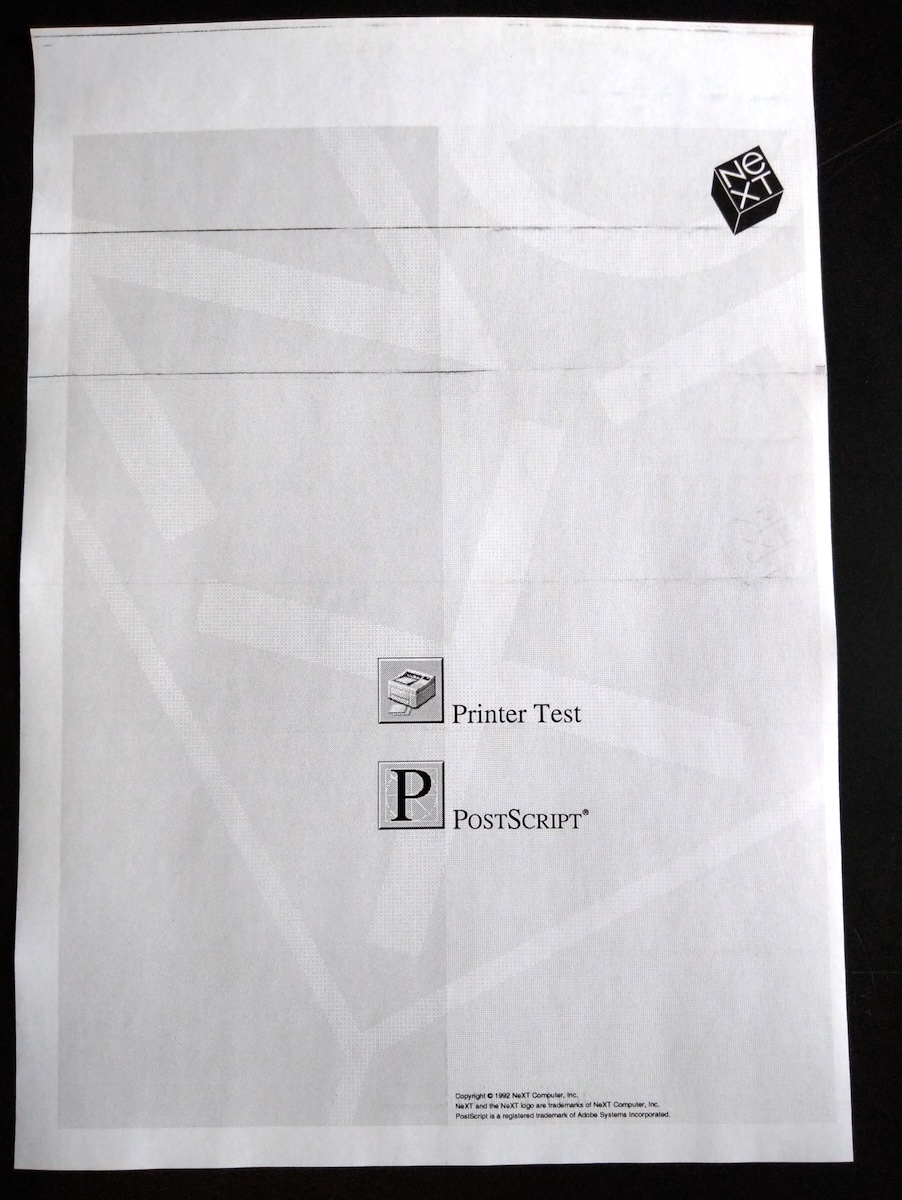
Cleaning the drum of the ink cartridge I can sometimes make it go down to one line/fainter lines, sometimes it gets better and sometimes it gets worse... For all I know this might still be an issue with the cartridge itself*, but I am not going to buy another one for now, nor go much deeper into the cartridge itself, and I guess I'll call this good enough for now.
* the troubleshooting guide does say: "Thin black horizontal streaks: Do the streaks occur at regular intervals? YES - Replace the cartridge"
Unfortunately one new issue came up. While cleaning the laser assembly (on the top door) I believe these two springs came out from that area. I found one in the area and one had dropped down to the floor.
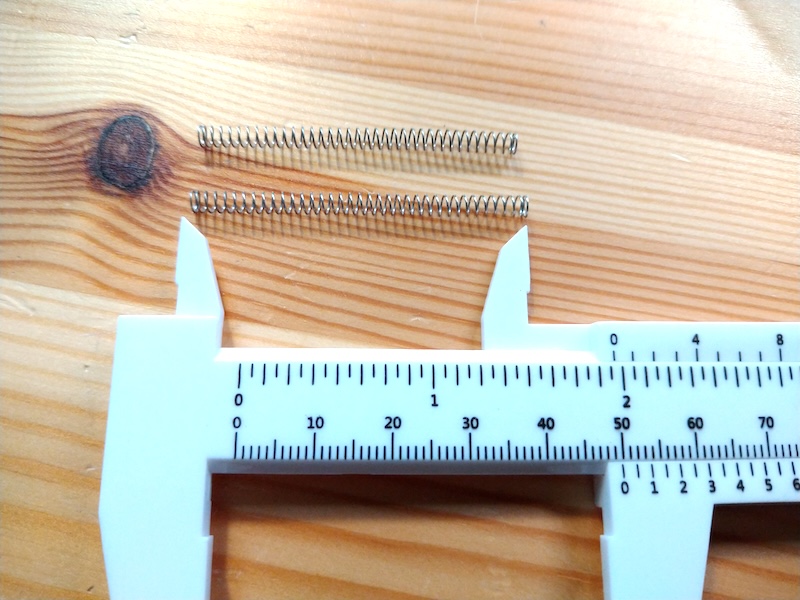
I can't figure out where they came from (doesn't seem to affect the workings of the printer though). I'd guess they might have something to do with the suspension of the ink cartridge/laser assembly on the top door, but I can't see any place where they'd fit. Any ideas? :-[
I ordered the new 14T expeller gear, and now the pages come out all the way. The old gear was very dried out and crumbling and had cracked (old gear on the left, two new ones on the right):
The new gear is thicker than the old one, but fits and appears to be an OK replacement. The replacement is described in this document (https://nextcomputers.org/NeXTfiles/Docs/Hardware/NeXT_Laser_Printer_N2000/NeXT_Laser_Printer_Service.pdf), although I strongly suggest using the video disassembly guide instead, I think some of the disassembly steps described in that PDF are unnecessary. (With patience you can remove the fuser assembly from the back without removing the side-cover and none of the internals).
I had a look on some free online gear-STL generators and with these values seem to produce something very similar to the new parts (in mm): Spur Gear, Module: 0.8, Pressure angle: 20, Number of teeth: 14, Gear length: 6.7, Circular hole radius: 3. I did not try to 3D-print these, but these look about right. Not sure how 3D-printed materials would hold that close to the hot fuser assembly...
There is still some dirt on the printouts, mainly one or two horizontal lines on the top-half of all pages (and sometimes slight repeating on the right edge, see below the NeXT logo):
Cleaning the drum of the ink cartridge I can sometimes make it go down to one line/fainter lines, sometimes it gets better and sometimes it gets worse... For all I know this might still be an issue with the cartridge itself*, but I am not going to buy another one for now, nor go much deeper into the cartridge itself, and I guess I'll call this good enough for now.
* the troubleshooting guide does say: "Thin black horizontal streaks: Do the streaks occur at regular intervals? YES - Replace the cartridge"
Unfortunately one new issue came up. While cleaning the laser assembly (on the top door) I believe these two springs came out from that area. I found one in the area and one had dropped down to the floor.
I can't figure out where they came from (doesn't seem to affect the workings of the printer though). I'd guess they might have something to do with the suspension of the ink cartridge/laser assembly on the top door, but I can't see any place where they'd fit. Any ideas? :-[
Title: Re: Yet another NeXT N2000 laser printer repair attempt
Post by: MindWalker on May 22, 2025, 01:31:09 PM
Post by: MindWalker on May 22, 2025, 01:31:09 PM
The last grand issue: the old, leaky toner cartridges.
While studying the subject, I came across this thread on the similar issue on Apple LaserWriter cartridges from 2022: https://68kmla.org/bb/index.php?threads/replacement-laserwriter-toner-drum-blades.40137/ (https://68kmla.org/bb/index.php?threads/replacement-laserwriter-toner-drum-blades.40137/)
The LaserWriter in question uses the same cartridges as the NeXT N2000: HP 95A (aka. HP 92295) and finally in this post (https://68kmla.org/bb/index.php?threads/replacement-laserwriter-toner-drum-blades.40137/page-2#post-436592) a replacement wiper blade was confirmed as working on "all Apple LaserWriter II cartridges, and all cartridges for the HP LaserJet II and III printers. Any HP 92295".
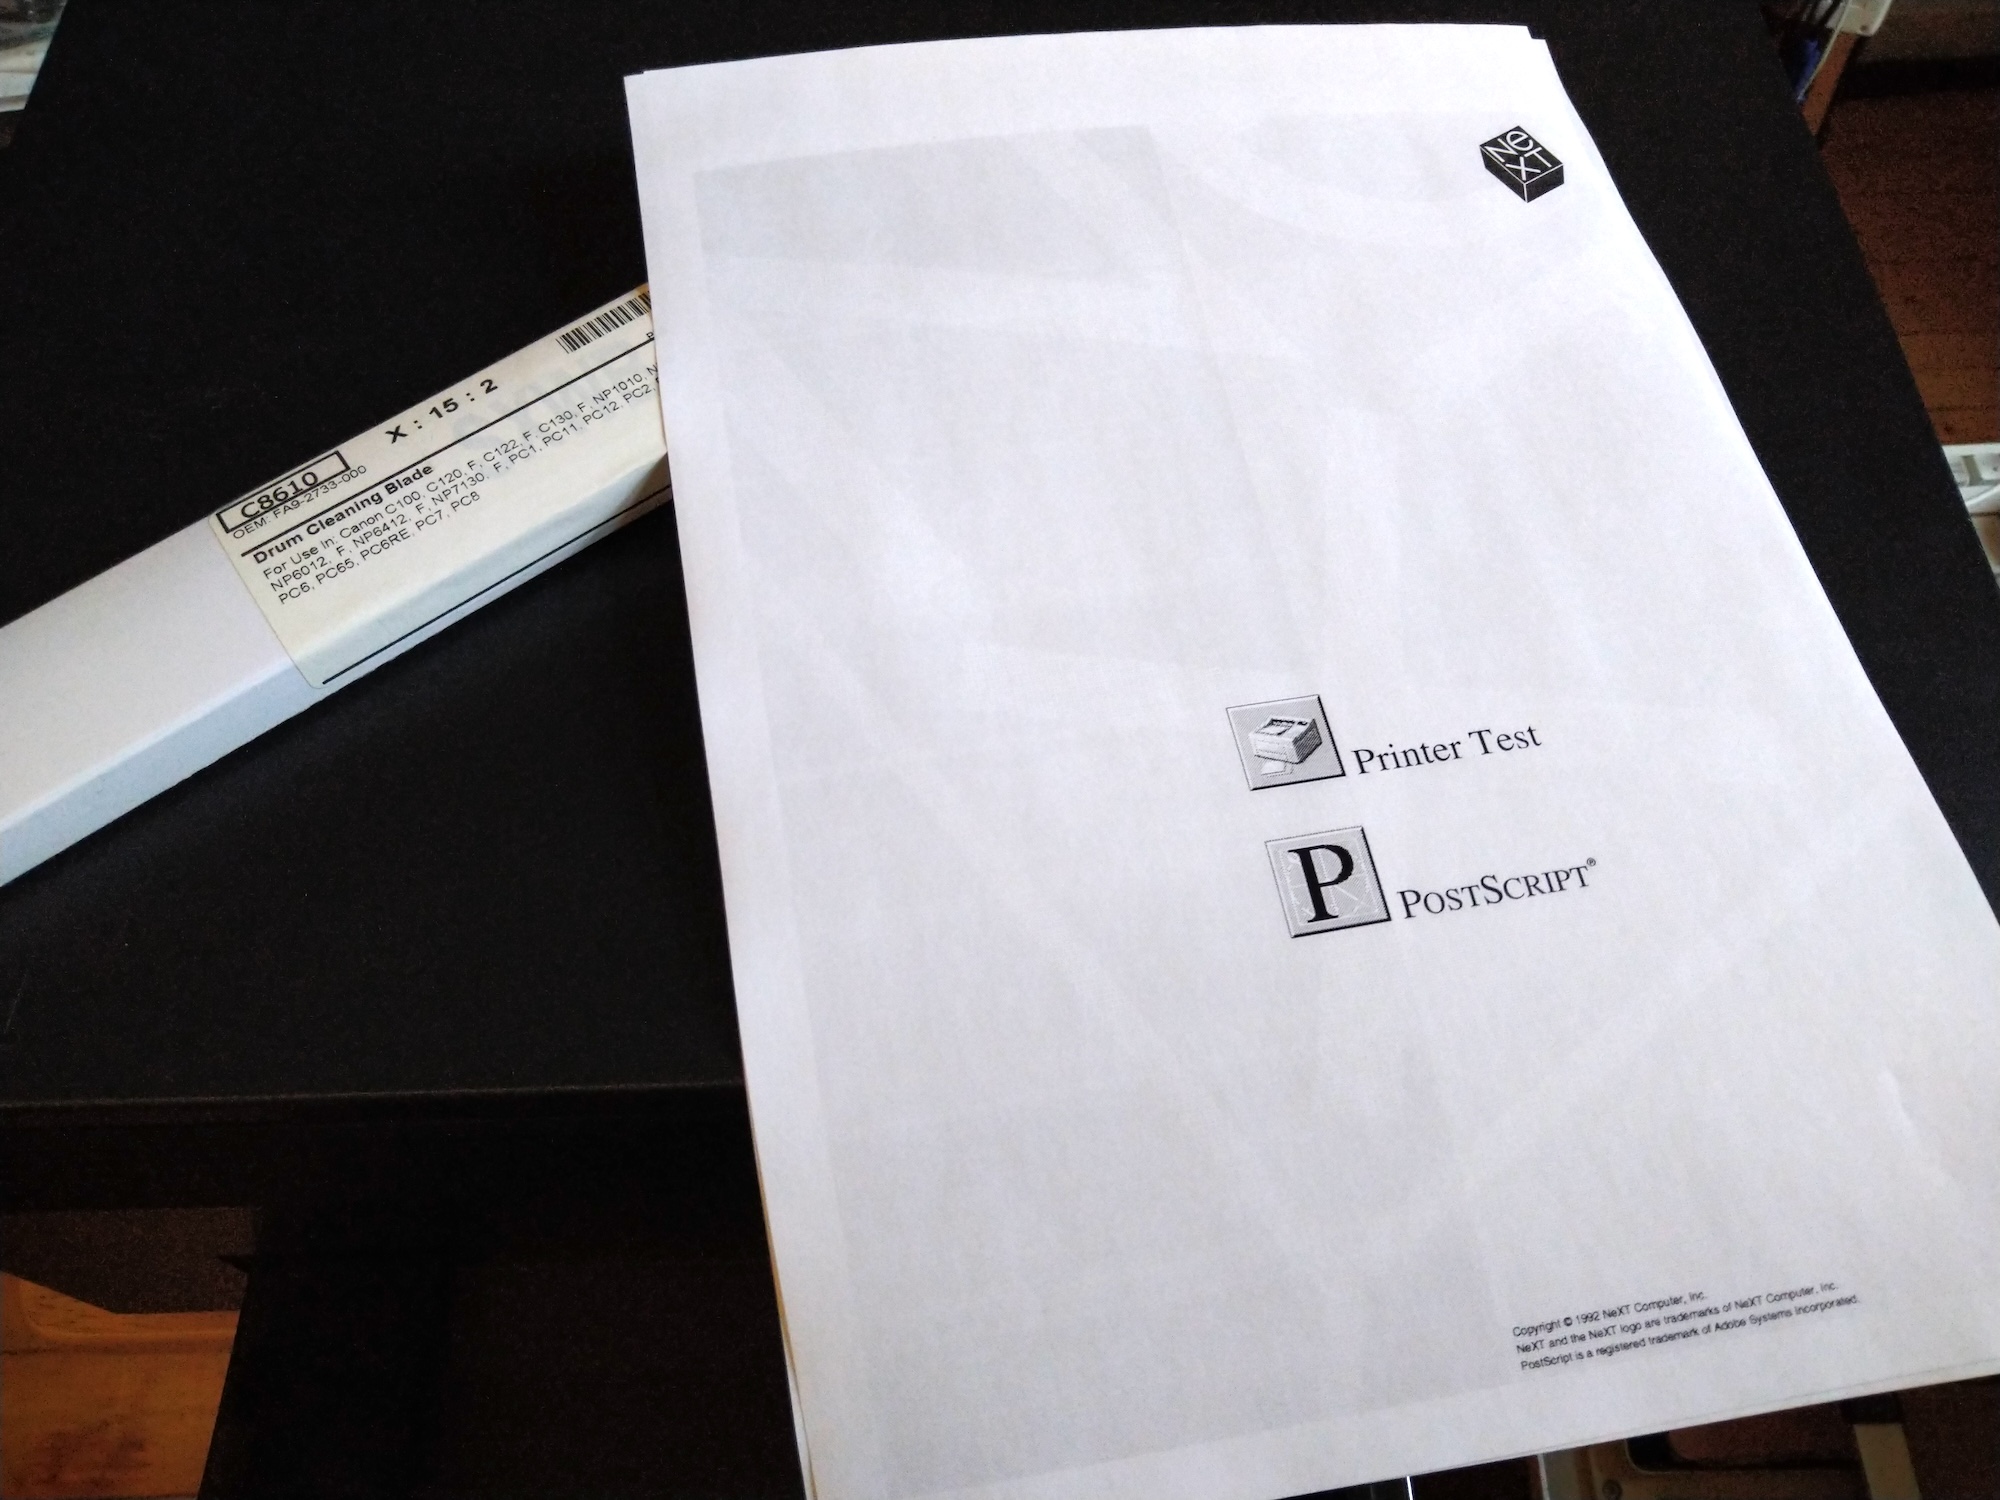
Which brought me here: https://www.precisionroller.com/fa9-2733-000-for-canon/details_pn_182.html (https://www.precisionroller.com/fa9-2733-000-for-canon/details_pn_182.html). This was overseas for me, but I couldn't find any other supplier so I bought one. It's a lightweight part so shipping was not too bad, and Fedex delivered it in just one week.
It wouldn't have been obvious how to take the cartridge apart, but fortunately there is a brilliant tutorial available on YouTube: Vintage HP LaserJet II Toner Cartridge Repair - Beautiful Prints (https://www.youtube.com/watch?v=yhqkPplgPaw) (by RavenWolf Retro Tech) from 2020. The whole Laserjet II repair series is worth of a watch as it bears lots of similarities to the N2000.
I did not have the "Ames PinPal" tool (can anyone find a current seller that has these, couldn't find any?) but inspired from the tool shown in the video I went thru my bin of screws and found a size that worked almost as well and I was able to pull out the tabs that hold the cartridge together.
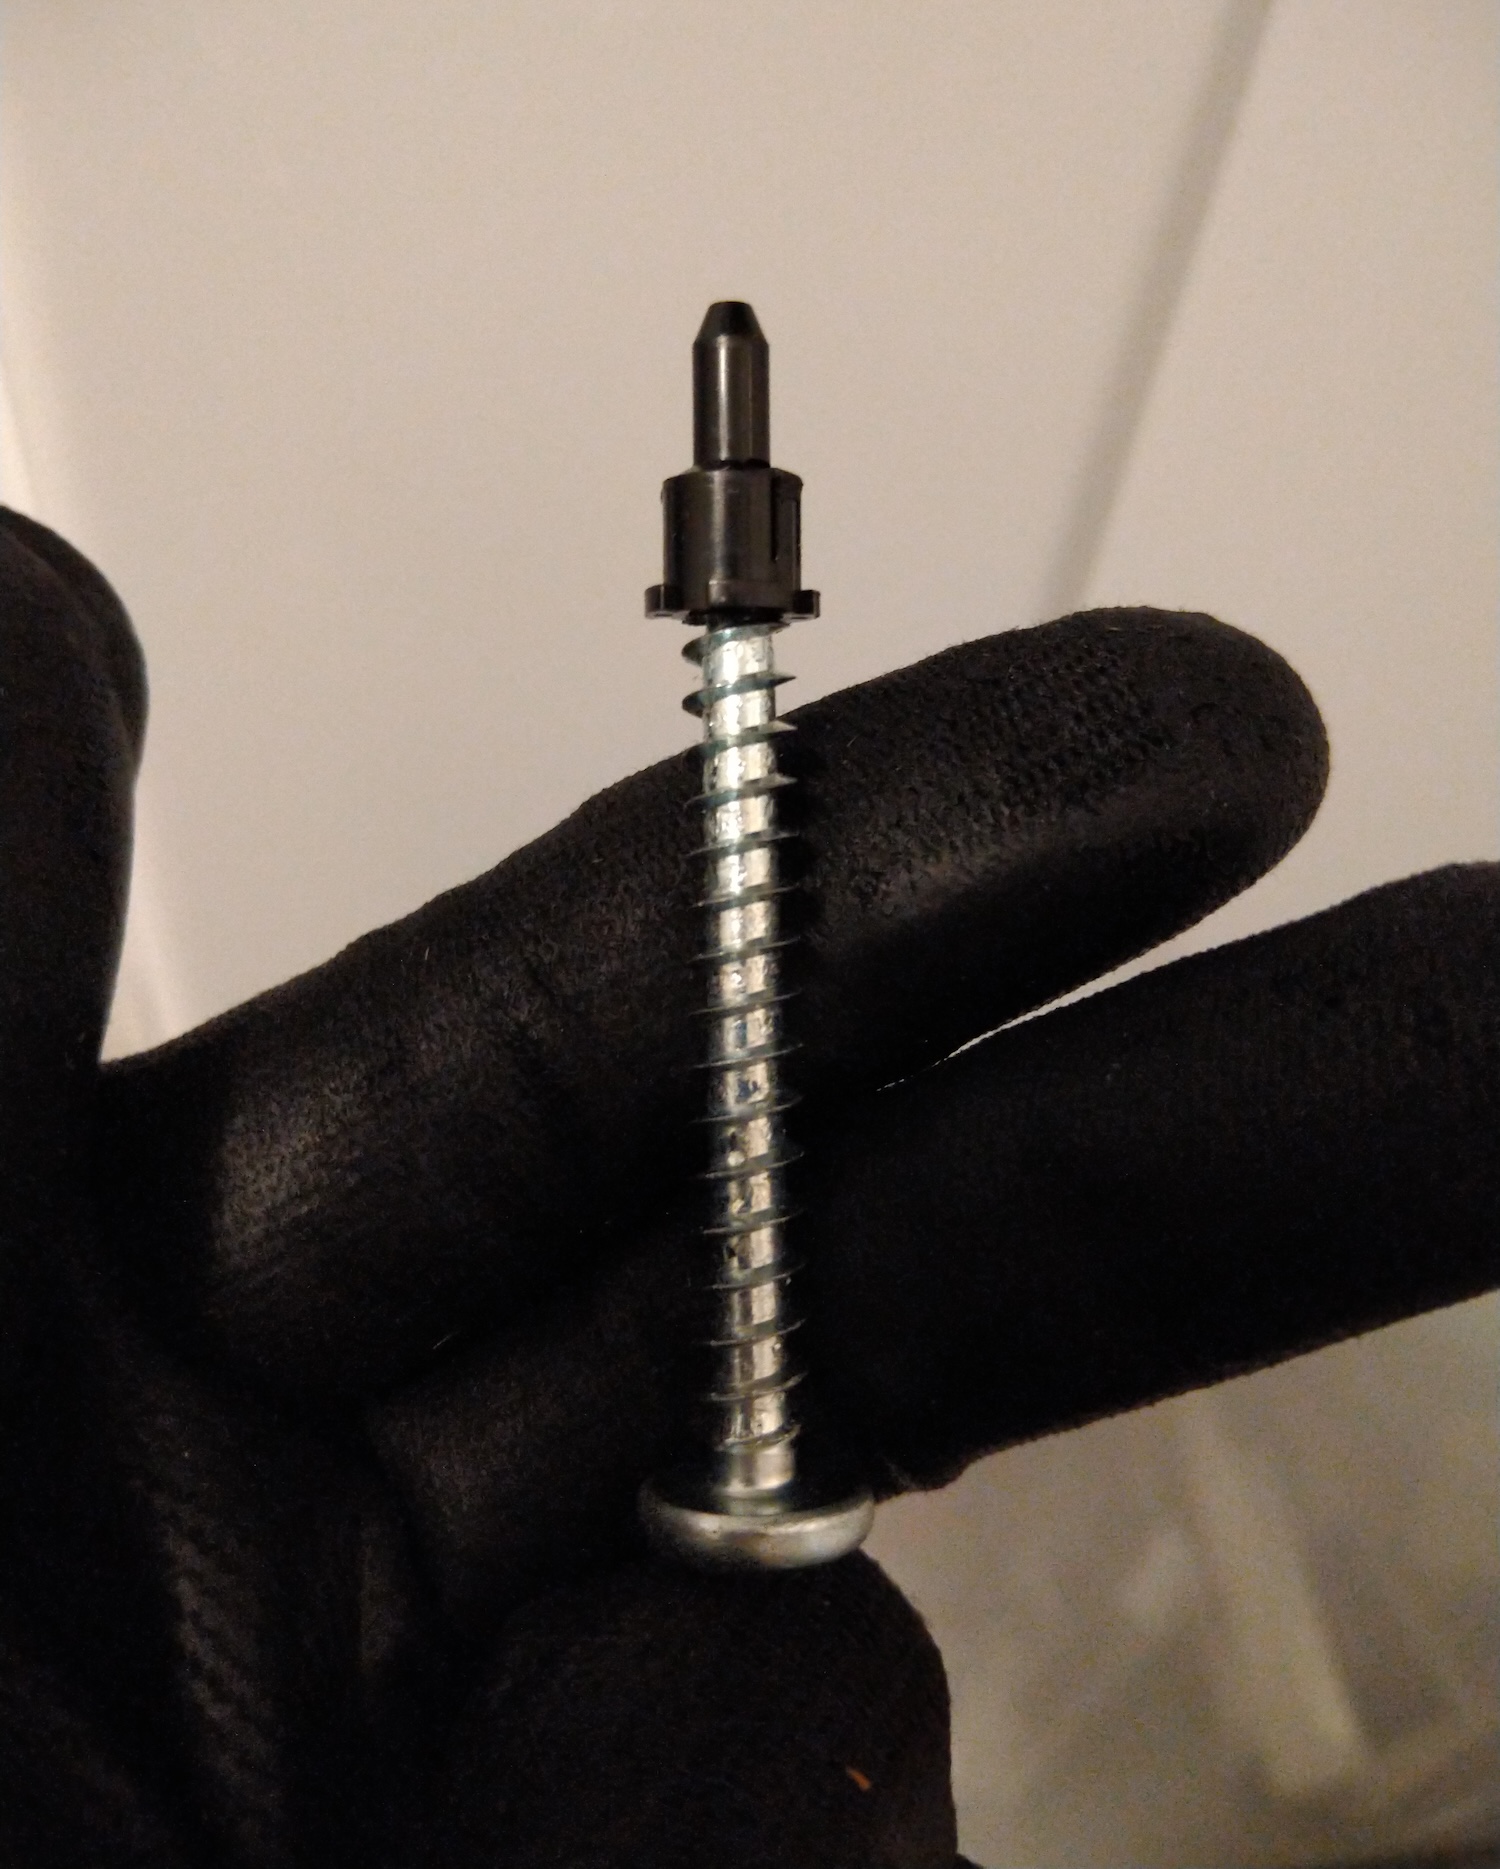
Not perfect but good enough for the job!
I took the cartridge apart (in my bathroom in attempt to keep the possible ink dust at bay!) and I must say it wasn't too bad. It's basically just couple of those plastic pins, three screws and two springs that need to be removed and it comes apart. There was some ink residue but nothing drastic, I think this is due to some foam-tape seals inside the cartridge that have become worn. I did not have any replacement at hand but I take some measurements. The cartridge would only release small drips of ink powder if tilted on one end, so it's manageable.
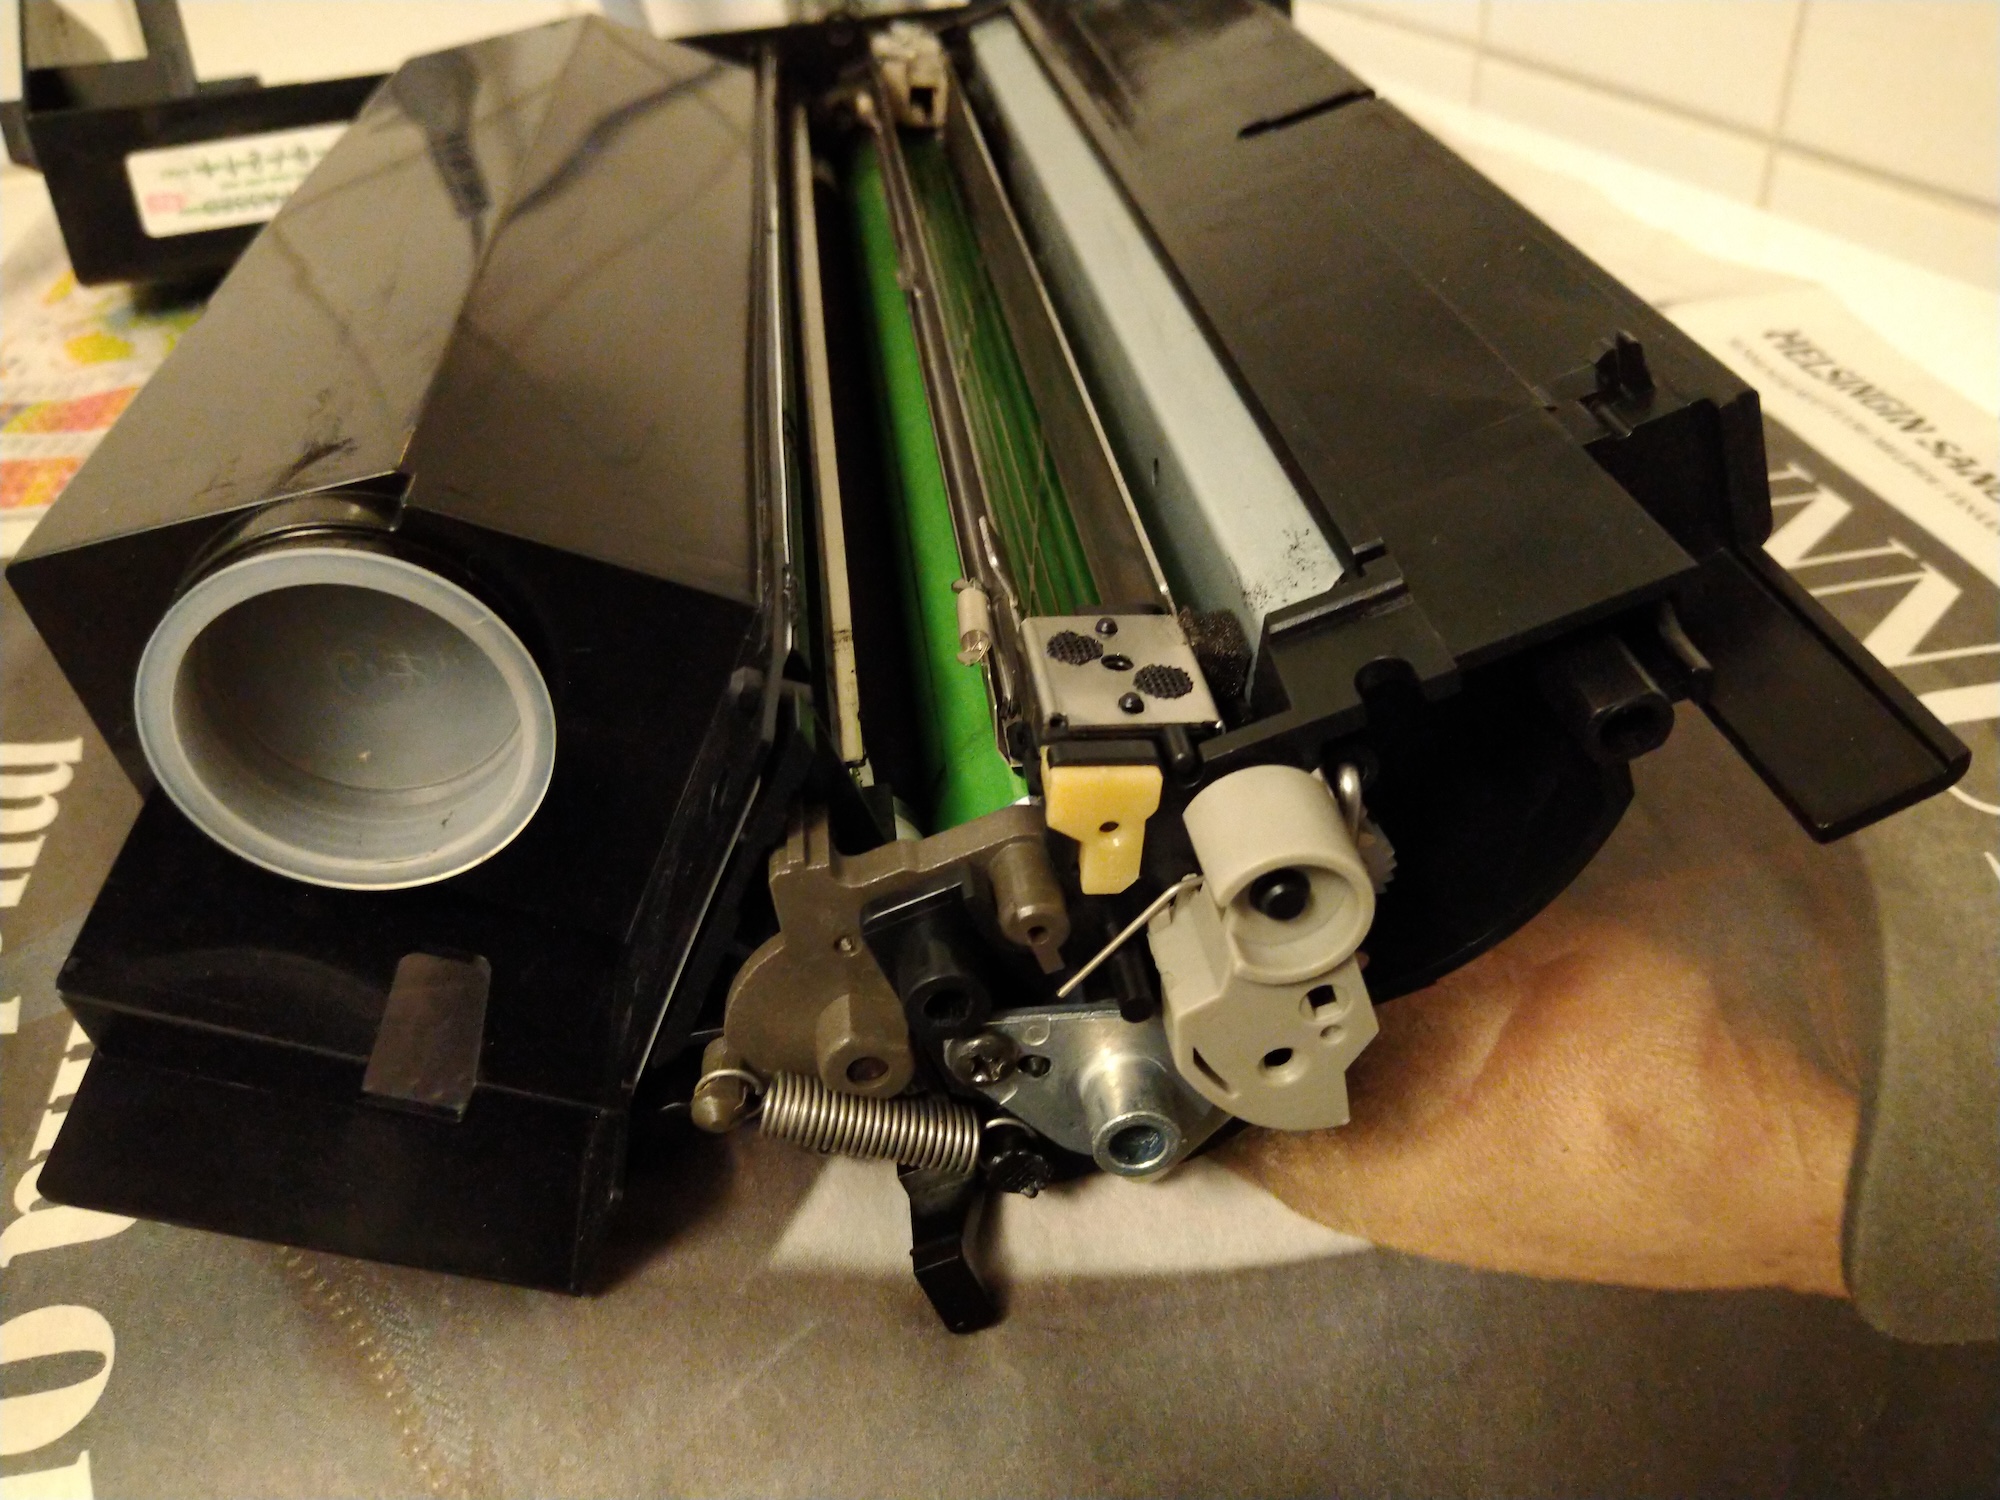
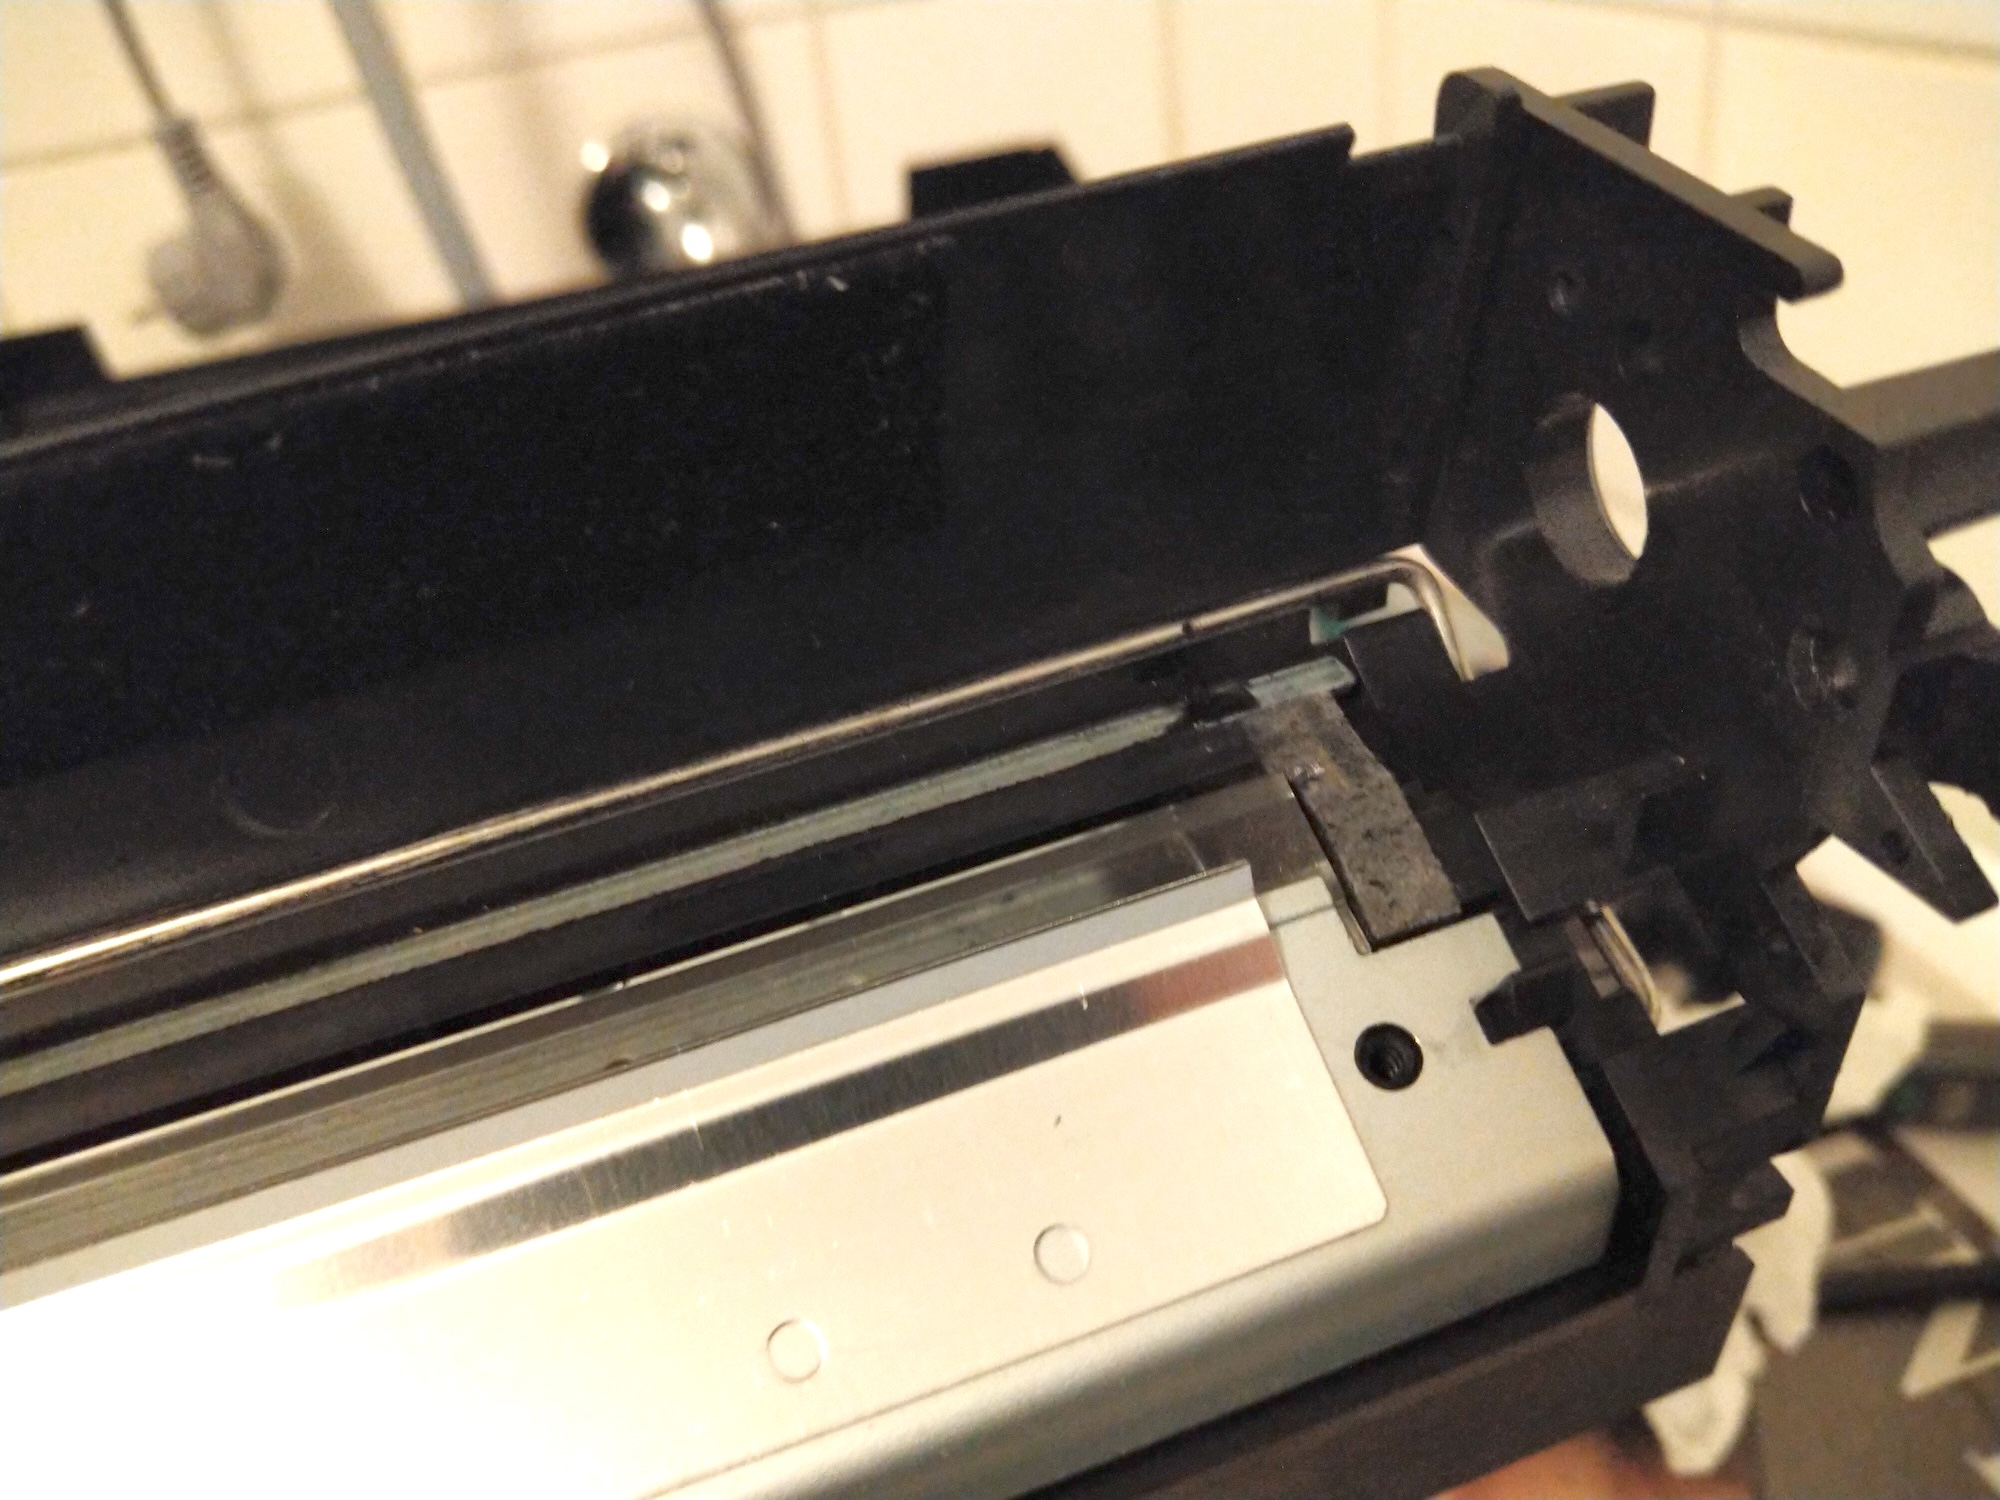
Top: inside the cartridge: one the left is the ink tank, the green drum is in the middle, the wire-frame thing is the corona wire and right to that on the silver backing is the wiper blade.
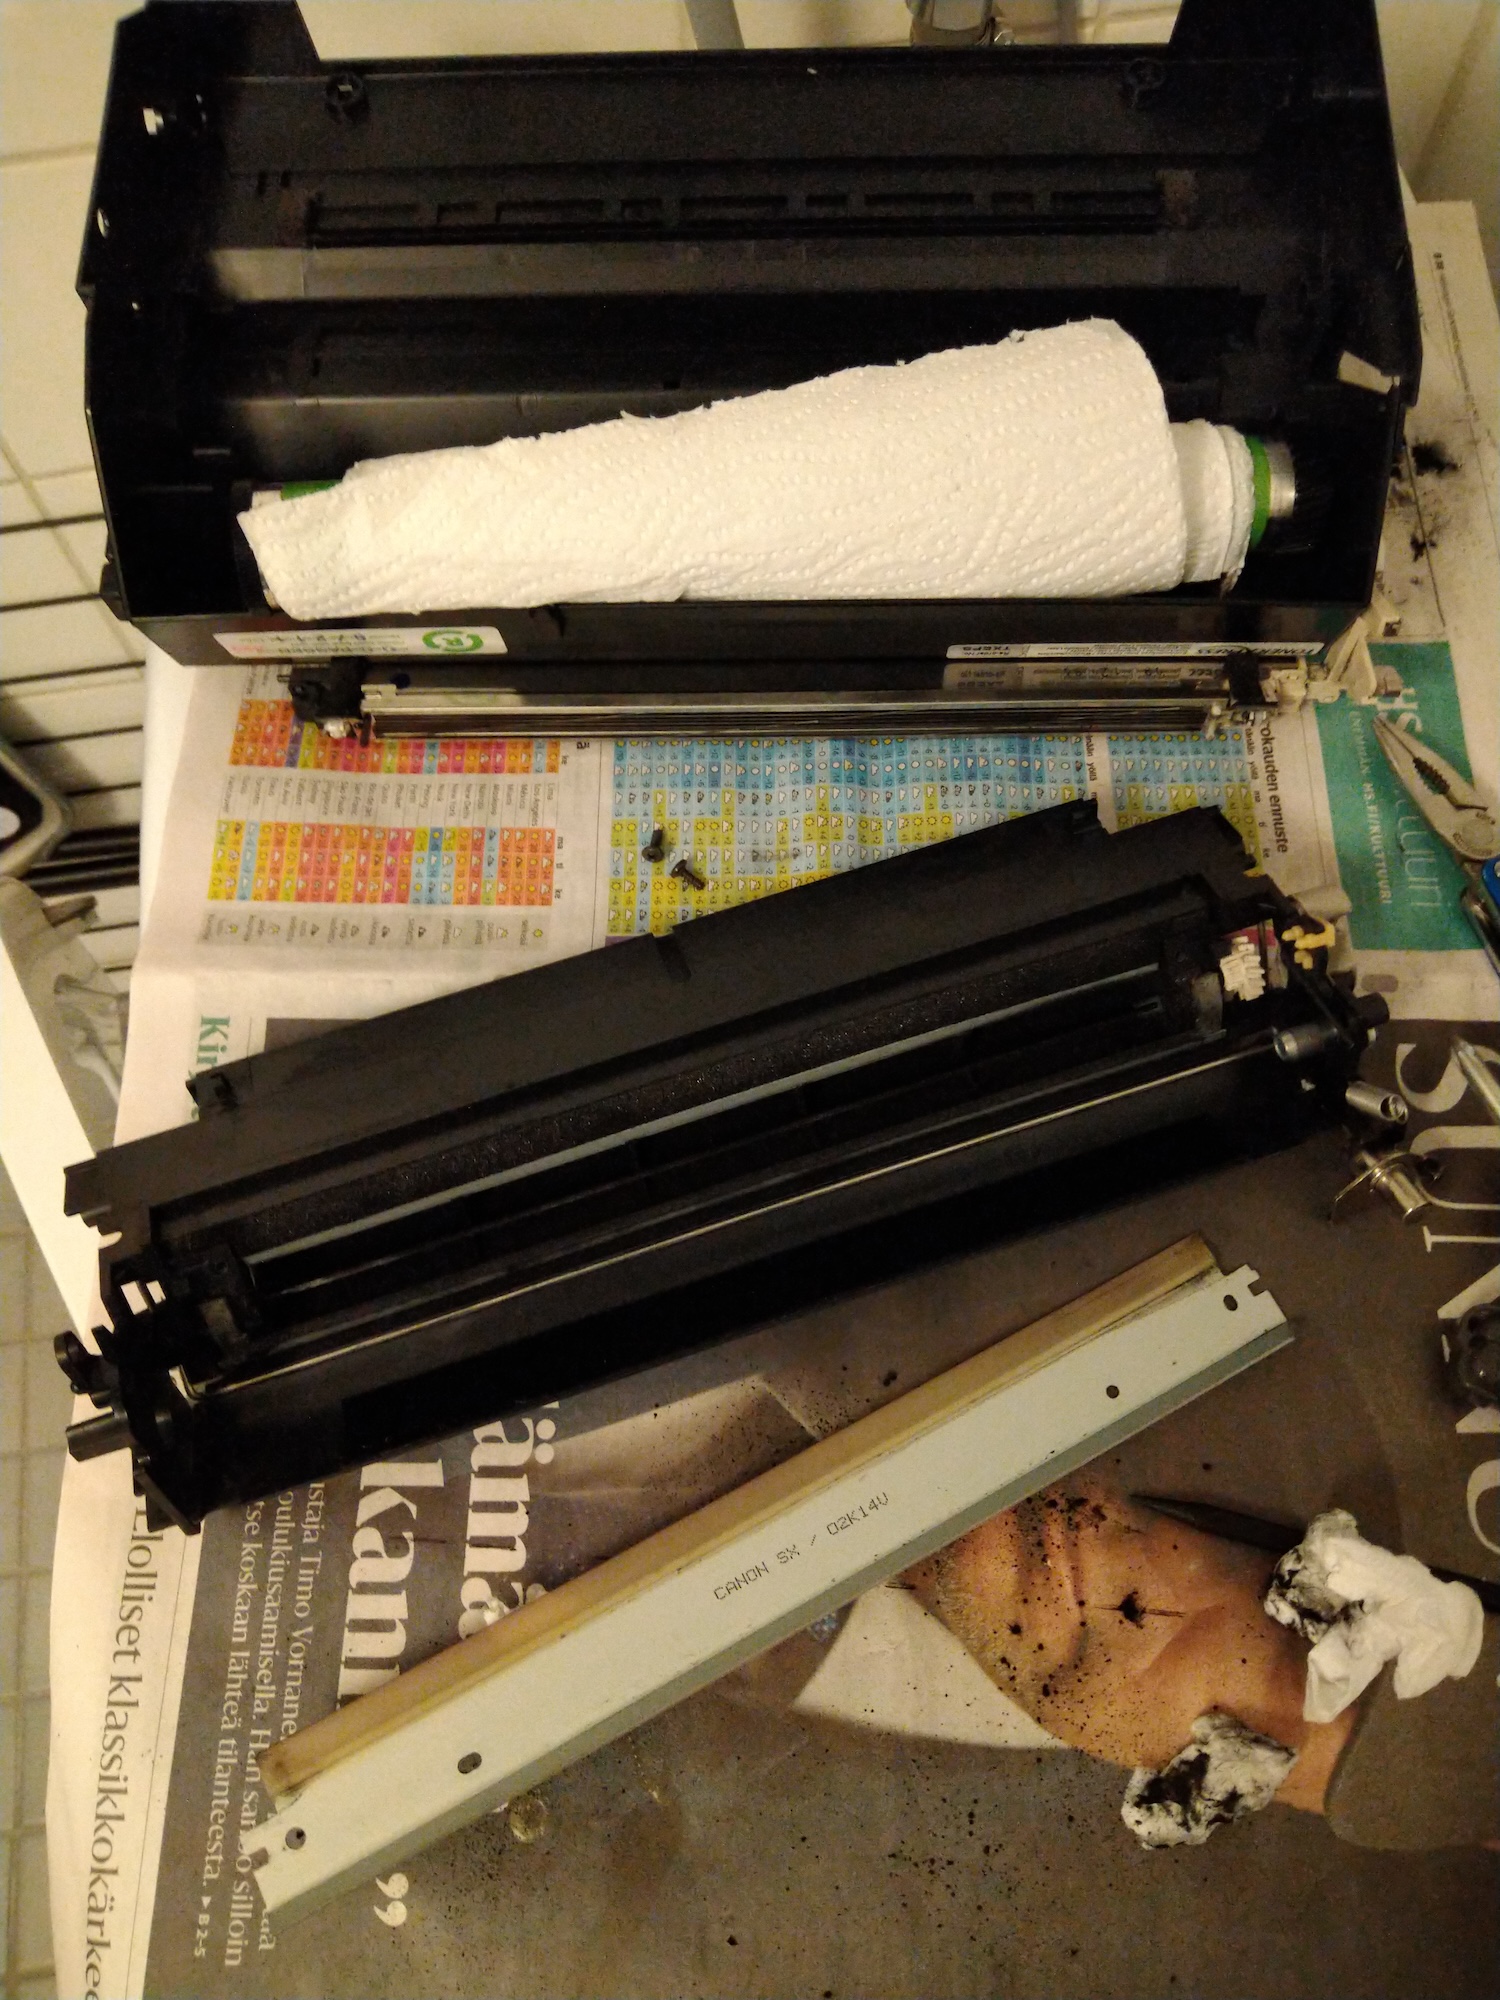
The ink tank and corona wire assemblies are detached and the old wiper blade (with "Canon SX" visible on surface) removed. The drum is somewhat light-sensitive so better keep it covered (also to prevent any surface damage).
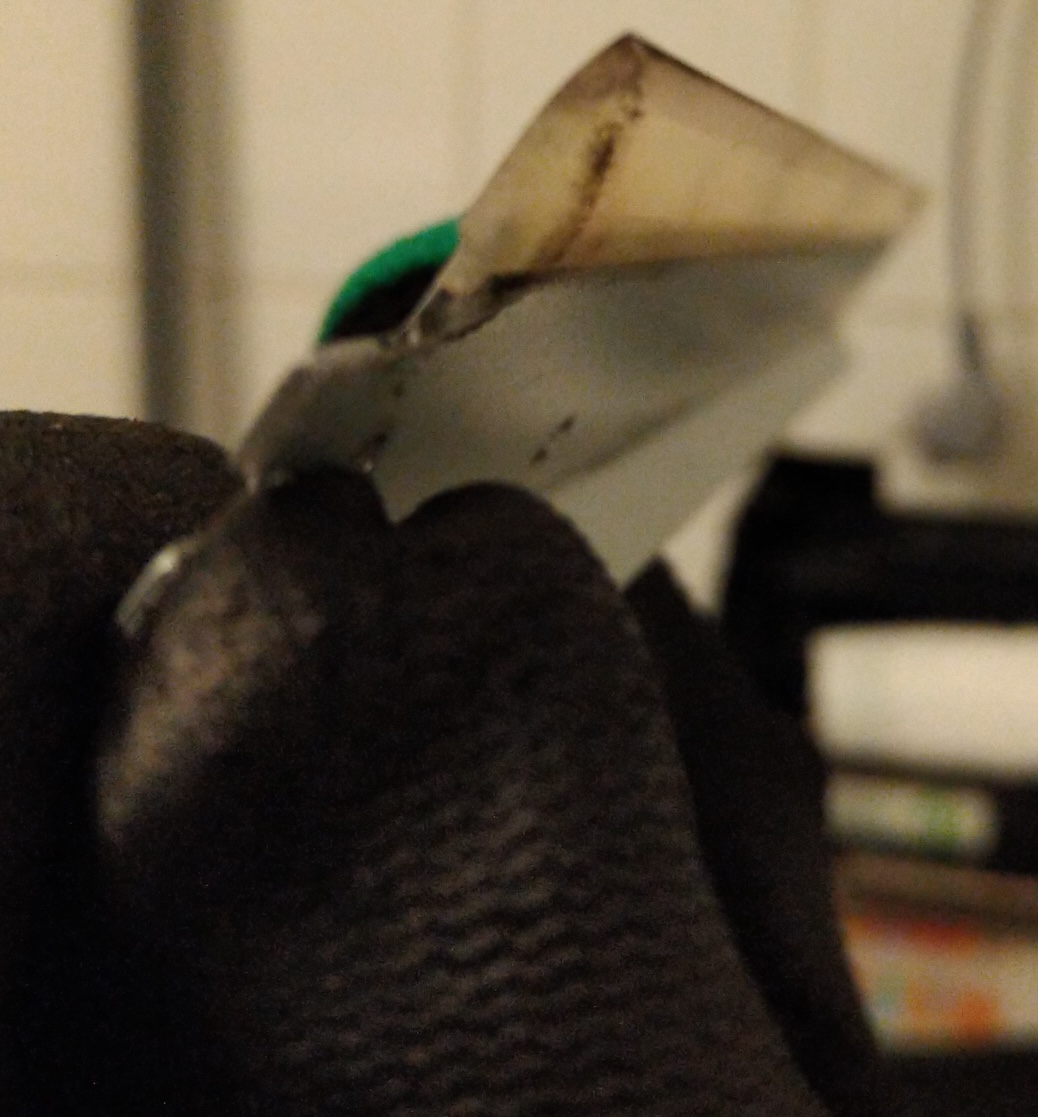
Doesn't really show here, but there was a small visible bend on the rubber edge of the old wiper. It was also very stiff and milky in appearence.
Here is the new blade in place, it was basically transparent. Also some old foam tape on the right.
Assembly in progress, the drum was wiped and I couldn't see any surface damage (which the old worn blade could cause). I didn't have any proper lubricant that should be used to cover the drum (explained in the video) so I attempted to wipe some ink dust on the tip of the new blade before installing.
I tried to clean all ink residue out from the cartridge case and I expected that there would still be ink deposits one the first printouts but incredibly the very first page was practically spotless!
I have not tried the printer since yesterday, but I am quite hopeful that this was a working fix... at least for now. I kinda wish I would've bought a second one as I still have the first (even more leaky) Canon cartridge too. I wanted to test this first with the apparently newer of the two cartridges that I have.
I hope Precision Rollers has plenty of these in stock for others to try this too. Would be great if there was other suppliers for the part too...
While studying the subject, I came across this thread on the similar issue on Apple LaserWriter cartridges from 2022: https://68kmla.org/bb/index.php?threads/replacement-laserwriter-toner-drum-blades.40137/ (https://68kmla.org/bb/index.php?threads/replacement-laserwriter-toner-drum-blades.40137/)
The LaserWriter in question uses the same cartridges as the NeXT N2000: HP 95A (aka. HP 92295) and finally in this post (https://68kmla.org/bb/index.php?threads/replacement-laserwriter-toner-drum-blades.40137/page-2#post-436592) a replacement wiper blade was confirmed as working on "all Apple LaserWriter II cartridges, and all cartridges for the HP LaserJet II and III printers. Any HP 92295".
Which brought me here: https://www.precisionroller.com/fa9-2733-000-for-canon/details_pn_182.html (https://www.precisionroller.com/fa9-2733-000-for-canon/details_pn_182.html). This was overseas for me, but I couldn't find any other supplier so I bought one. It's a lightweight part so shipping was not too bad, and Fedex delivered it in just one week.
It wouldn't have been obvious how to take the cartridge apart, but fortunately there is a brilliant tutorial available on YouTube: Vintage HP LaserJet II Toner Cartridge Repair - Beautiful Prints (https://www.youtube.com/watch?v=yhqkPplgPaw) (by RavenWolf Retro Tech) from 2020. The whole Laserjet II repair series is worth of a watch as it bears lots of similarities to the N2000.
I did not have the "Ames PinPal" tool (can anyone find a current seller that has these, couldn't find any?) but inspired from the tool shown in the video I went thru my bin of screws and found a size that worked almost as well and I was able to pull out the tabs that hold the cartridge together.
Not perfect but good enough for the job!
I took the cartridge apart (in my bathroom in attempt to keep the possible ink dust at bay!) and I must say it wasn't too bad. It's basically just couple of those plastic pins, three screws and two springs that need to be removed and it comes apart. There was some ink residue but nothing drastic, I think this is due to some foam-tape seals inside the cartridge that have become worn. I did not have any replacement at hand but I take some measurements. The cartridge would only release small drips of ink powder if tilted on one end, so it's manageable.
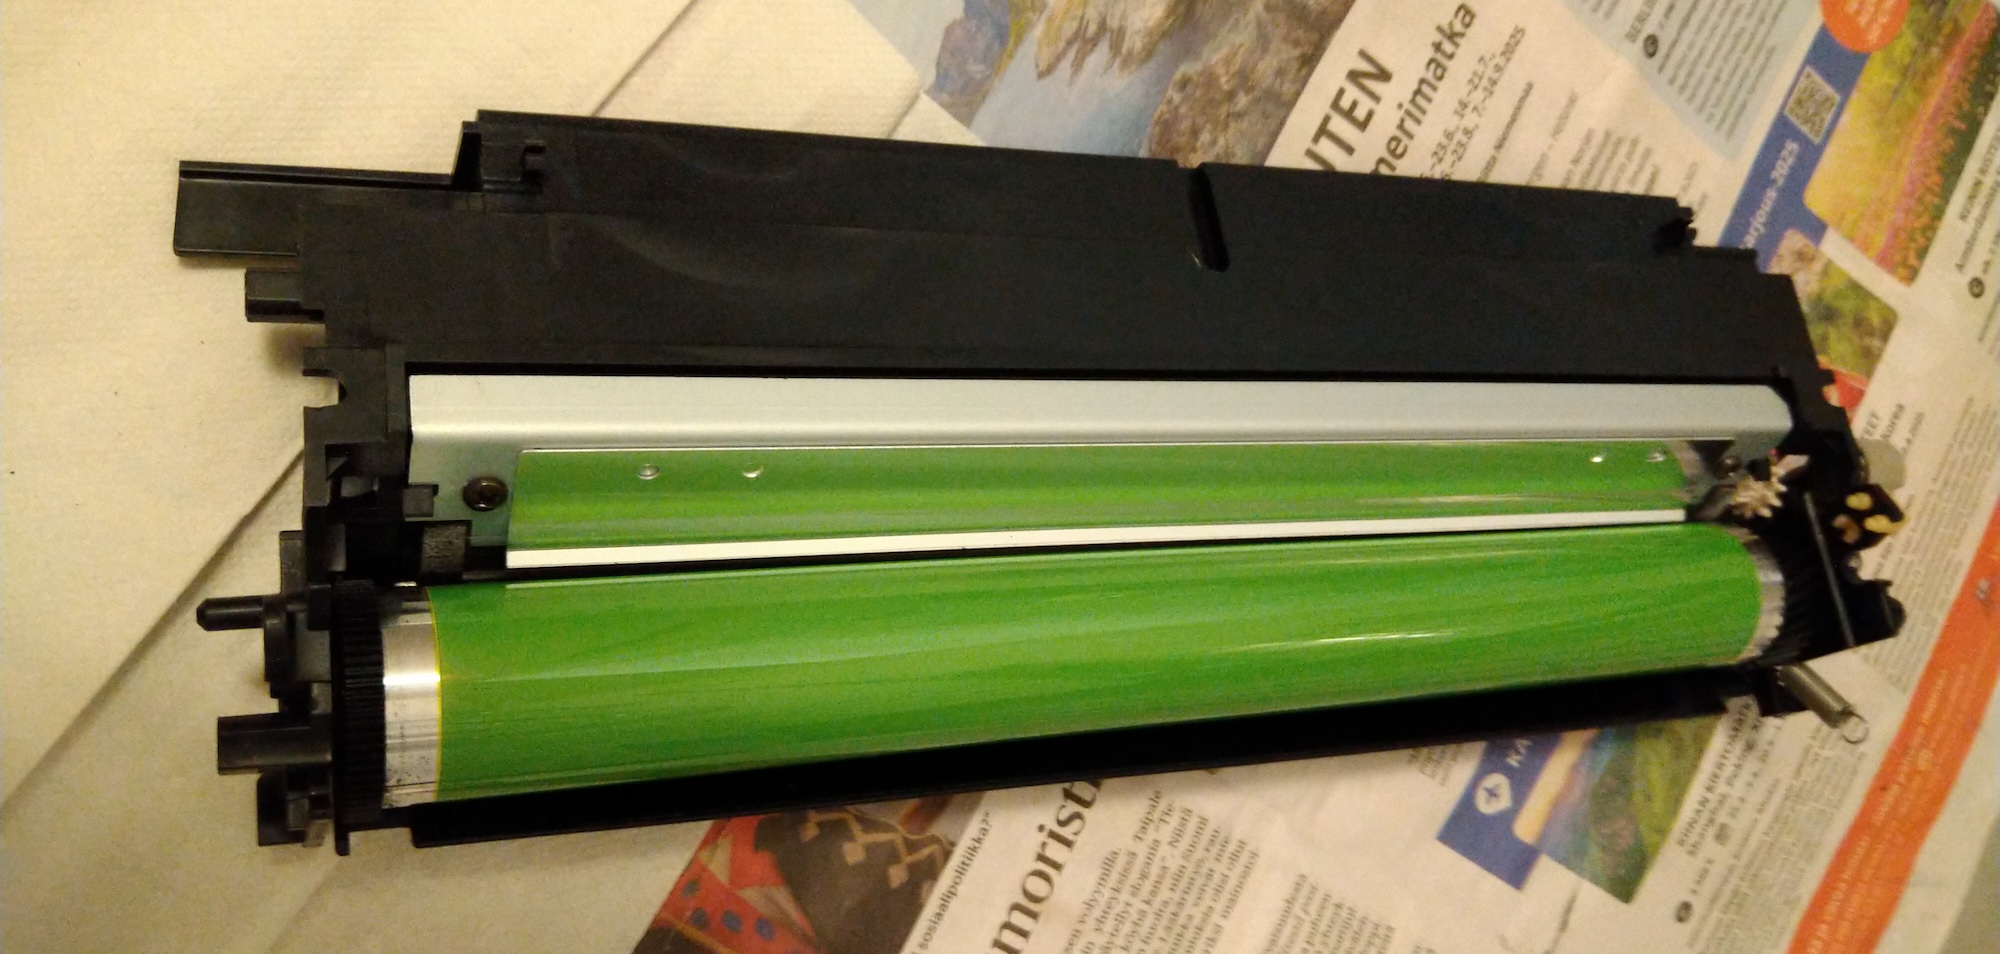
Top: inside the cartridge: one the left is the ink tank, the green drum is in the middle, the wire-frame thing is the corona wire and right to that on the silver backing is the wiper blade.
The ink tank and corona wire assemblies are detached and the old wiper blade (with "Canon SX" visible on surface) removed. The drum is somewhat light-sensitive so better keep it covered (also to prevent any surface damage).
Doesn't really show here, but there was a small visible bend on the rubber edge of the old wiper. It was also very stiff and milky in appearence.
Here is the new blade in place, it was basically transparent. Also some old foam tape on the right.
Assembly in progress, the drum was wiped and I couldn't see any surface damage (which the old worn blade could cause). I didn't have any proper lubricant that should be used to cover the drum (explained in the video) so I attempted to wipe some ink dust on the tip of the new blade before installing.
I tried to clean all ink residue out from the cartridge case and I expected that there would still be ink deposits one the first printouts but incredibly the very first page was practically spotless!
I have not tried the printer since yesterday, but I am quite hopeful that this was a working fix... at least for now. I kinda wish I would've bought a second one as I still have the first (even more leaky) Canon cartridge too. I wanted to test this first with the apparently newer of the two cartridges that I have.
I hope Precision Rollers has plenty of these in stock for others to try this too. Would be great if there was other suppliers for the part too...
Title: Re: Yet another NeXT N2000 laser printer repair attempt
Post by: NeXTnewbe on May 23, 2025, 05:27:21 AM
Post by: NeXTnewbe on May 23, 2025, 05:27:21 AM
sadly the blades are out of stock :(
Title: Re: Yet another NeXT N2000 laser printer repair attempt
Post by: Nitro on May 23, 2025, 01:45:35 PM
Post by: Nitro on May 23, 2025, 01:45:35 PM
Title: Re: Yet another NeXT N2000 laser printer repair attempt
Post by: NeXTnewbe on May 23, 2025, 03:16:31 PM
Post by: NeXTnewbe on May 23, 2025, 03:16:31 PM
I asked they don't ship to the UK :( unless anyone can buy the and send me 4 units :), I iwll pay offcourse
paypal anyone :)
paypal anyone :)
Title: Re: Yet another NeXT N2000 laser printer repair attempt
Post by: MindWalker on May 25, 2025, 11:12:34 AM
Post by: MindWalker on May 25, 2025, 11:12:34 AM
Hopefully they'll re-stock or we can find some other suppliers :-\
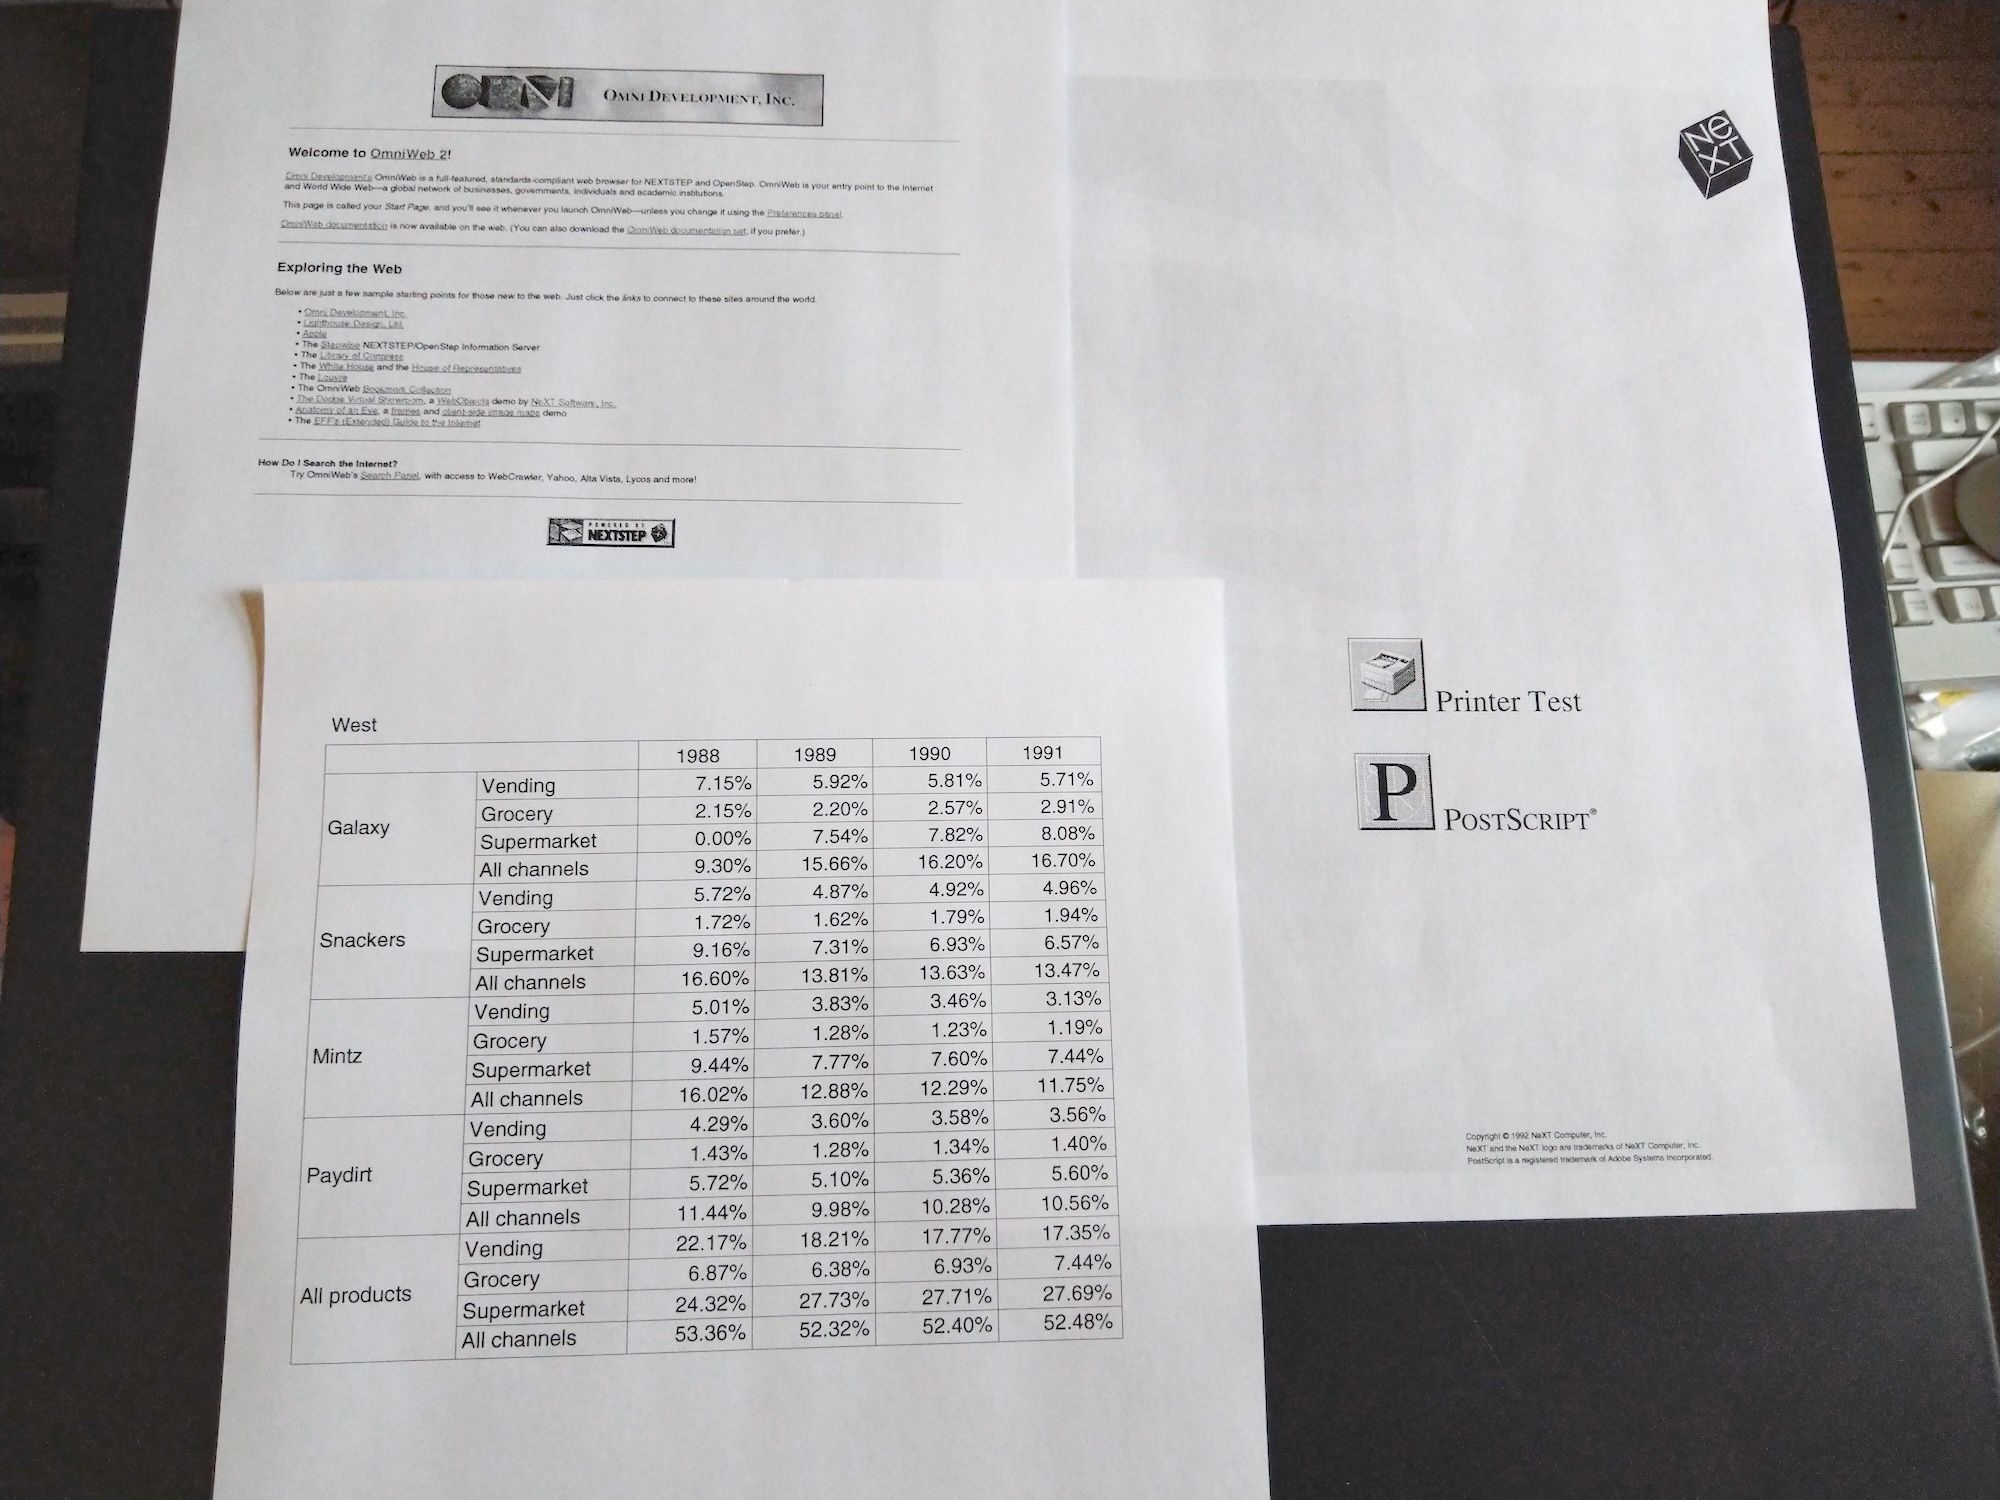
I did some more printing and I am happy to say the fix has held... the quality is still very nice!
I also realized I had put the 'print density' adjust knob in at the wrong orientation as my range is now backwards (and the know can't be pulled without taking the printer apart), d'oh. Well at least now I know the range (see the pencil marks on the top three test pages).
(Right-click and open bigger)
Now for my next trick (I found something rather cool...) that I'd like to test out, I'd need the printer to be shared to the network (from the NeXTStation). I presume I need to set Access to Public, but I get this error:
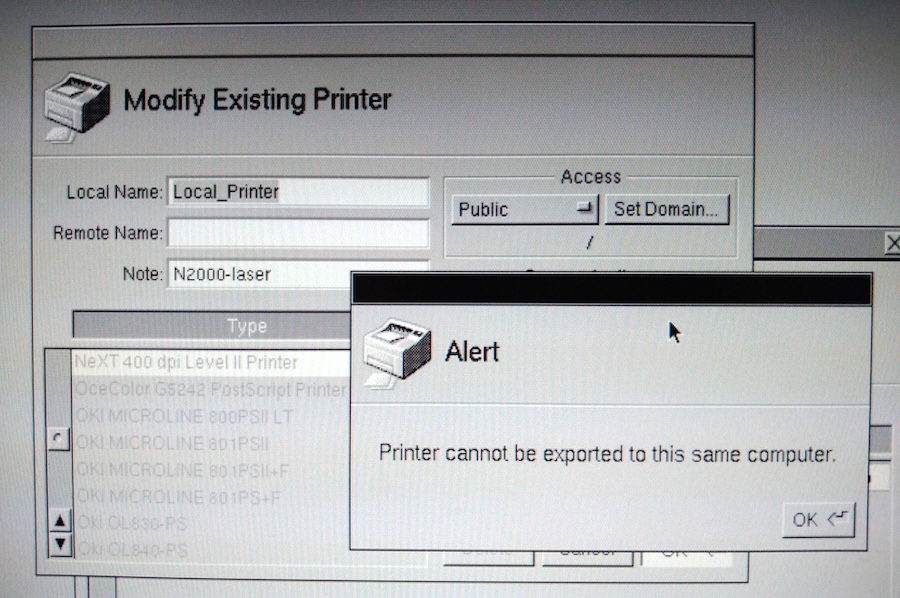
If I click 'Set Domain' the only option is '/'. Is there a way around this (without learning too much about NetInfo-stuff)? ;D
I did some more printing and I am happy to say the fix has held... the quality is still very nice!
I also realized I had put the 'print density' adjust knob in at the wrong orientation as my range is now backwards (and the know can't be pulled without taking the printer apart), d'oh. Well at least now I know the range (see the pencil marks on the top three test pages).
(Right-click and open bigger)
Now for my next trick (I found something rather cool...) that I'd like to test out, I'd need the printer to be shared to the network (from the NeXTStation). I presume I need to set Access to Public, but I get this error:
If I click 'Set Domain' the only option is '/'. Is there a way around this (without learning too much about NetInfo-stuff)? ;D
Title: Re: Yet another NeXT N2000 laser printer repair attempt
Post by: NeXTnewbe on May 29, 2025, 03:53:46 AM
Post by: NeXTnewbe on May 29, 2025, 03:53:46 AM
Precision Roller will have new stock on June 11, 2025,
if anyone is interested
if anyone is interested
Title: Re: Yet another NeXT N2000 laser printer repair attempt
Post by: NeXTnewbe on June 03, 2025, 02:56:25 AM
Post by: NeXTnewbe on June 03, 2025, 02:56:25 AM
sadly the part has been discontinued and is no longer available with the manufacturer.
>:(
however, I found it on Alibaba, but minimum order is 100 units, I will buying a sample, hope it works, if so, I will update here and maybe Rob Blessin might buy 100 units for those here in the forum
>:(
however, I found it on Alibaba, but minimum order is 100 units, I will buying a sample, hope it works, if so, I will update here and maybe Rob Blessin might buy 100 units for those here in the forum
Title: Re: Yet another NeXT N2000 laser printer repair attempt
Post by: NeXTnewbe on July 07, 2025, 06:40:17 AM
Post by: NeXTnewbe on July 07, 2025, 06:40:17 AM
as update, even in Alibaba this part is not longer available
:(
:(
Title: Re: Yet another NeXT N2000 laser printer repair attempt
Post by: MindWalker on July 07, 2025, 01:56:54 PM
Post by: MindWalker on July 07, 2025, 01:56:54 PM
@NeXTnewbe: I can't make sure if this is correct (or in stock) but this listing says minimum order 5 pcs and it has the correct part number in the name at least? https://www.alibaba.com/product-detail/Drum-Cleaning-Blade-For-Canon-NP_60751925954.html
Title: Re: Yet another NeXT N2000 laser printer repair attempt
Post by: NeXTnewbe on July 09, 2025, 05:04:00 PM
Post by: NeXTnewbe on July 09, 2025, 05:04:00 PM
I already ask them, and sadly no stock available