Title: I destroyed a printer so you don't have to.
Post by: spitfire on July 21, 2022, 04:32:50 PM
Post by: spitfire on July 21, 2022, 04:32:50 PM
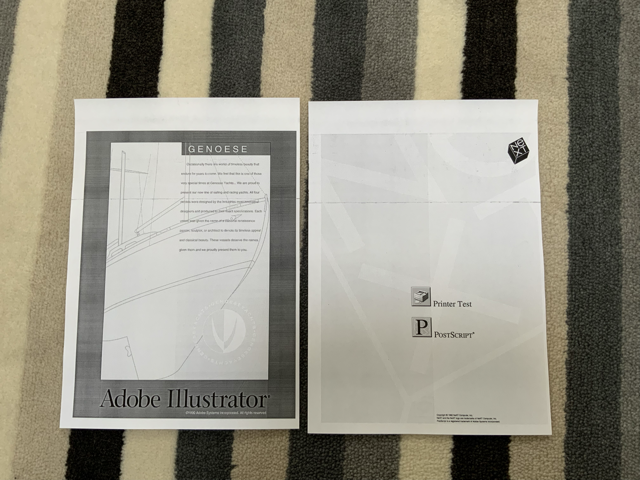
So I bought a $100 (shipping included) NeXT printer for parts. My good printer stopped printing mid print job with a fuser error according to "PP" (found on the Nova CD collection).
Since there's fewer and fewer working printers around I decided to spend a bit of time searching down parts. The Canon LBP-UX engine in NeXT Laser printers is close to the Canon SX engine, but not exactly the same. The SX engine was used in the HP Laserjet II printers, known as "HP's mistake" for their excellent reliability.
I searched the internet for parts and found a company parts-mart.com that still has LJ II (Canon SX) parts.
Here's the parts-mart page fot the HP Laserjet II
https://www.partsmart-corp.com/printer-parts/model/laserjet-ii
I ordered pretty much anything that looked like it might fit.
1x RF1-0842-OEM Thermoswitch
1x RH7-7009-OEM Thermistor (OEM) for HP LaserJet II
1x RS1-2104-000 Spring, Arm Gear for HP LaserJet II
1x RA1-3968-000 Upper Fuser Roller for HP LaserJet II
1x FB1-0242-000 Fuser Pressure Roller for HP LaserJet II
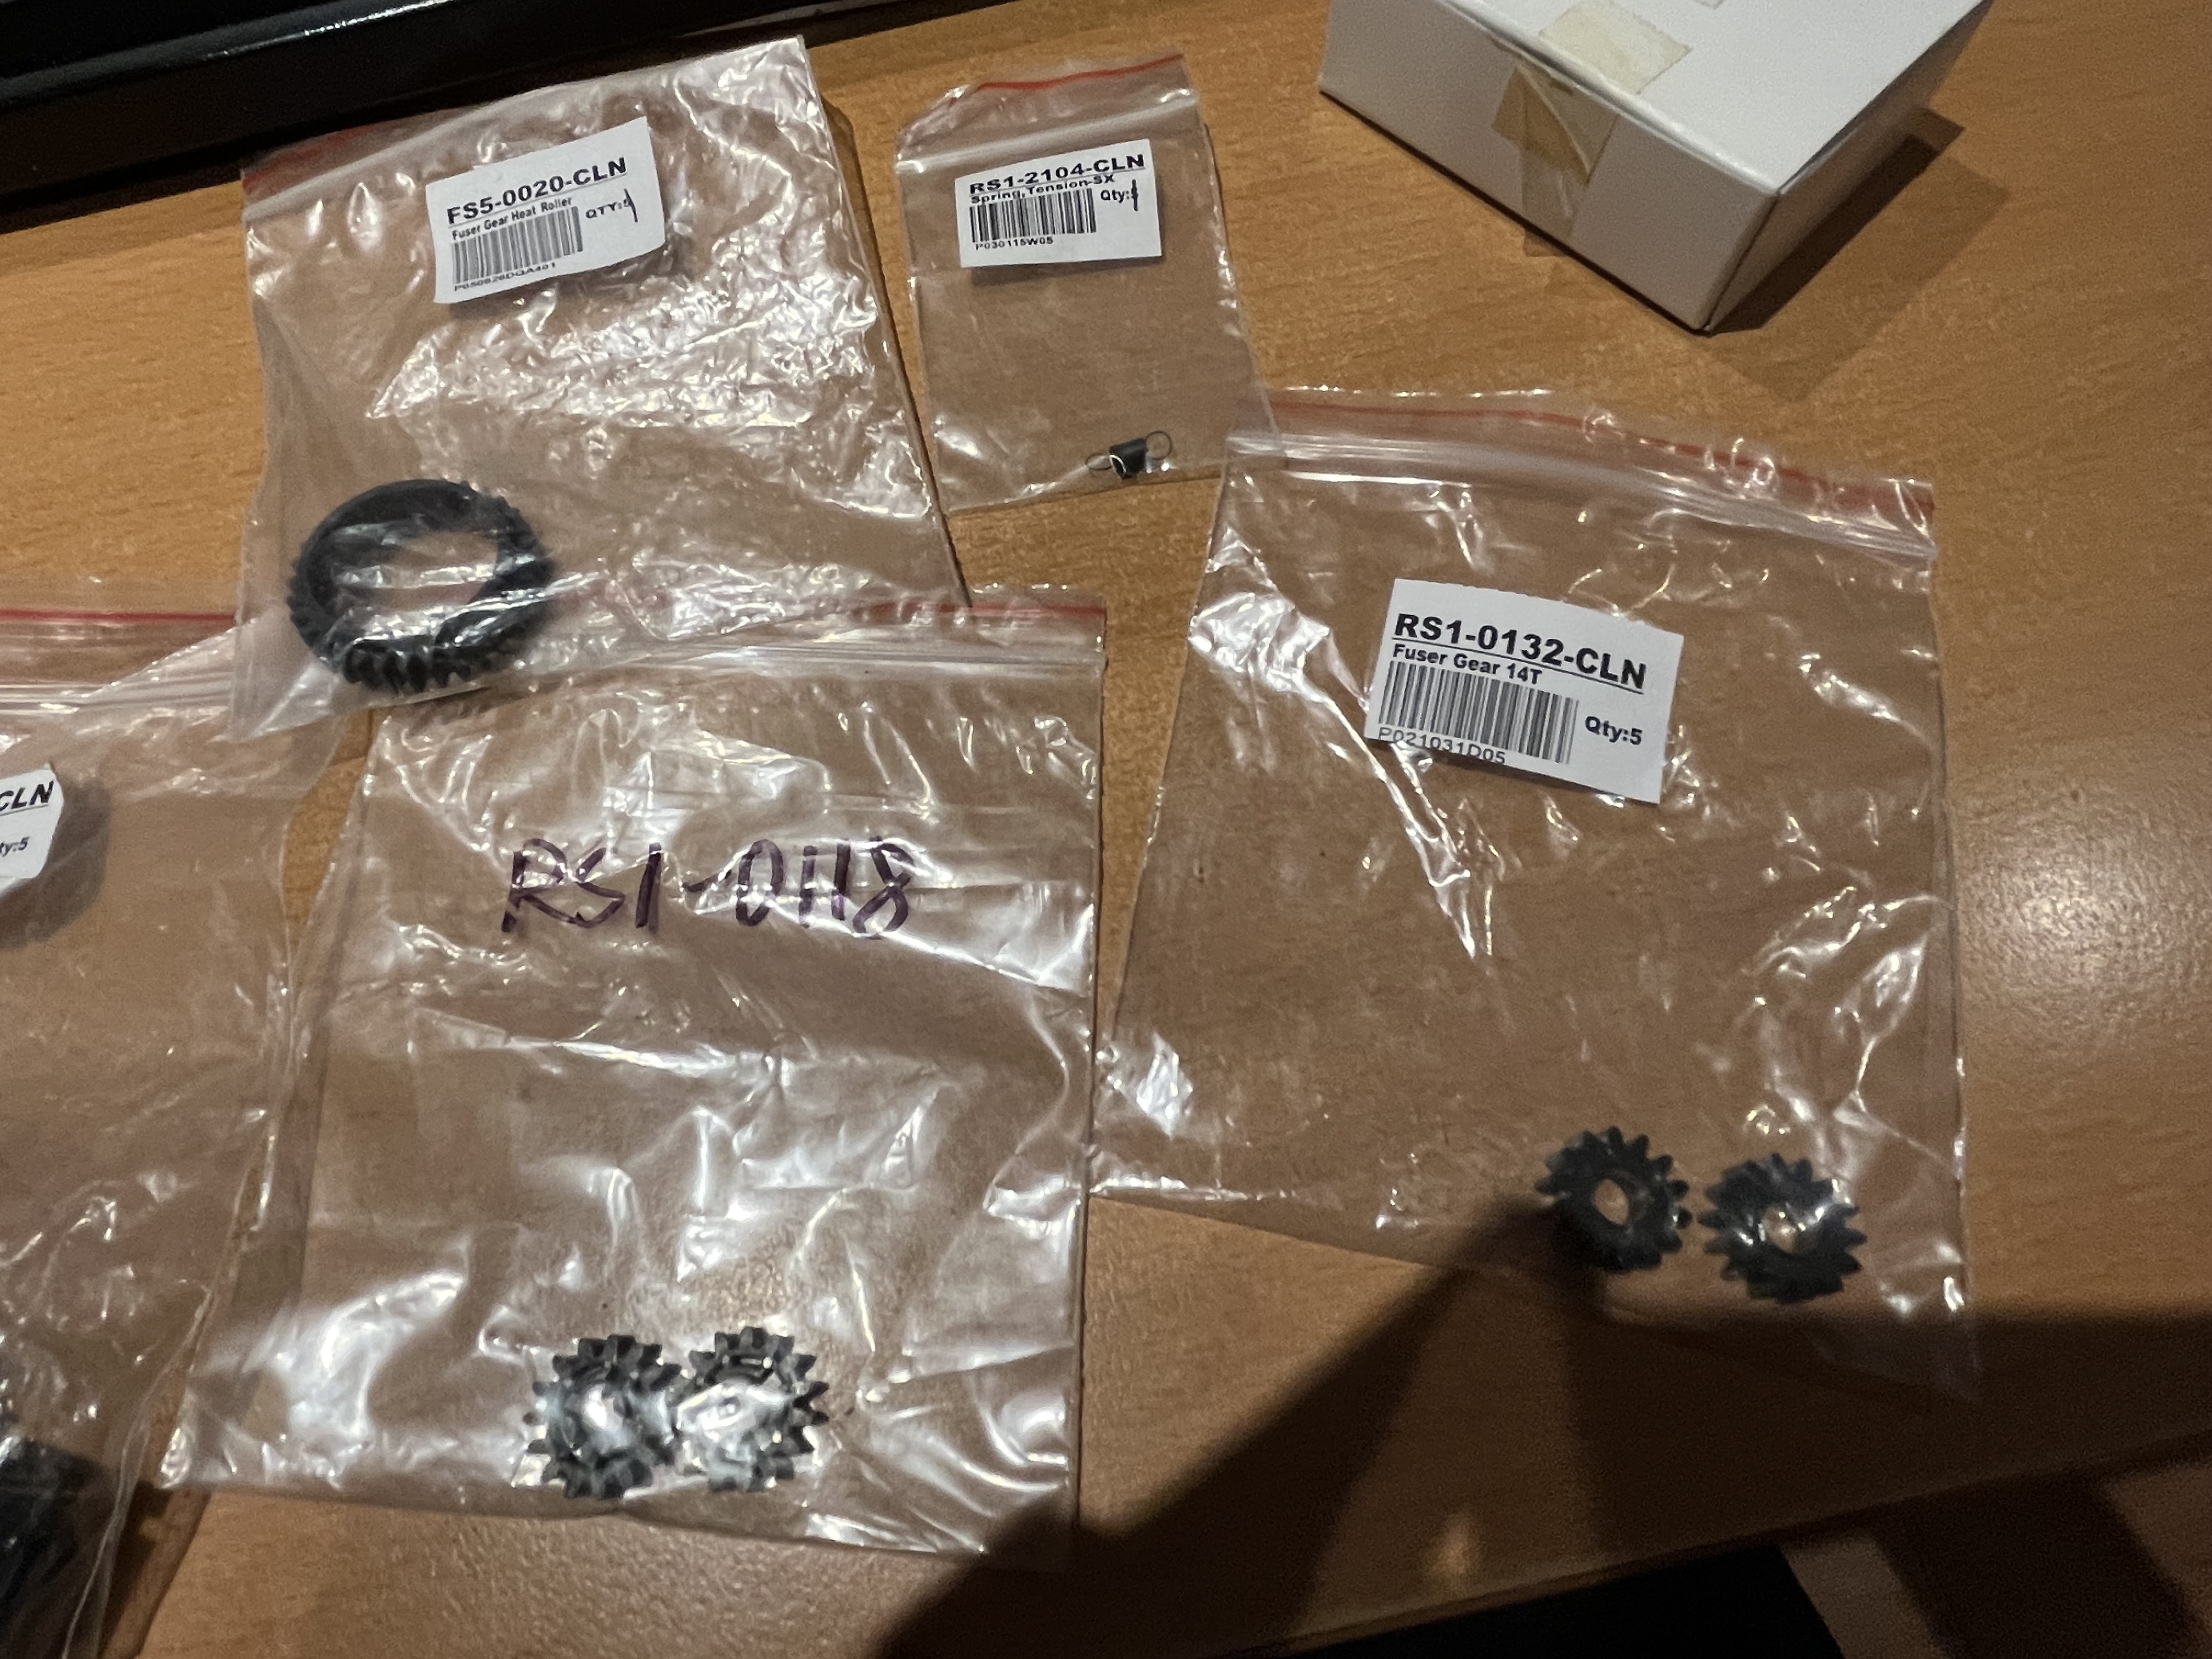
1x FS5-0020-000 Fuser Gear, Heat Roller (32T) for HP LaserJet II
3x RA1-3851-000 Pick-up Roller for HP LaserJet II
2x RA1-3976-000 Delivery Roller for HP LaserJet II
2x RF1-1145-000 Separation Pad for HP LaserJet II
2x RF1-2130-PRE Ozone Filter (Pre-89) for HP LaserJet II
2x RH7-4024-000 Heating Lamp (115V, 620W) for HP LaserJet II
2x RS1-0116-000 Fuser Gear (20T) for HP LaserJet II
2x RS1-0116-OLD Fuser Gear (20T), Old Style for HP LaserJet II
2x RS1-0118-000 Fuser Gear (15T) for HP LaserJet II
2x RS1-0132-000 Fuser Gear (14T) for HP LaserJet II
2x RS1-1019-000 Heat Bushing for HP LaserJet II
From that list the only part that doesn't look identical is the heating lamp (Fuser lamp). Which is both too long, and has different connections.
The heating lamp inside the NeXT laser printer is "Ushio UG1" "240V 1100W".
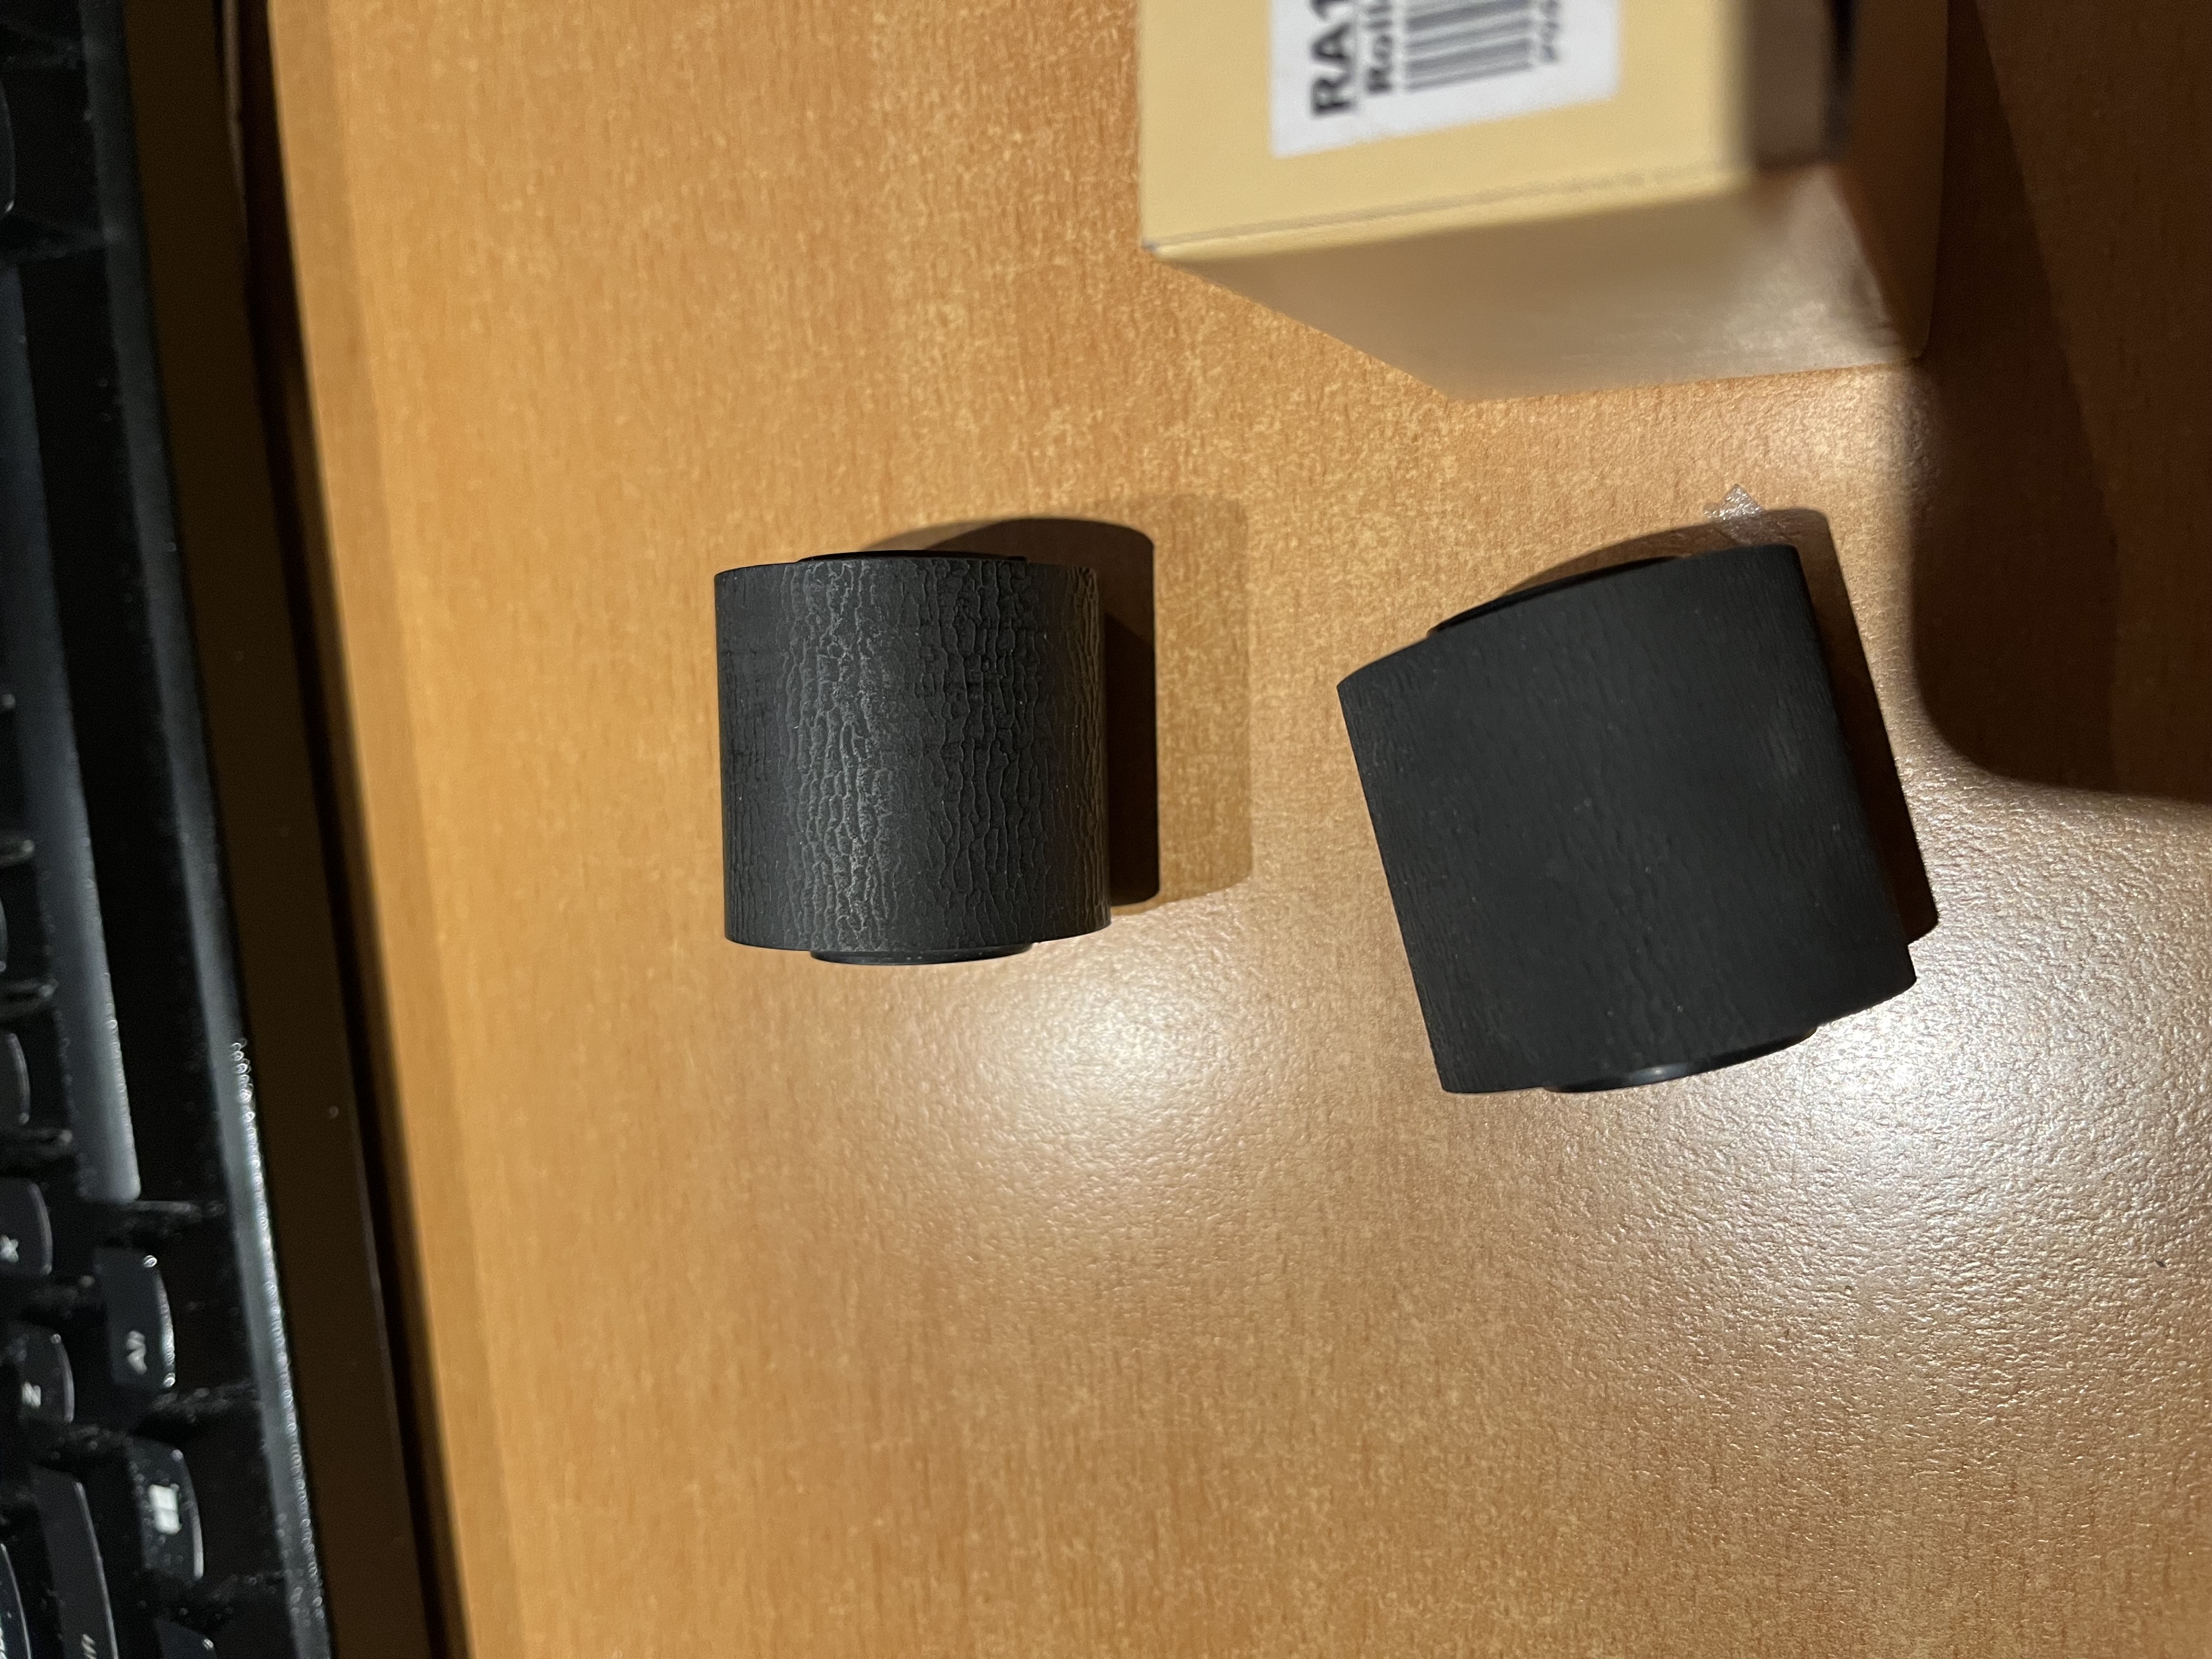
As for the normal problems we experience intake feed rollers, the HP LJ II roller is an exact match. Rob no longer has to salvage parts out of dead printers. Just order an RA1-2851-CLN for a brand new item.
I will post pictures of everything below.
PS: I apologize for such a long post - I didn't have time to write a short one.
Since there's fewer and fewer working printers around I decided to spend a bit of time searching down parts. The Canon LBP-UX engine in NeXT Laser printers is close to the Canon SX engine, but not exactly the same. The SX engine was used in the HP Laserjet II printers, known as "HP's mistake" for their excellent reliability.
I searched the internet for parts and found a company parts-mart.com that still has LJ II (Canon SX) parts.
Here's the parts-mart page fot the HP Laserjet II
https://www.partsmart-corp.com/printer-parts/model/laserjet-ii
I ordered pretty much anything that looked like it might fit.
1x RF1-0842-OEM Thermoswitch
1x RH7-7009-OEM Thermistor (OEM) for HP LaserJet II
1x RS1-2104-000 Spring, Arm Gear for HP LaserJet II
1x RA1-3968-000 Upper Fuser Roller for HP LaserJet II
1x FB1-0242-000 Fuser Pressure Roller for HP LaserJet II
1x FS5-0020-000 Fuser Gear, Heat Roller (32T) for HP LaserJet II
3x RA1-3851-000 Pick-up Roller for HP LaserJet II
2x RA1-3976-000 Delivery Roller for HP LaserJet II
2x RF1-1145-000 Separation Pad for HP LaserJet II
2x RF1-2130-PRE Ozone Filter (Pre-89) for HP LaserJet II
2x RH7-4024-000 Heating Lamp (115V, 620W) for HP LaserJet II
2x RS1-0116-000 Fuser Gear (20T) for HP LaserJet II
2x RS1-0116-OLD Fuser Gear (20T), Old Style for HP LaserJet II
2x RS1-0118-000 Fuser Gear (15T) for HP LaserJet II
2x RS1-0132-000 Fuser Gear (14T) for HP LaserJet II
2x RS1-1019-000 Heat Bushing for HP LaserJet II
From that list the only part that doesn't look identical is the heating lamp (Fuser lamp). Which is both too long, and has different connections.
The heating lamp inside the NeXT laser printer is "Ushio UG1" "240V 1100W".
As for the normal problems we experience intake feed rollers, the HP LJ II roller is an exact match. Rob no longer has to salvage parts out of dead printers. Just order an RA1-2851-CLN for a brand new item.
I will post pictures of everything below.
PS: I apologize for such a long post - I didn't have time to write a short one.
Title: Re: I destroyed a printer so you don't have to.
Post by: spitfire on July 21, 2022, 04:34:41 PM
Post by: spitfire on July 21, 2022, 04:34:41 PM
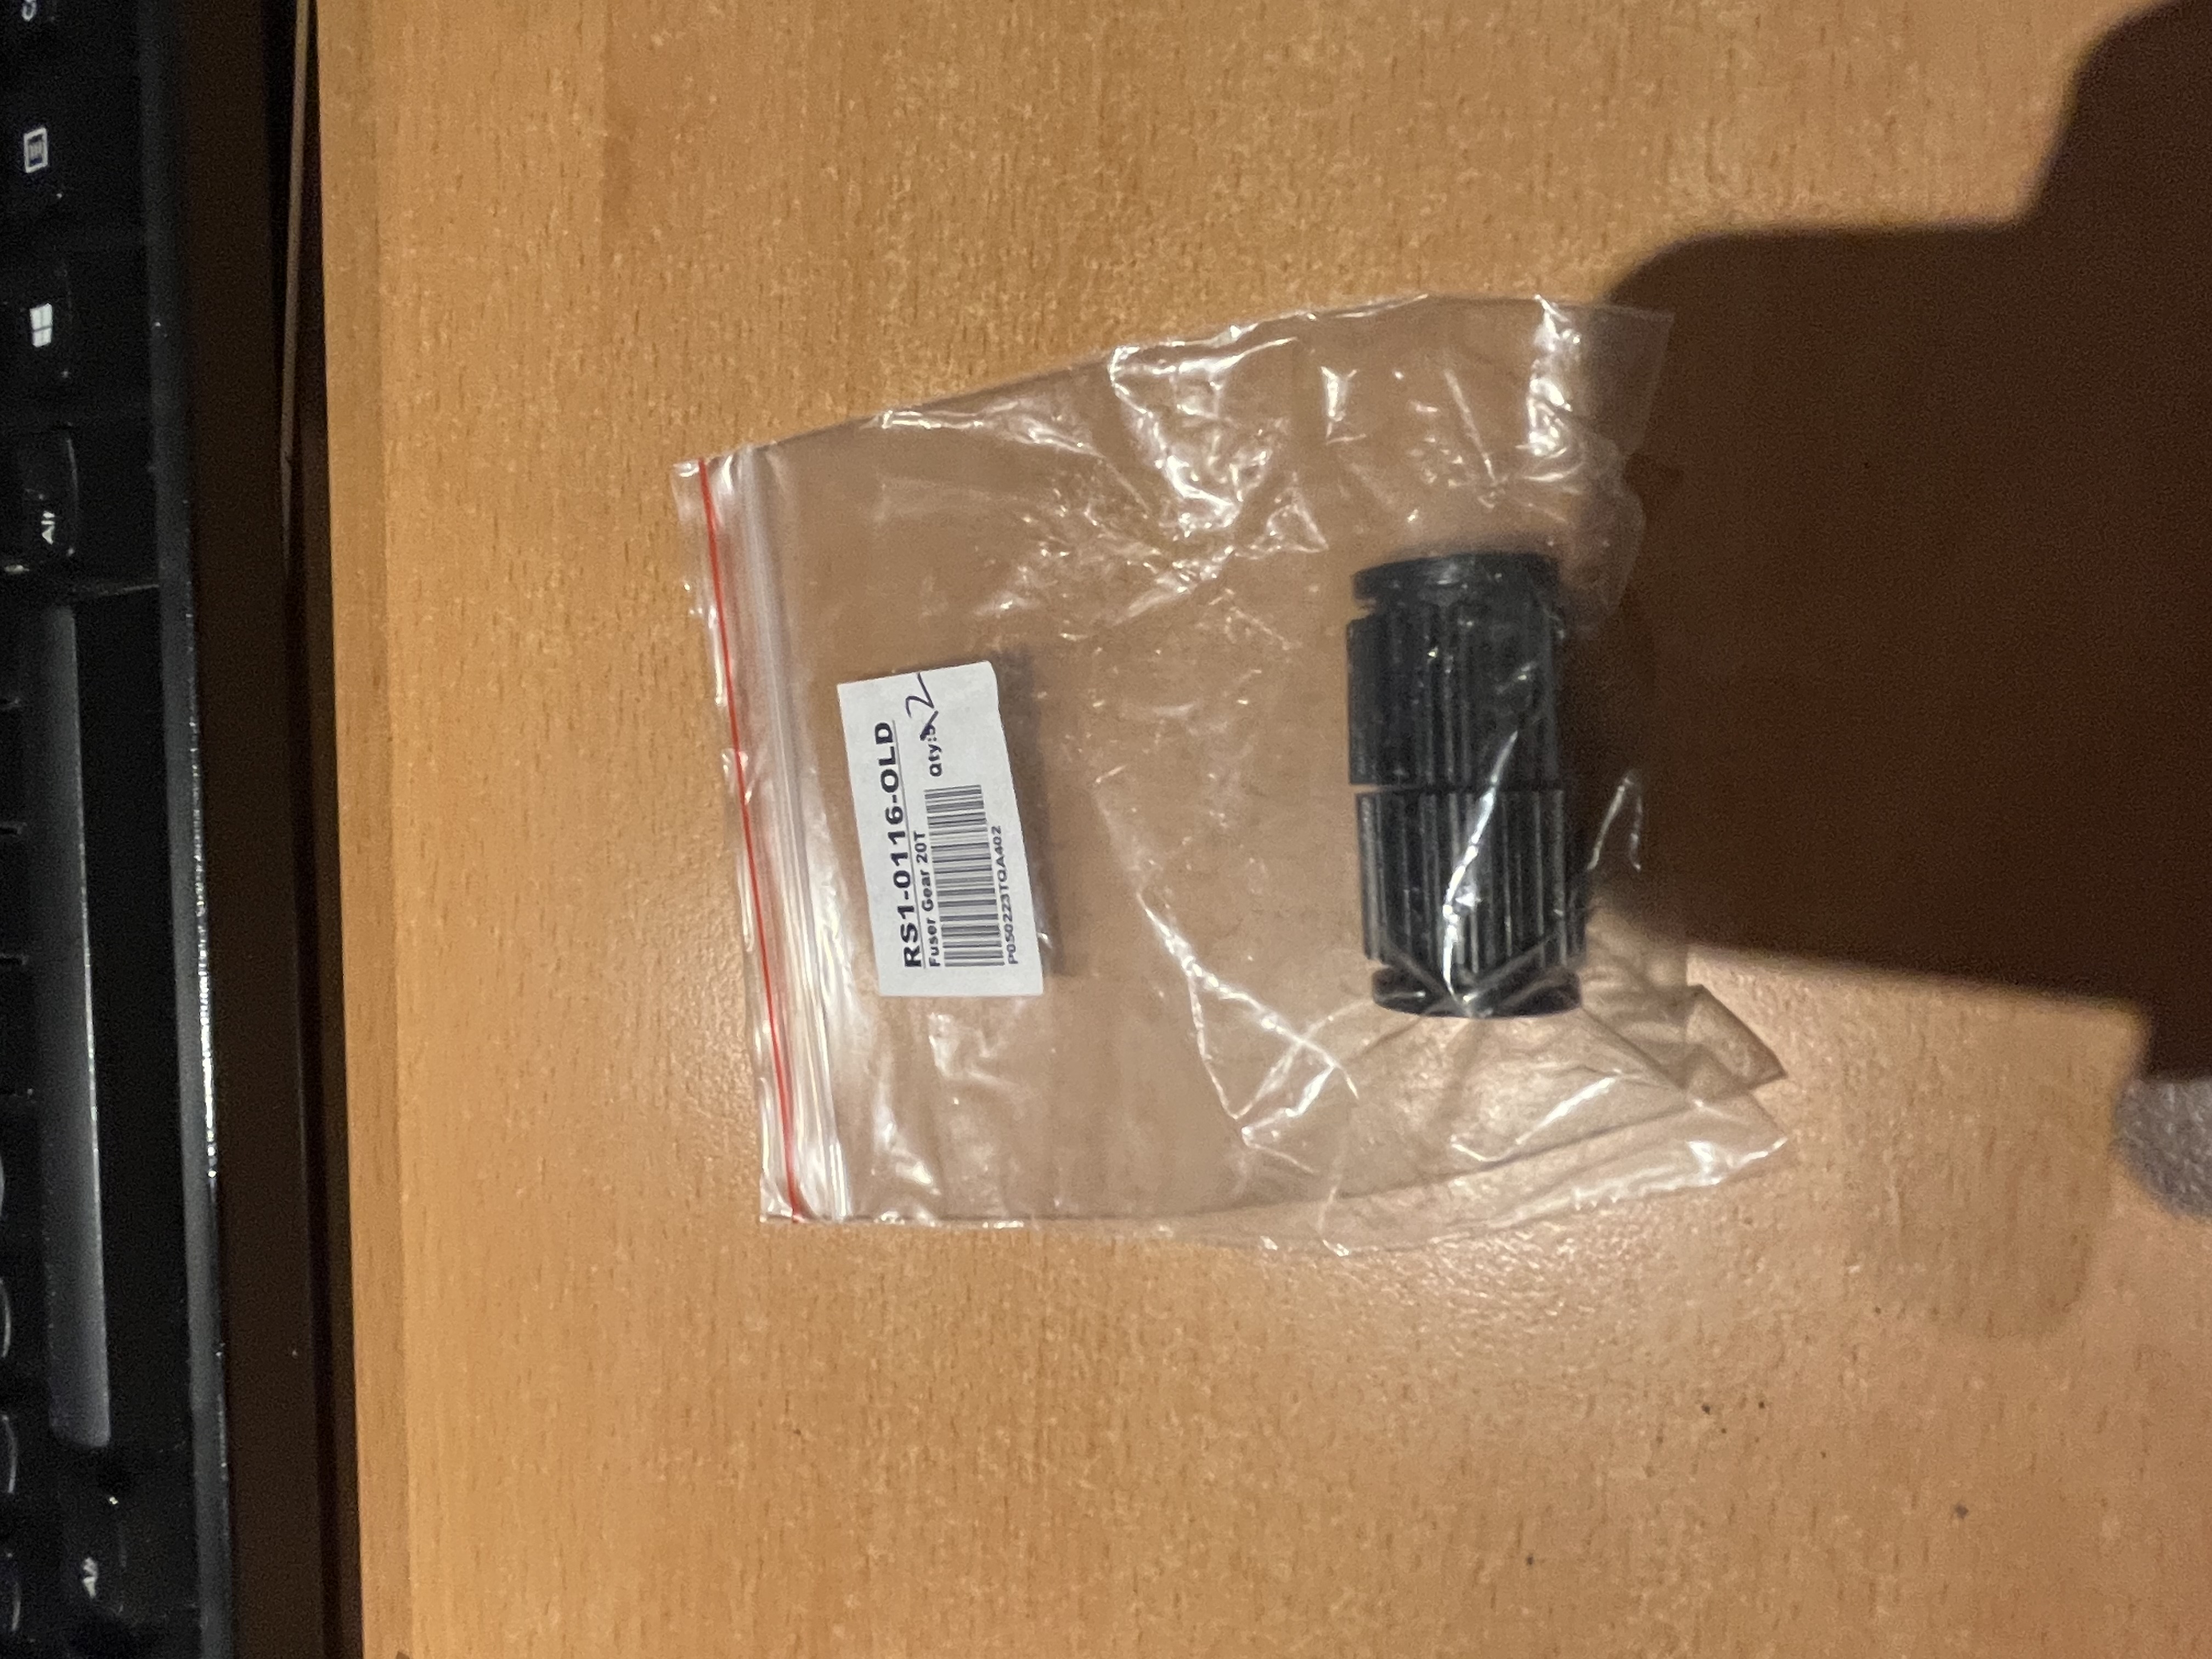
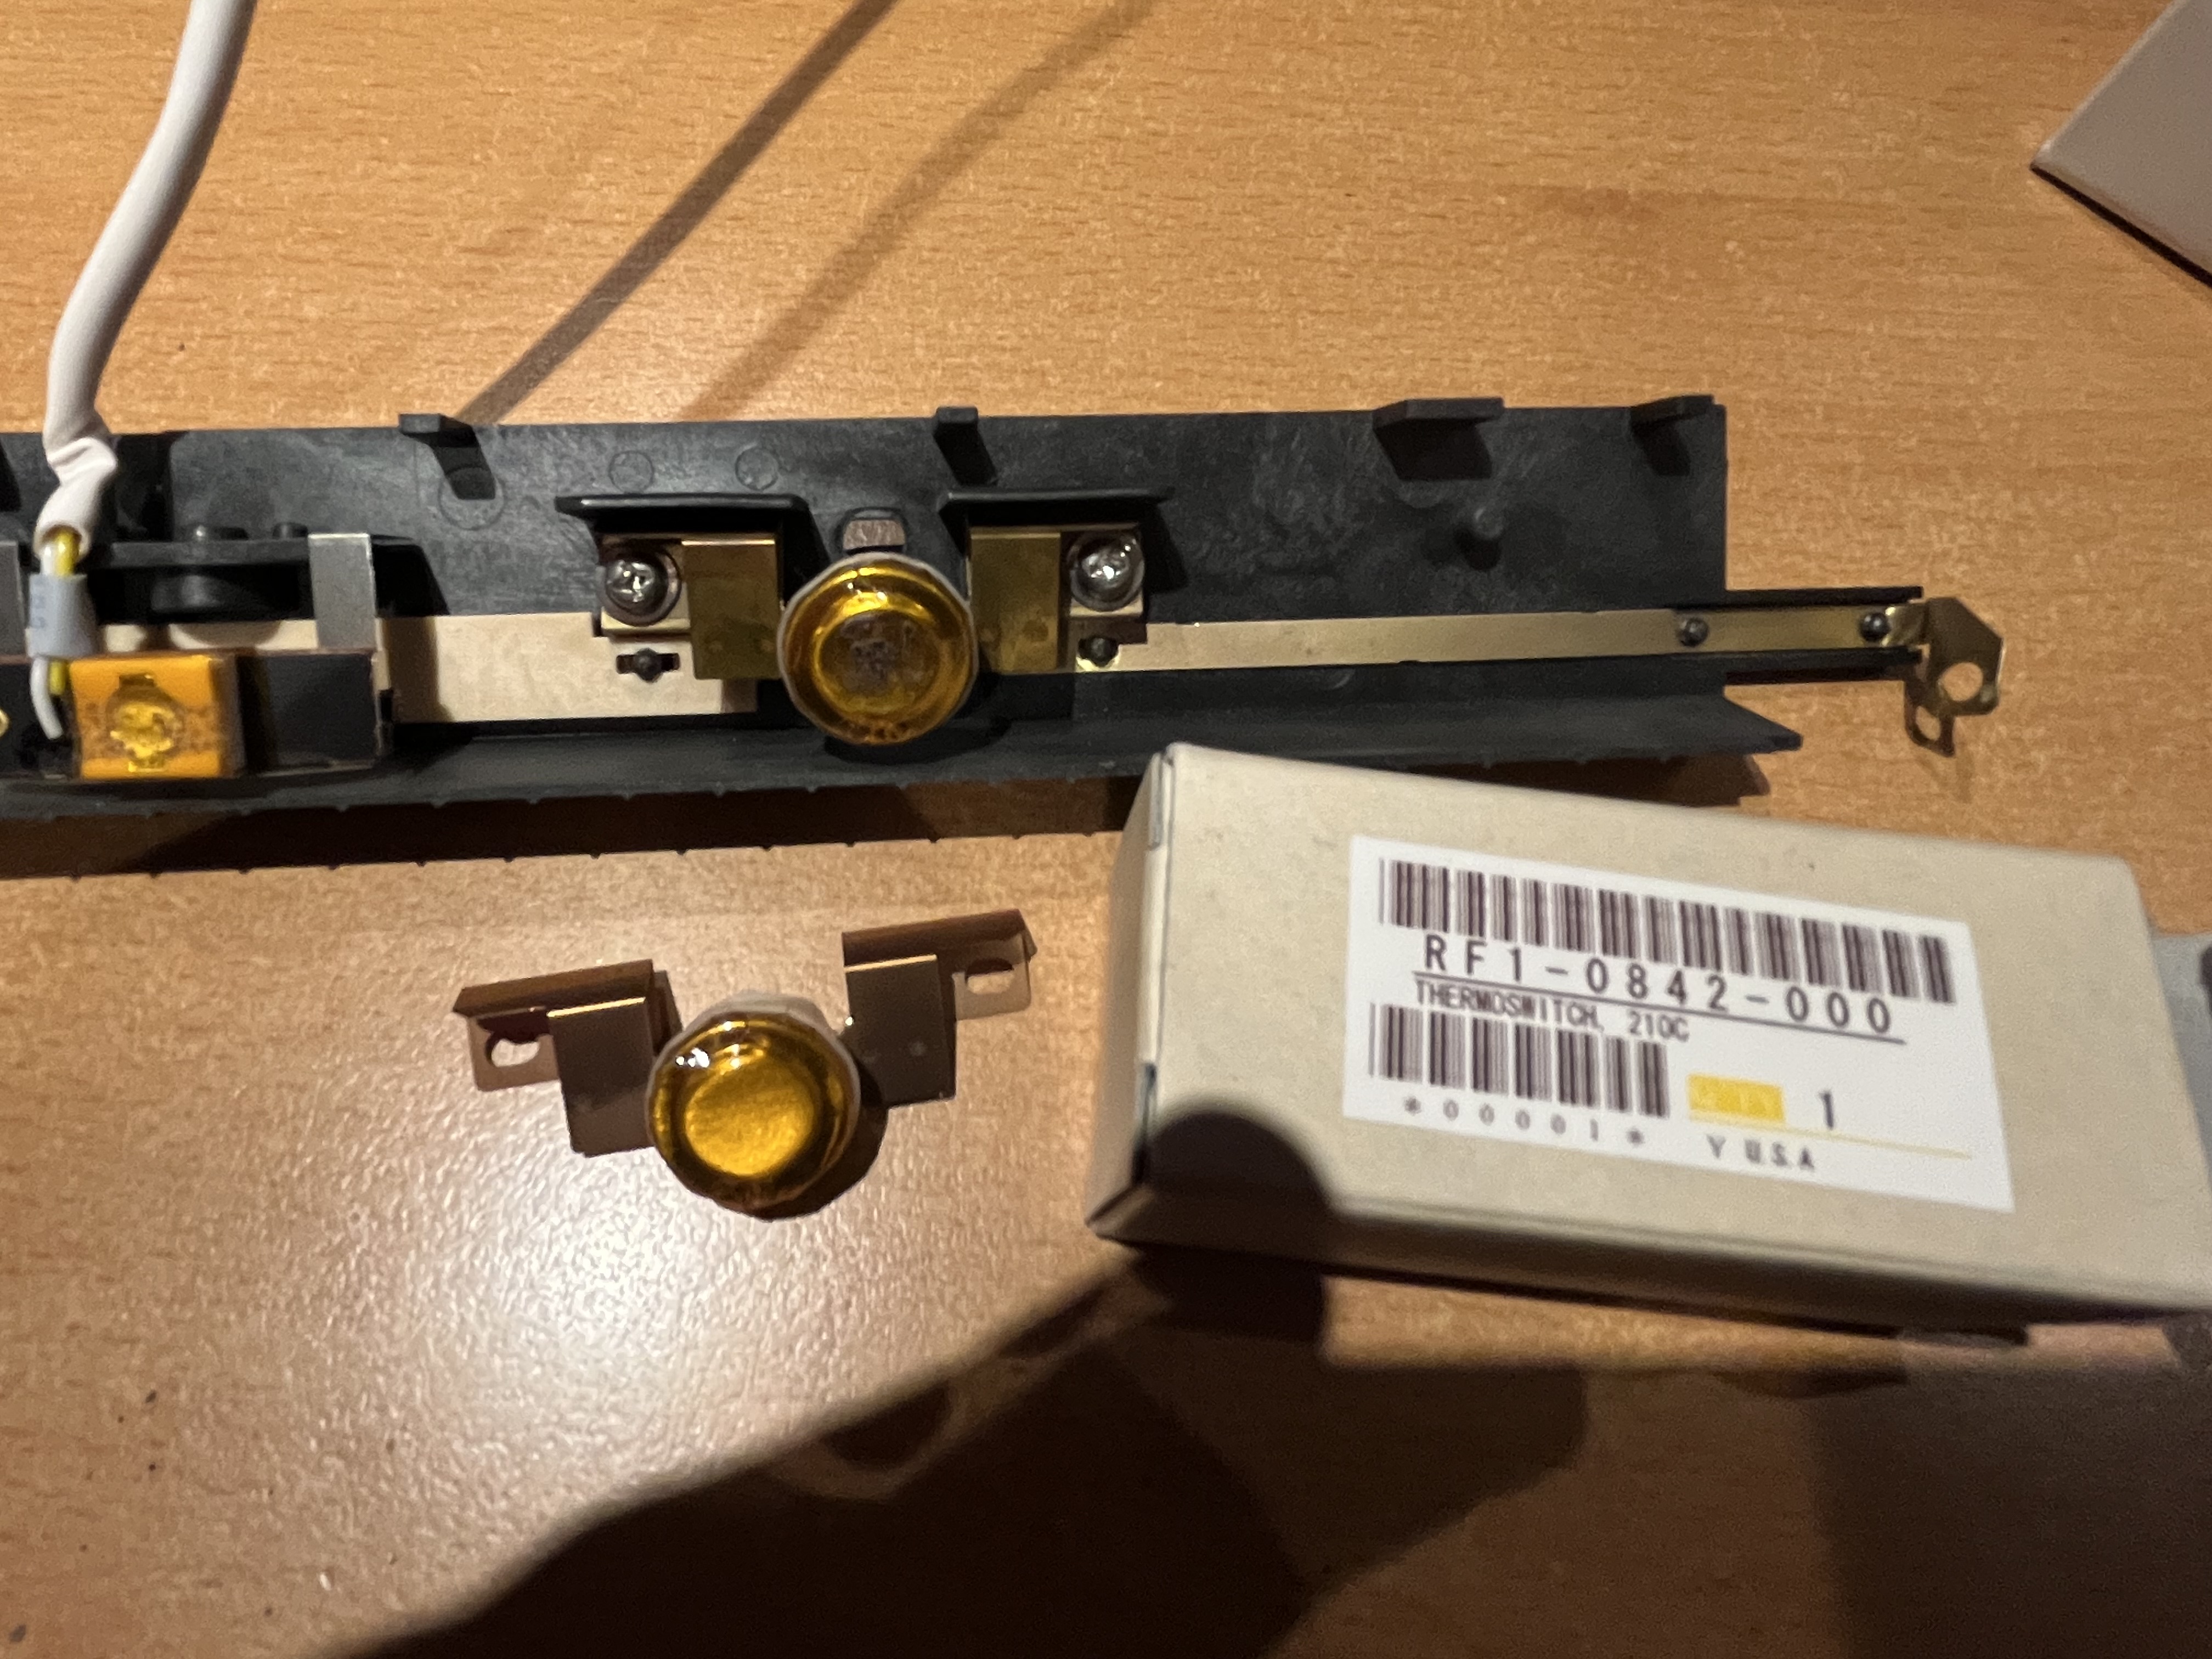 Thermoswitch and fuser gear.
Title: Re: I destroyed a printer so you don't have to.
Post by: spitfire on July 21, 2022, 04:35:35 PM
Post by: spitfire on July 21, 2022, 04:35:35 PM
Gears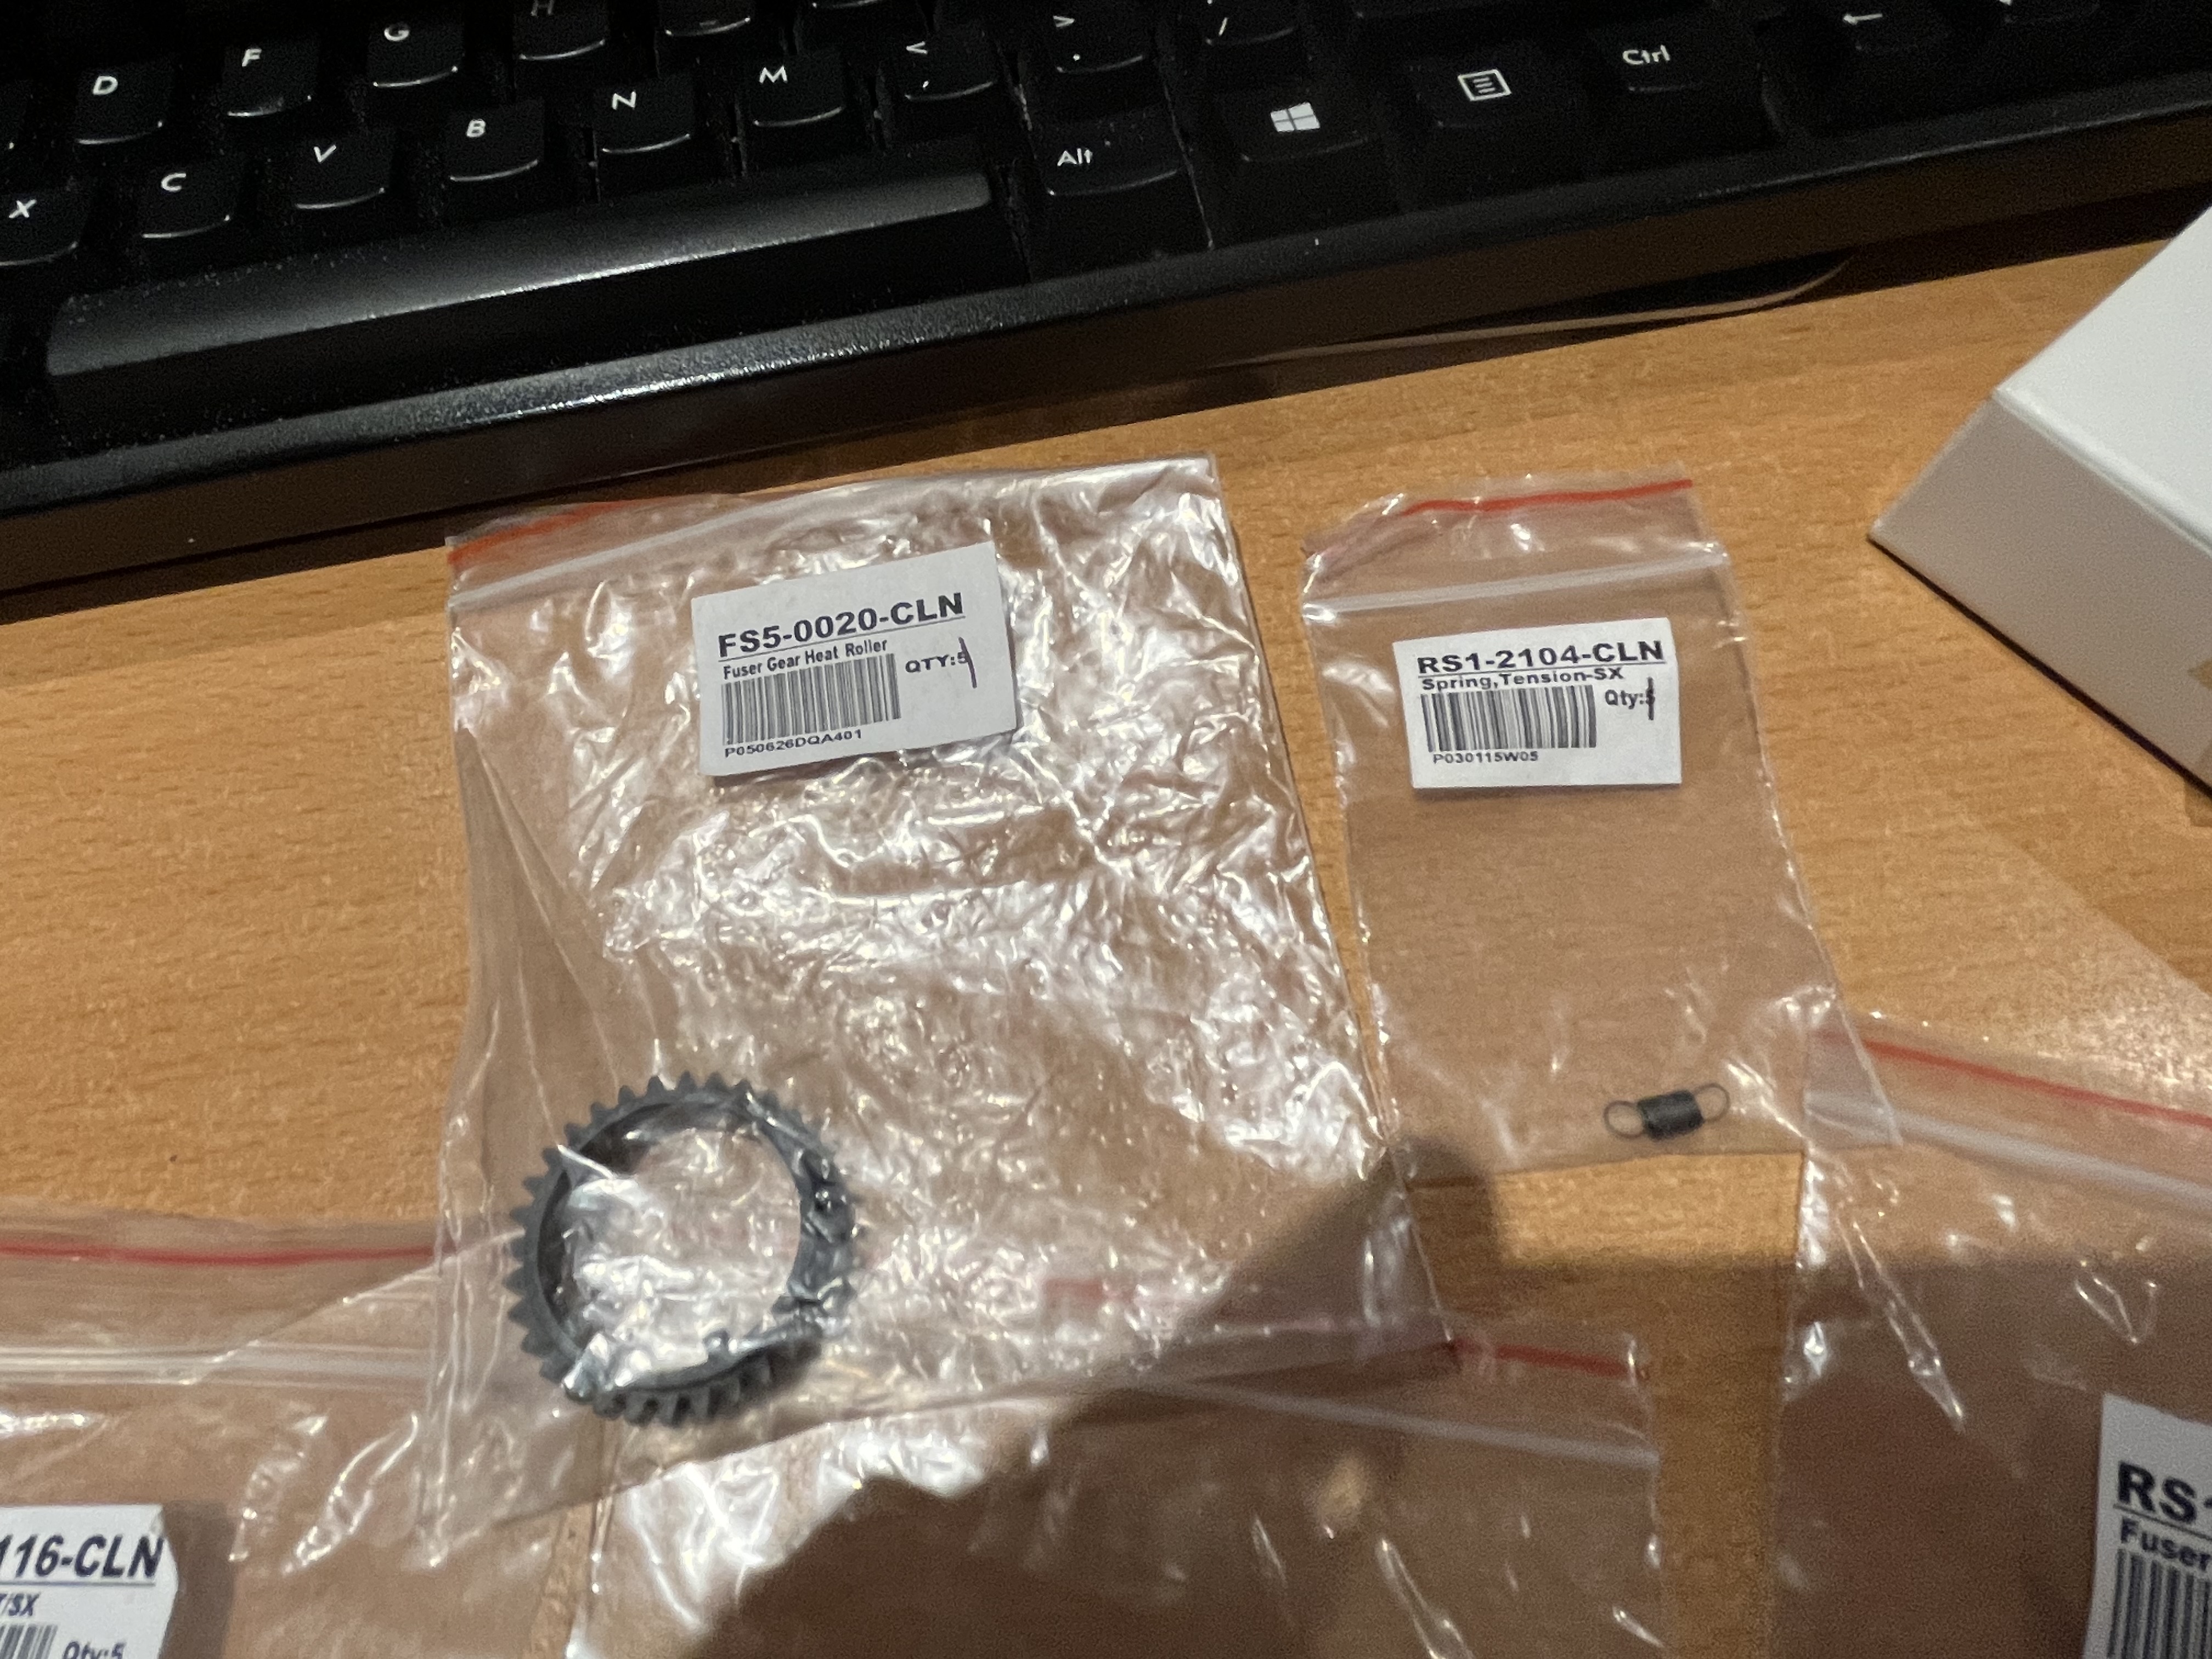
Title: Re: I destroyed a printer so you don't have to.
Post by: spitfire on July 21, 2022, 04:36:37 PM
Post by: spitfire on July 21, 2022, 04:36:37 PM
More fuser gear and ozone filter.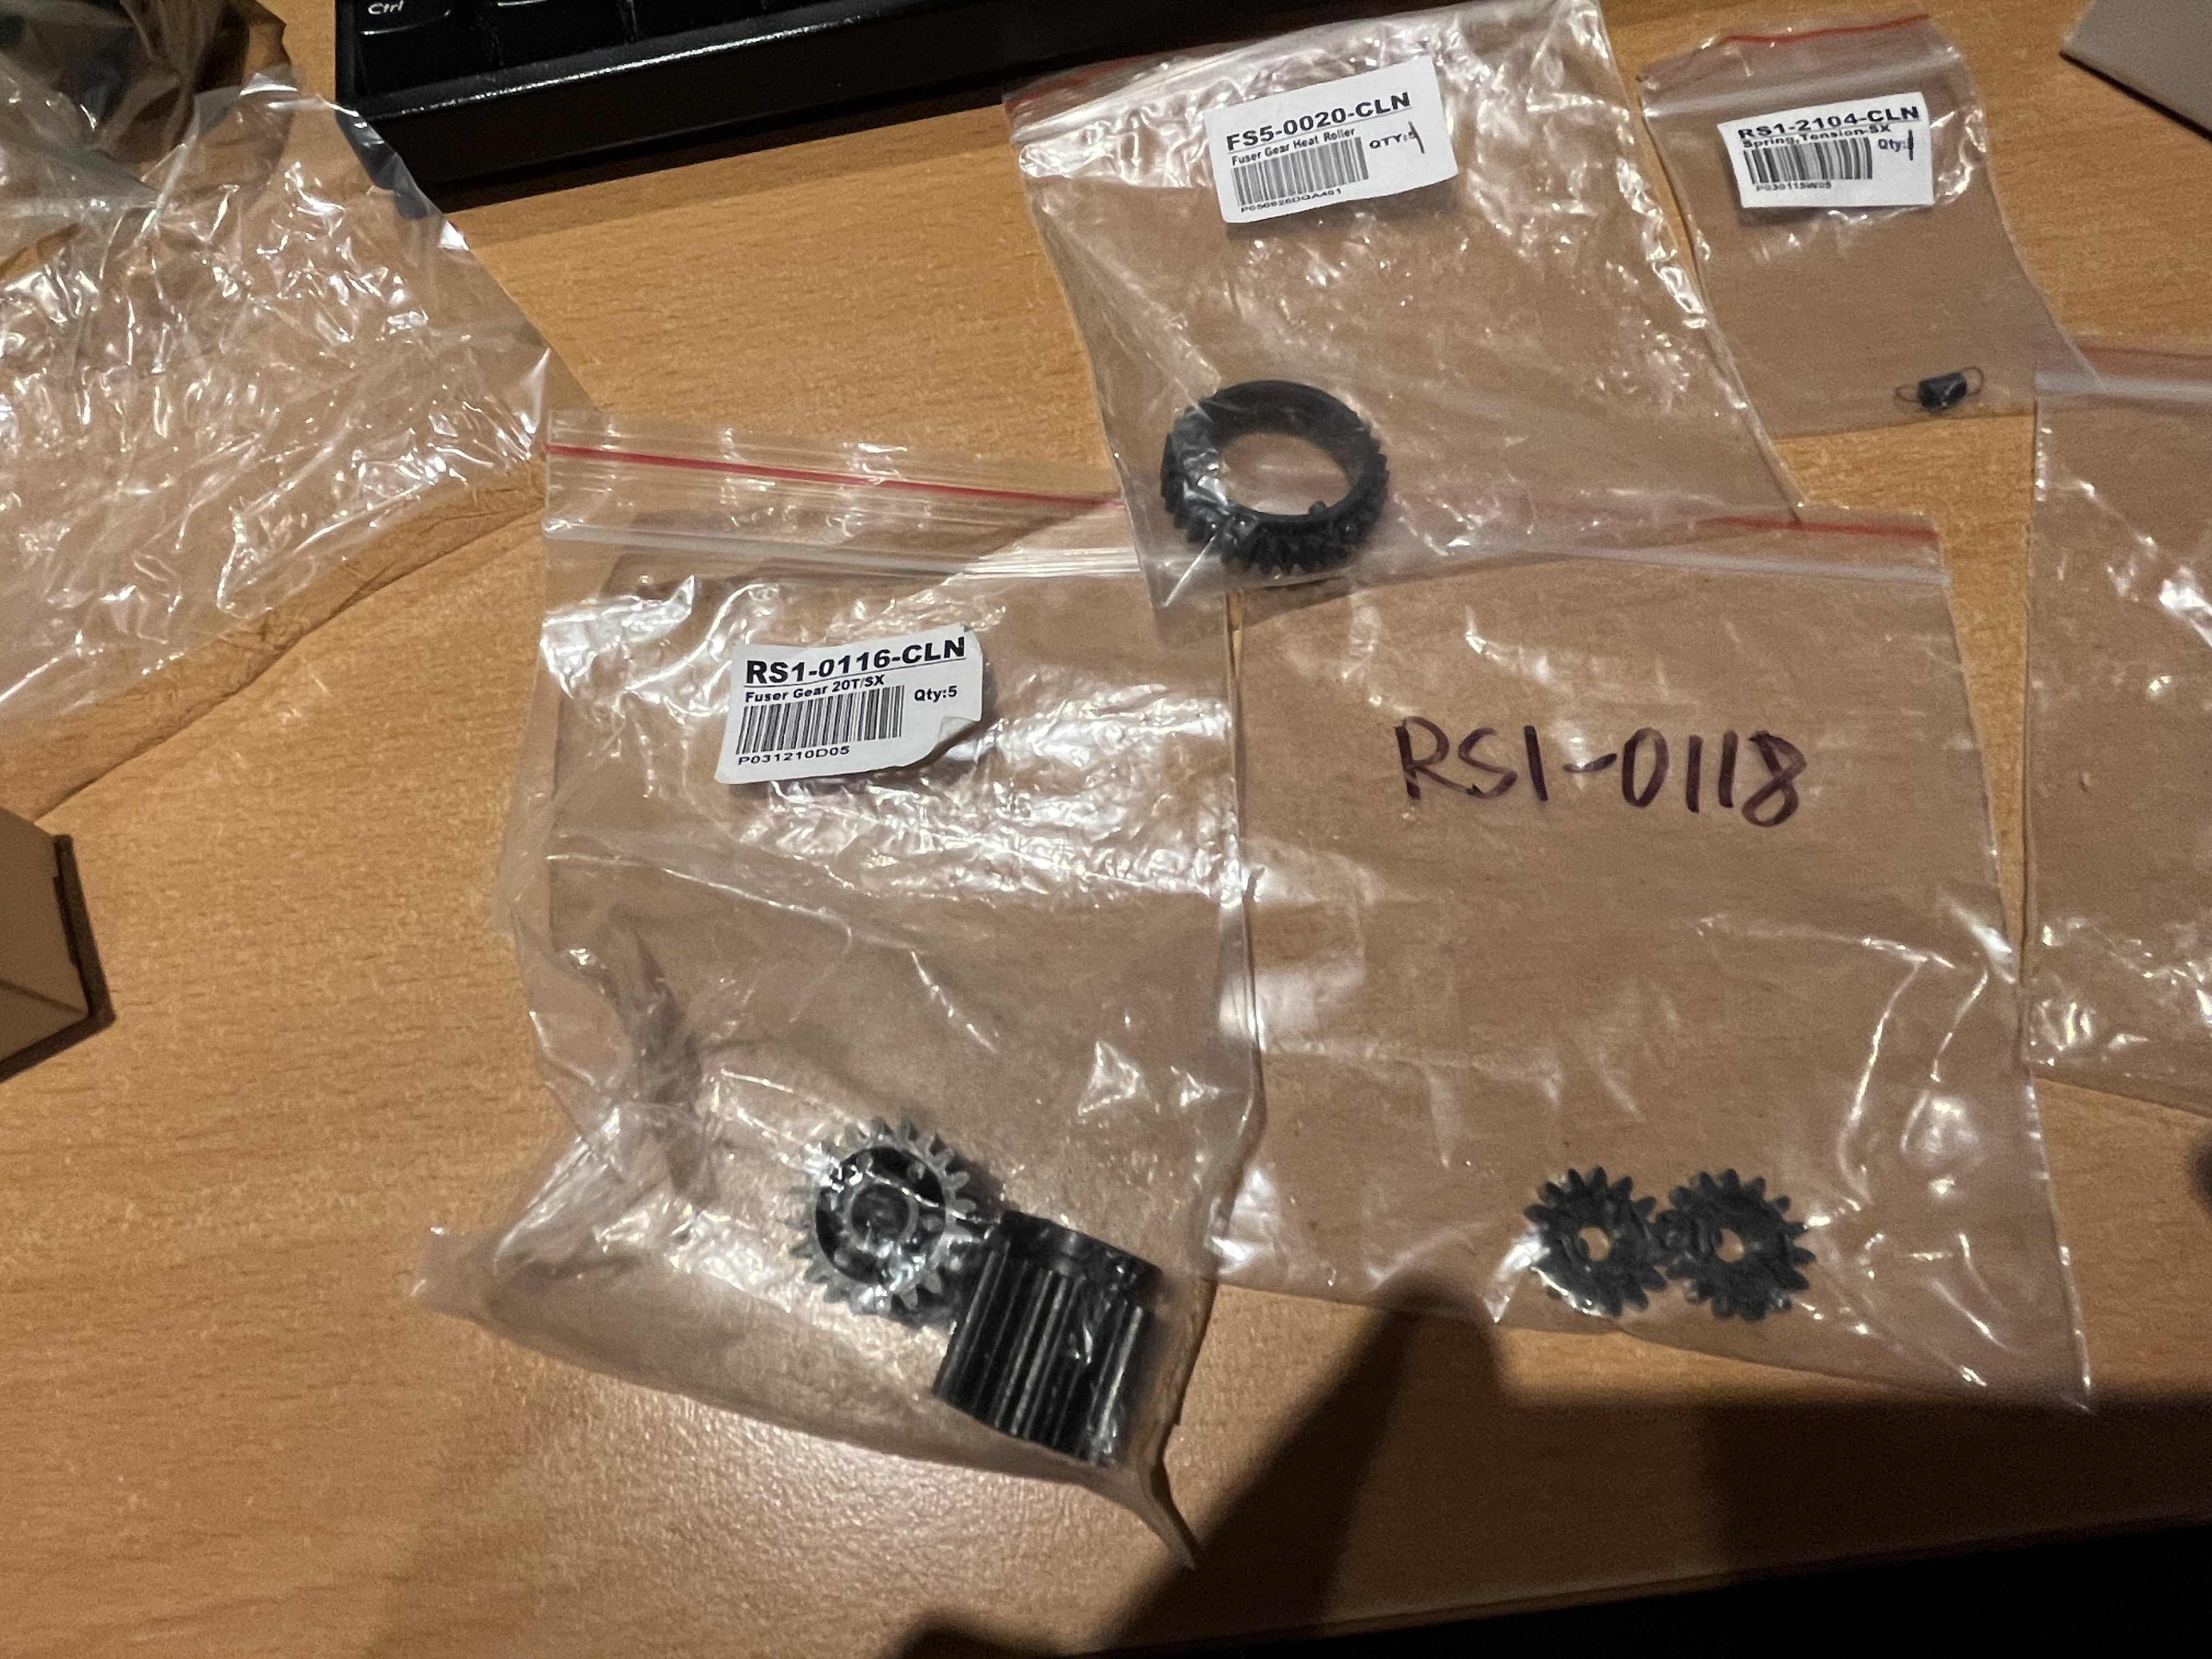

Title: Re: I destroyed a printer so you don't have to.
Post by: spitfire on July 21, 2022, 04:37:42 PM
Post by: spitfire on July 21, 2022, 04:37:42 PM
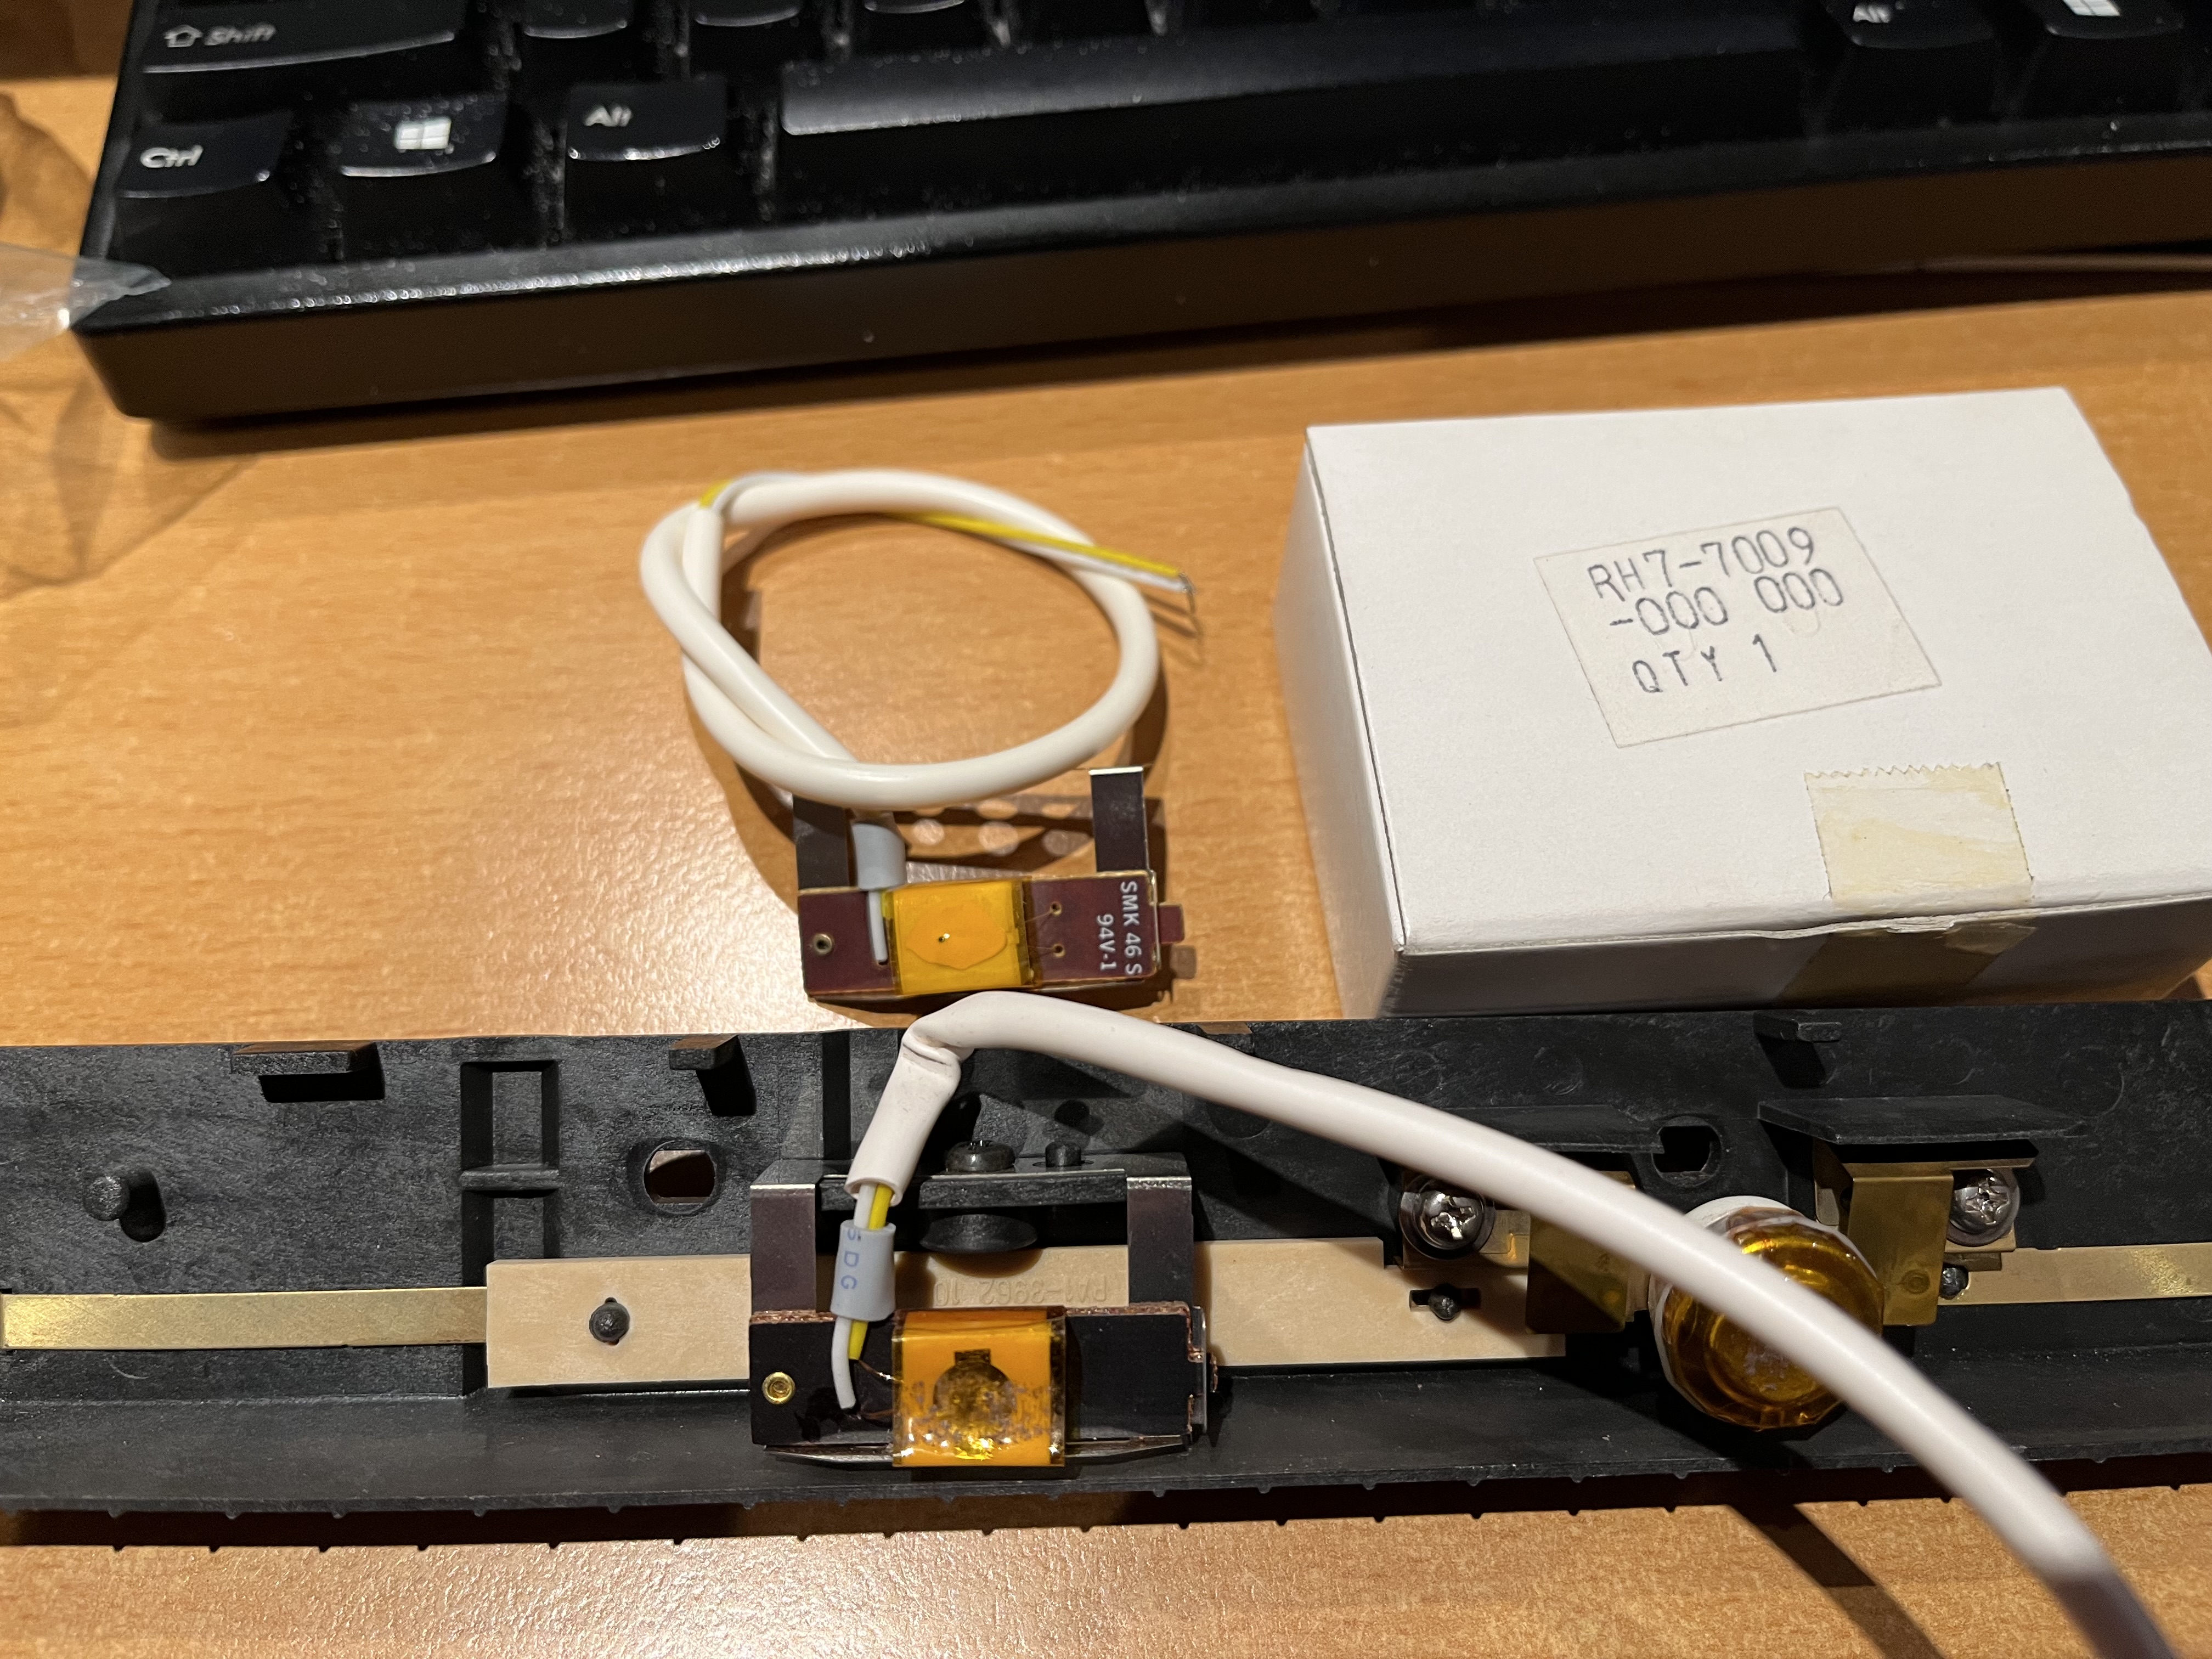
Separation pad and thermistor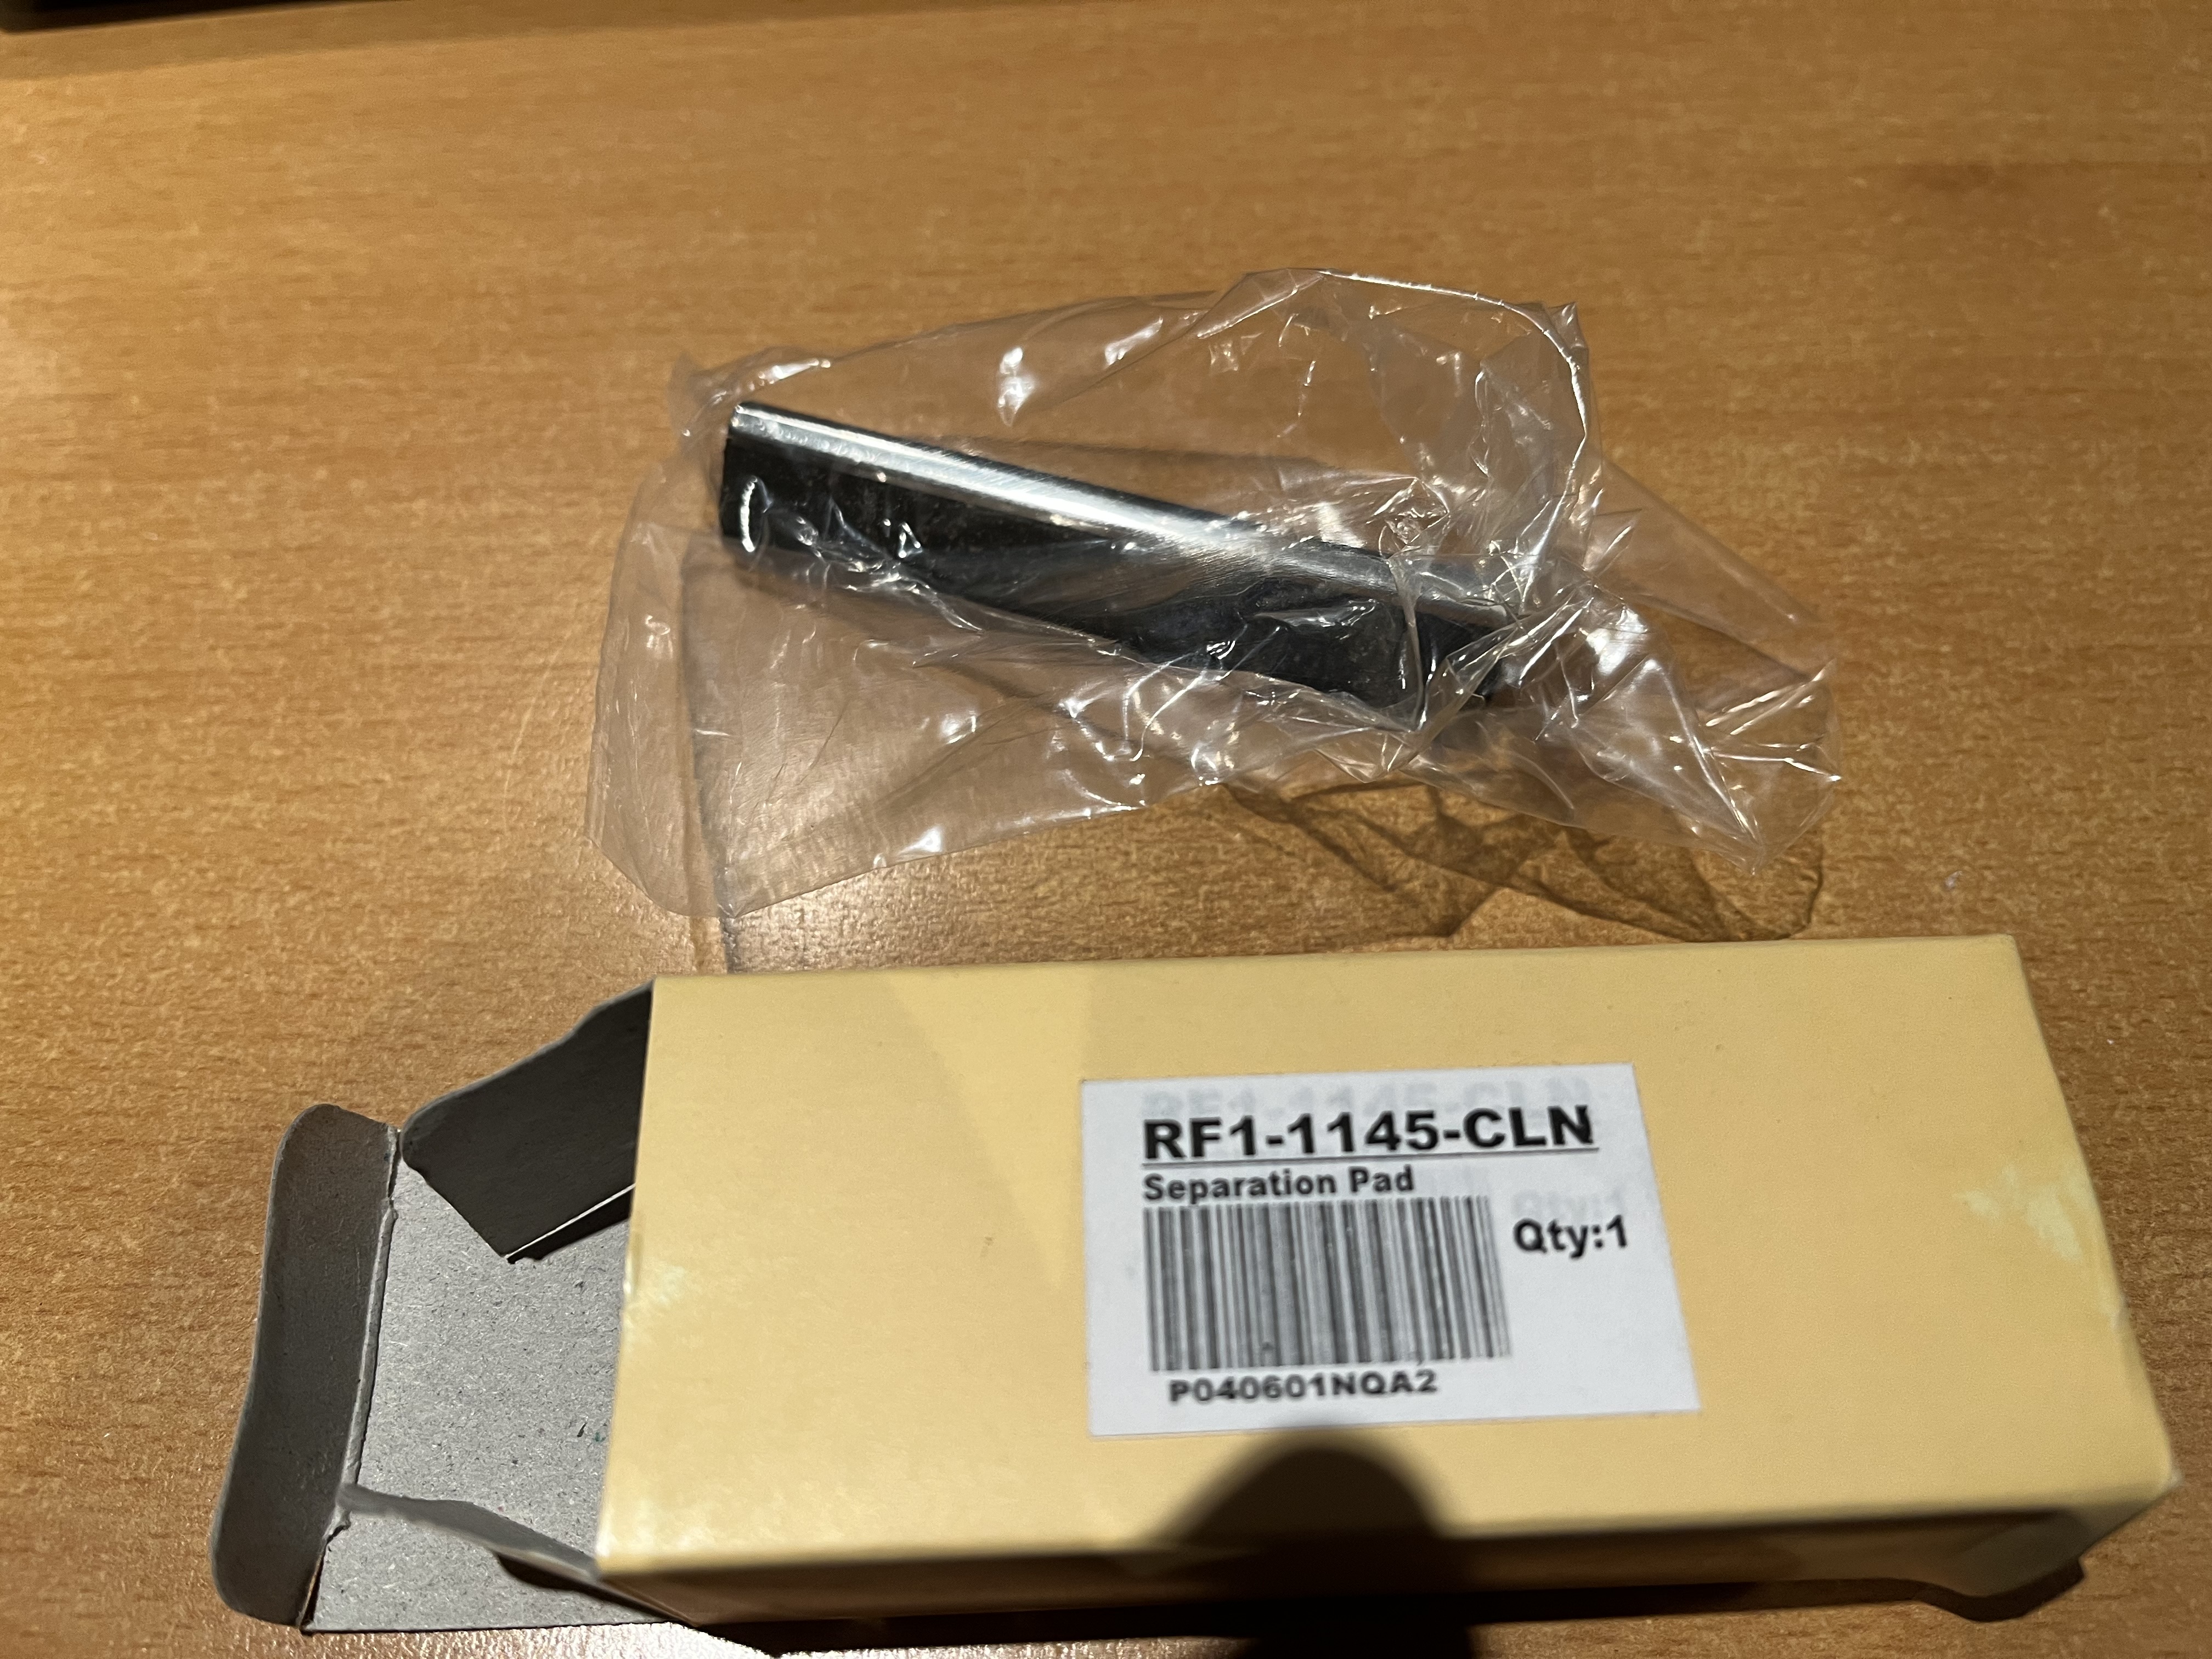
Title: Re: I destroyed a printer so you don't have to.
Post by: spitfire on July 21, 2022, 04:38:51 PM
Post by: spitfire on July 21, 2022, 04:38:51 PM
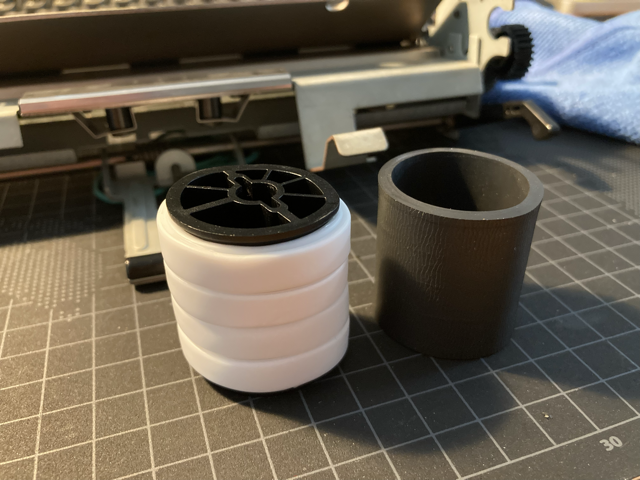
Fuser bushing, and old vs new roller. 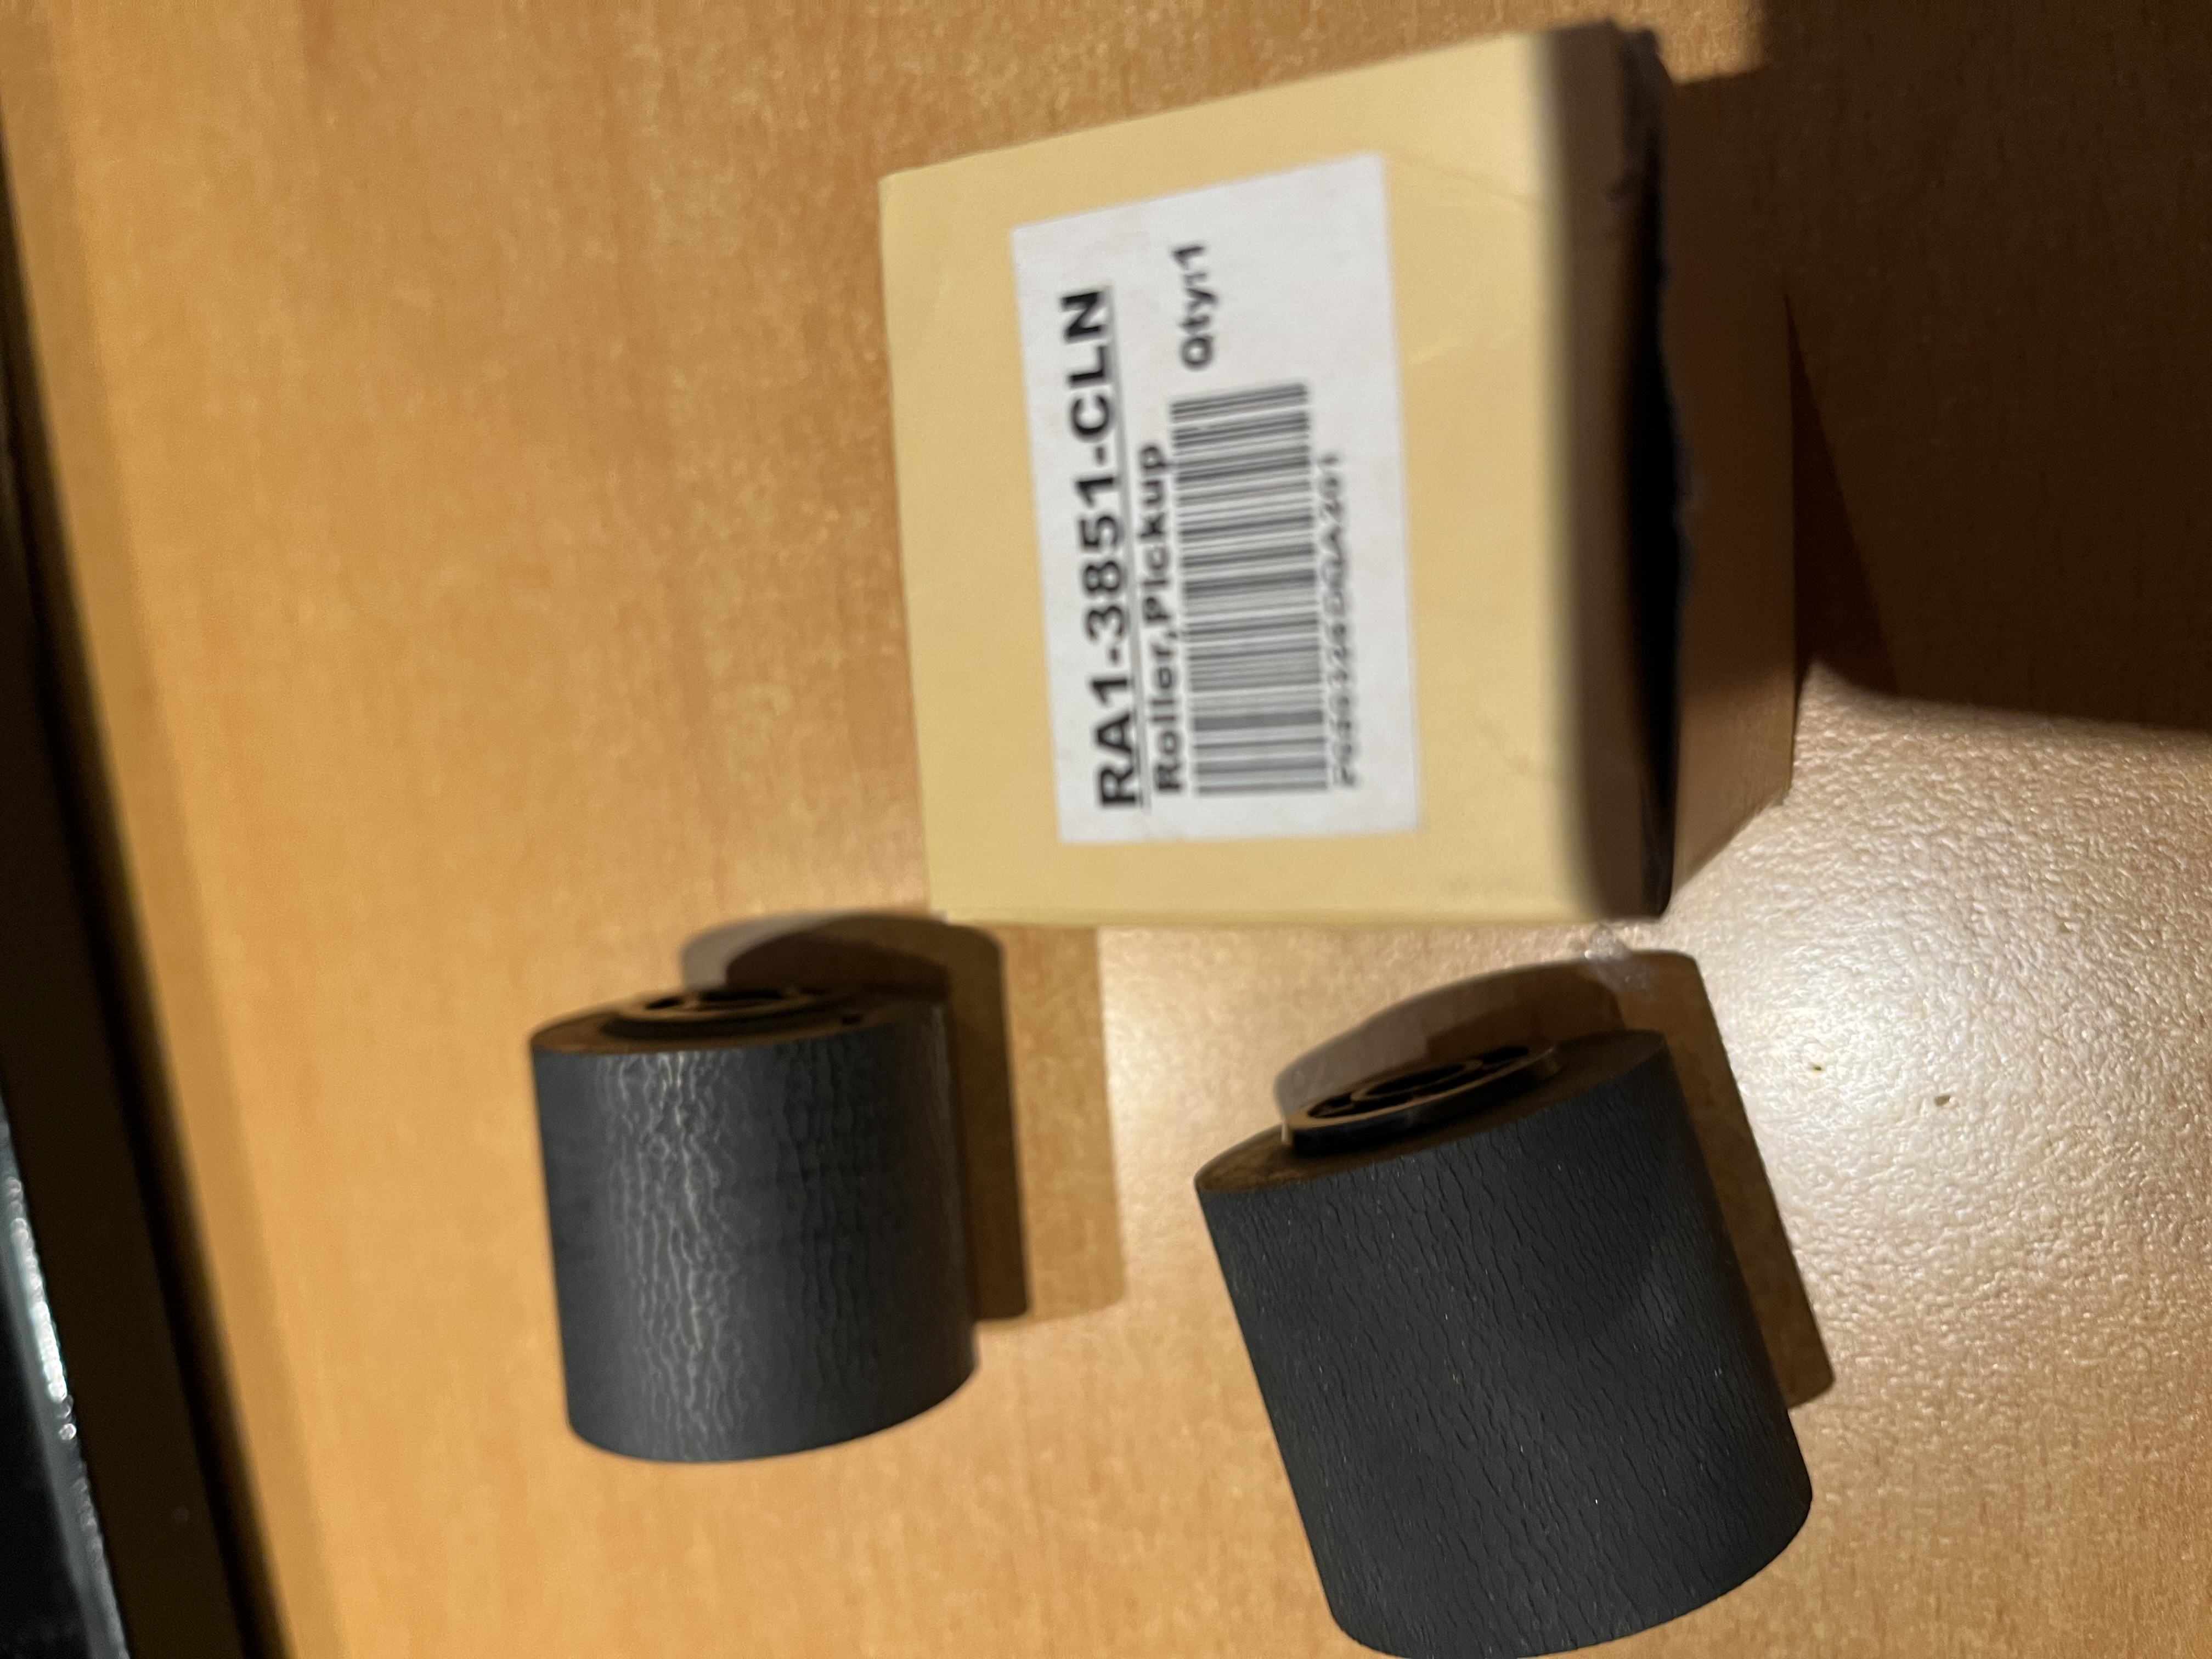

Title: Re: I destroyed a printer so you don't have to.
Post by: spitfire on July 21, 2022, 04:39:47 PM
Post by: spitfire on July 21, 2022, 04:39:47 PM
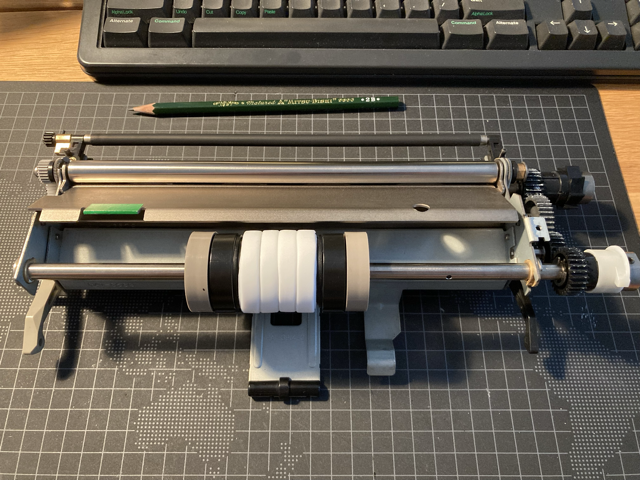
More shots of intake rollers.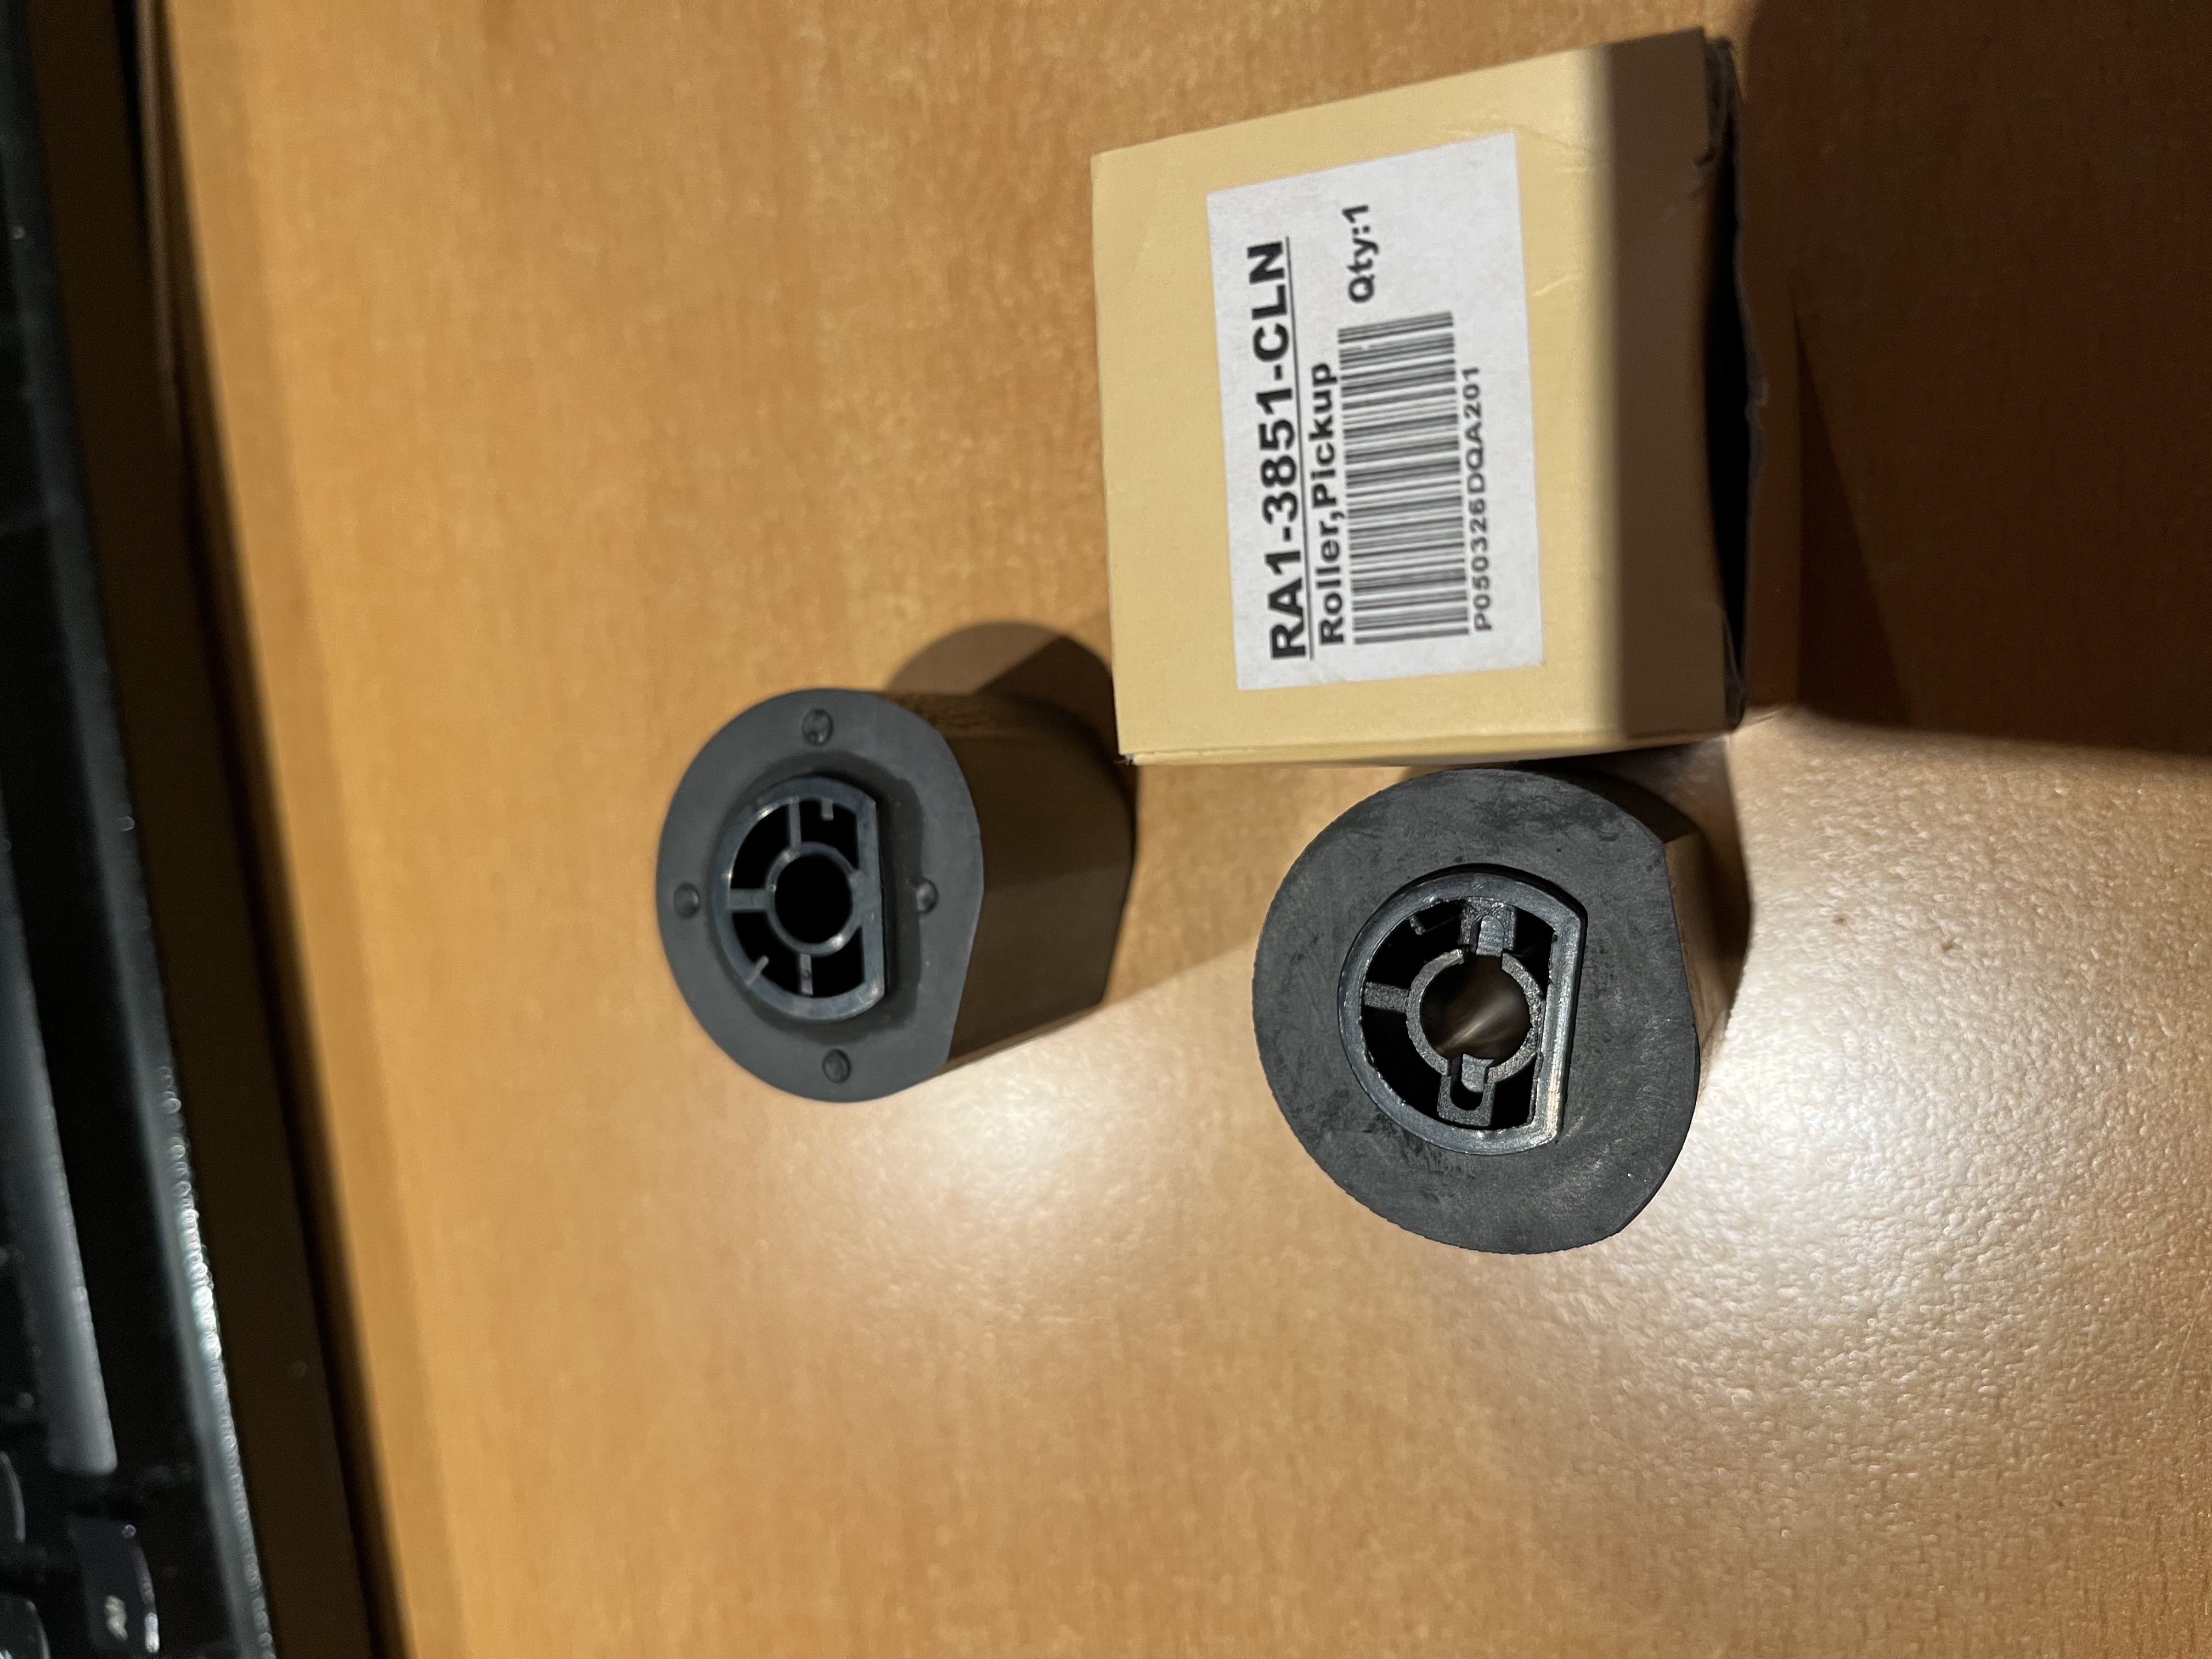
Title: Re: I destroyed a printer so you don't have to.
Post by: spitfire on July 21, 2022, 04:41:35 PM
Post by: spitfire on July 21, 2022, 04:41:35 PM
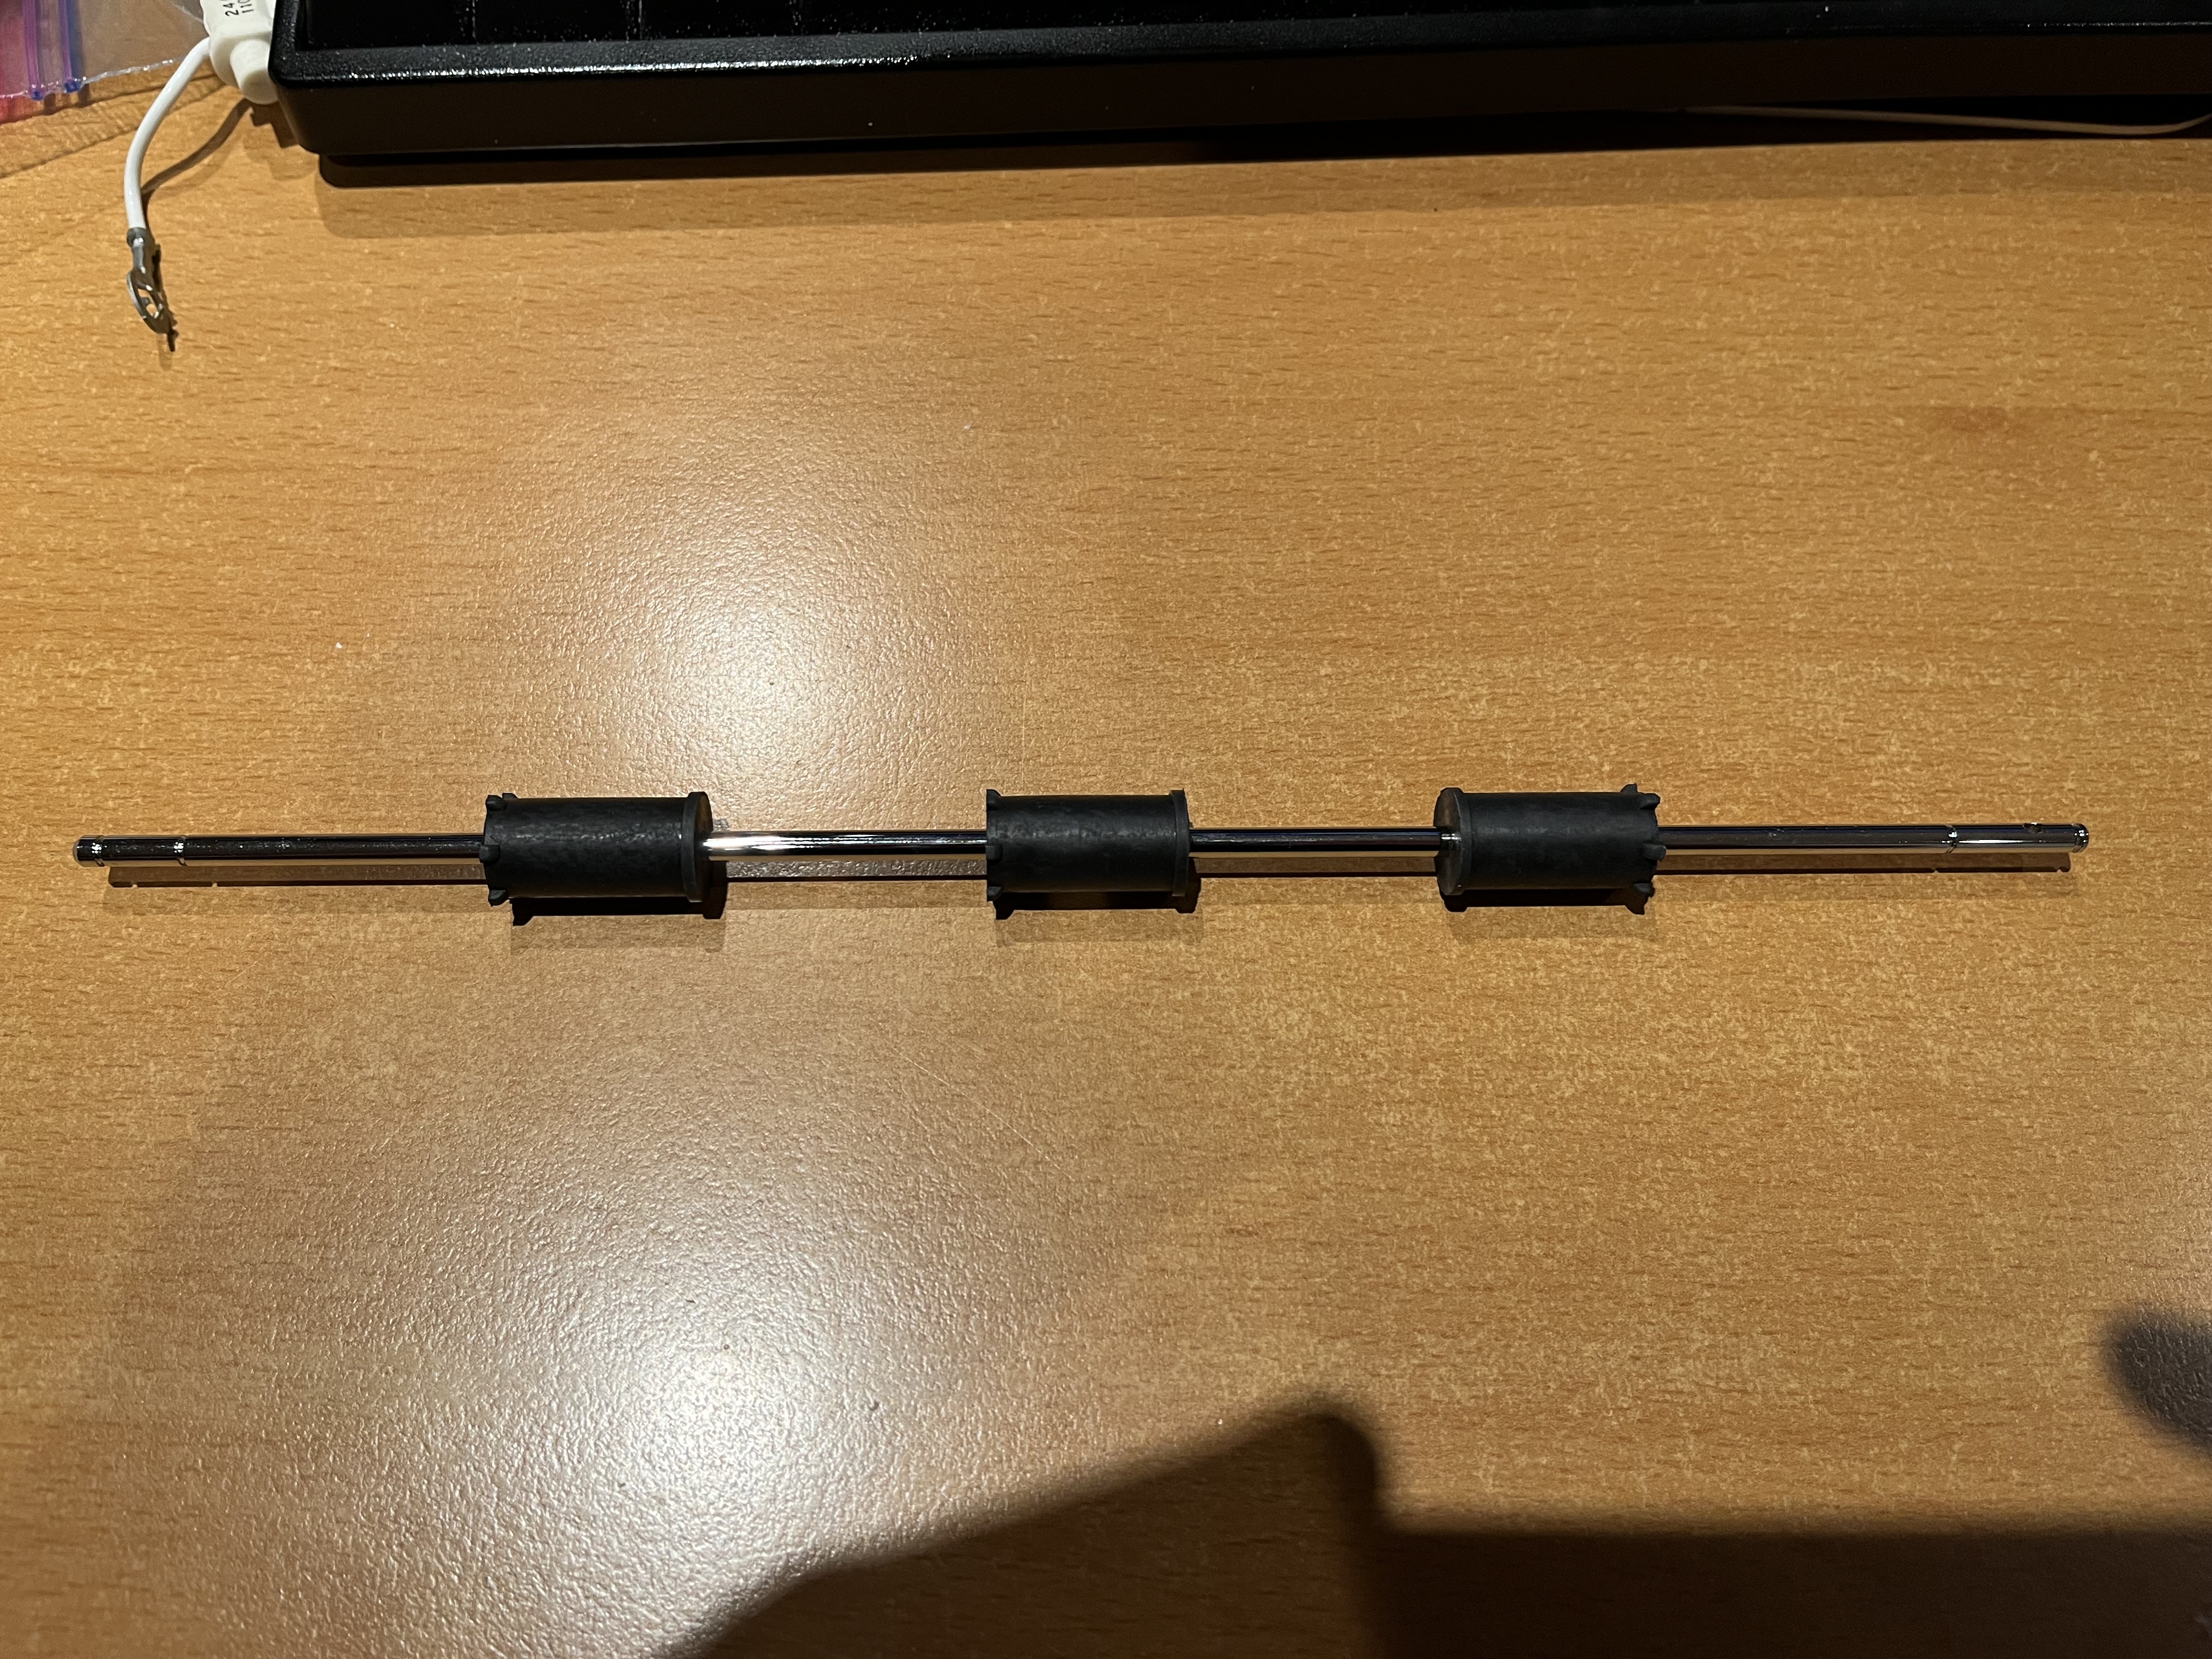
New exit roller.
Title: Re: I destroyed a printer so you don't have to.
Post by: spitfire on July 21, 2022, 04:42:35 PM
Post by: spitfire on July 21, 2022, 04:42:35 PM
Original USHIO fuser lamp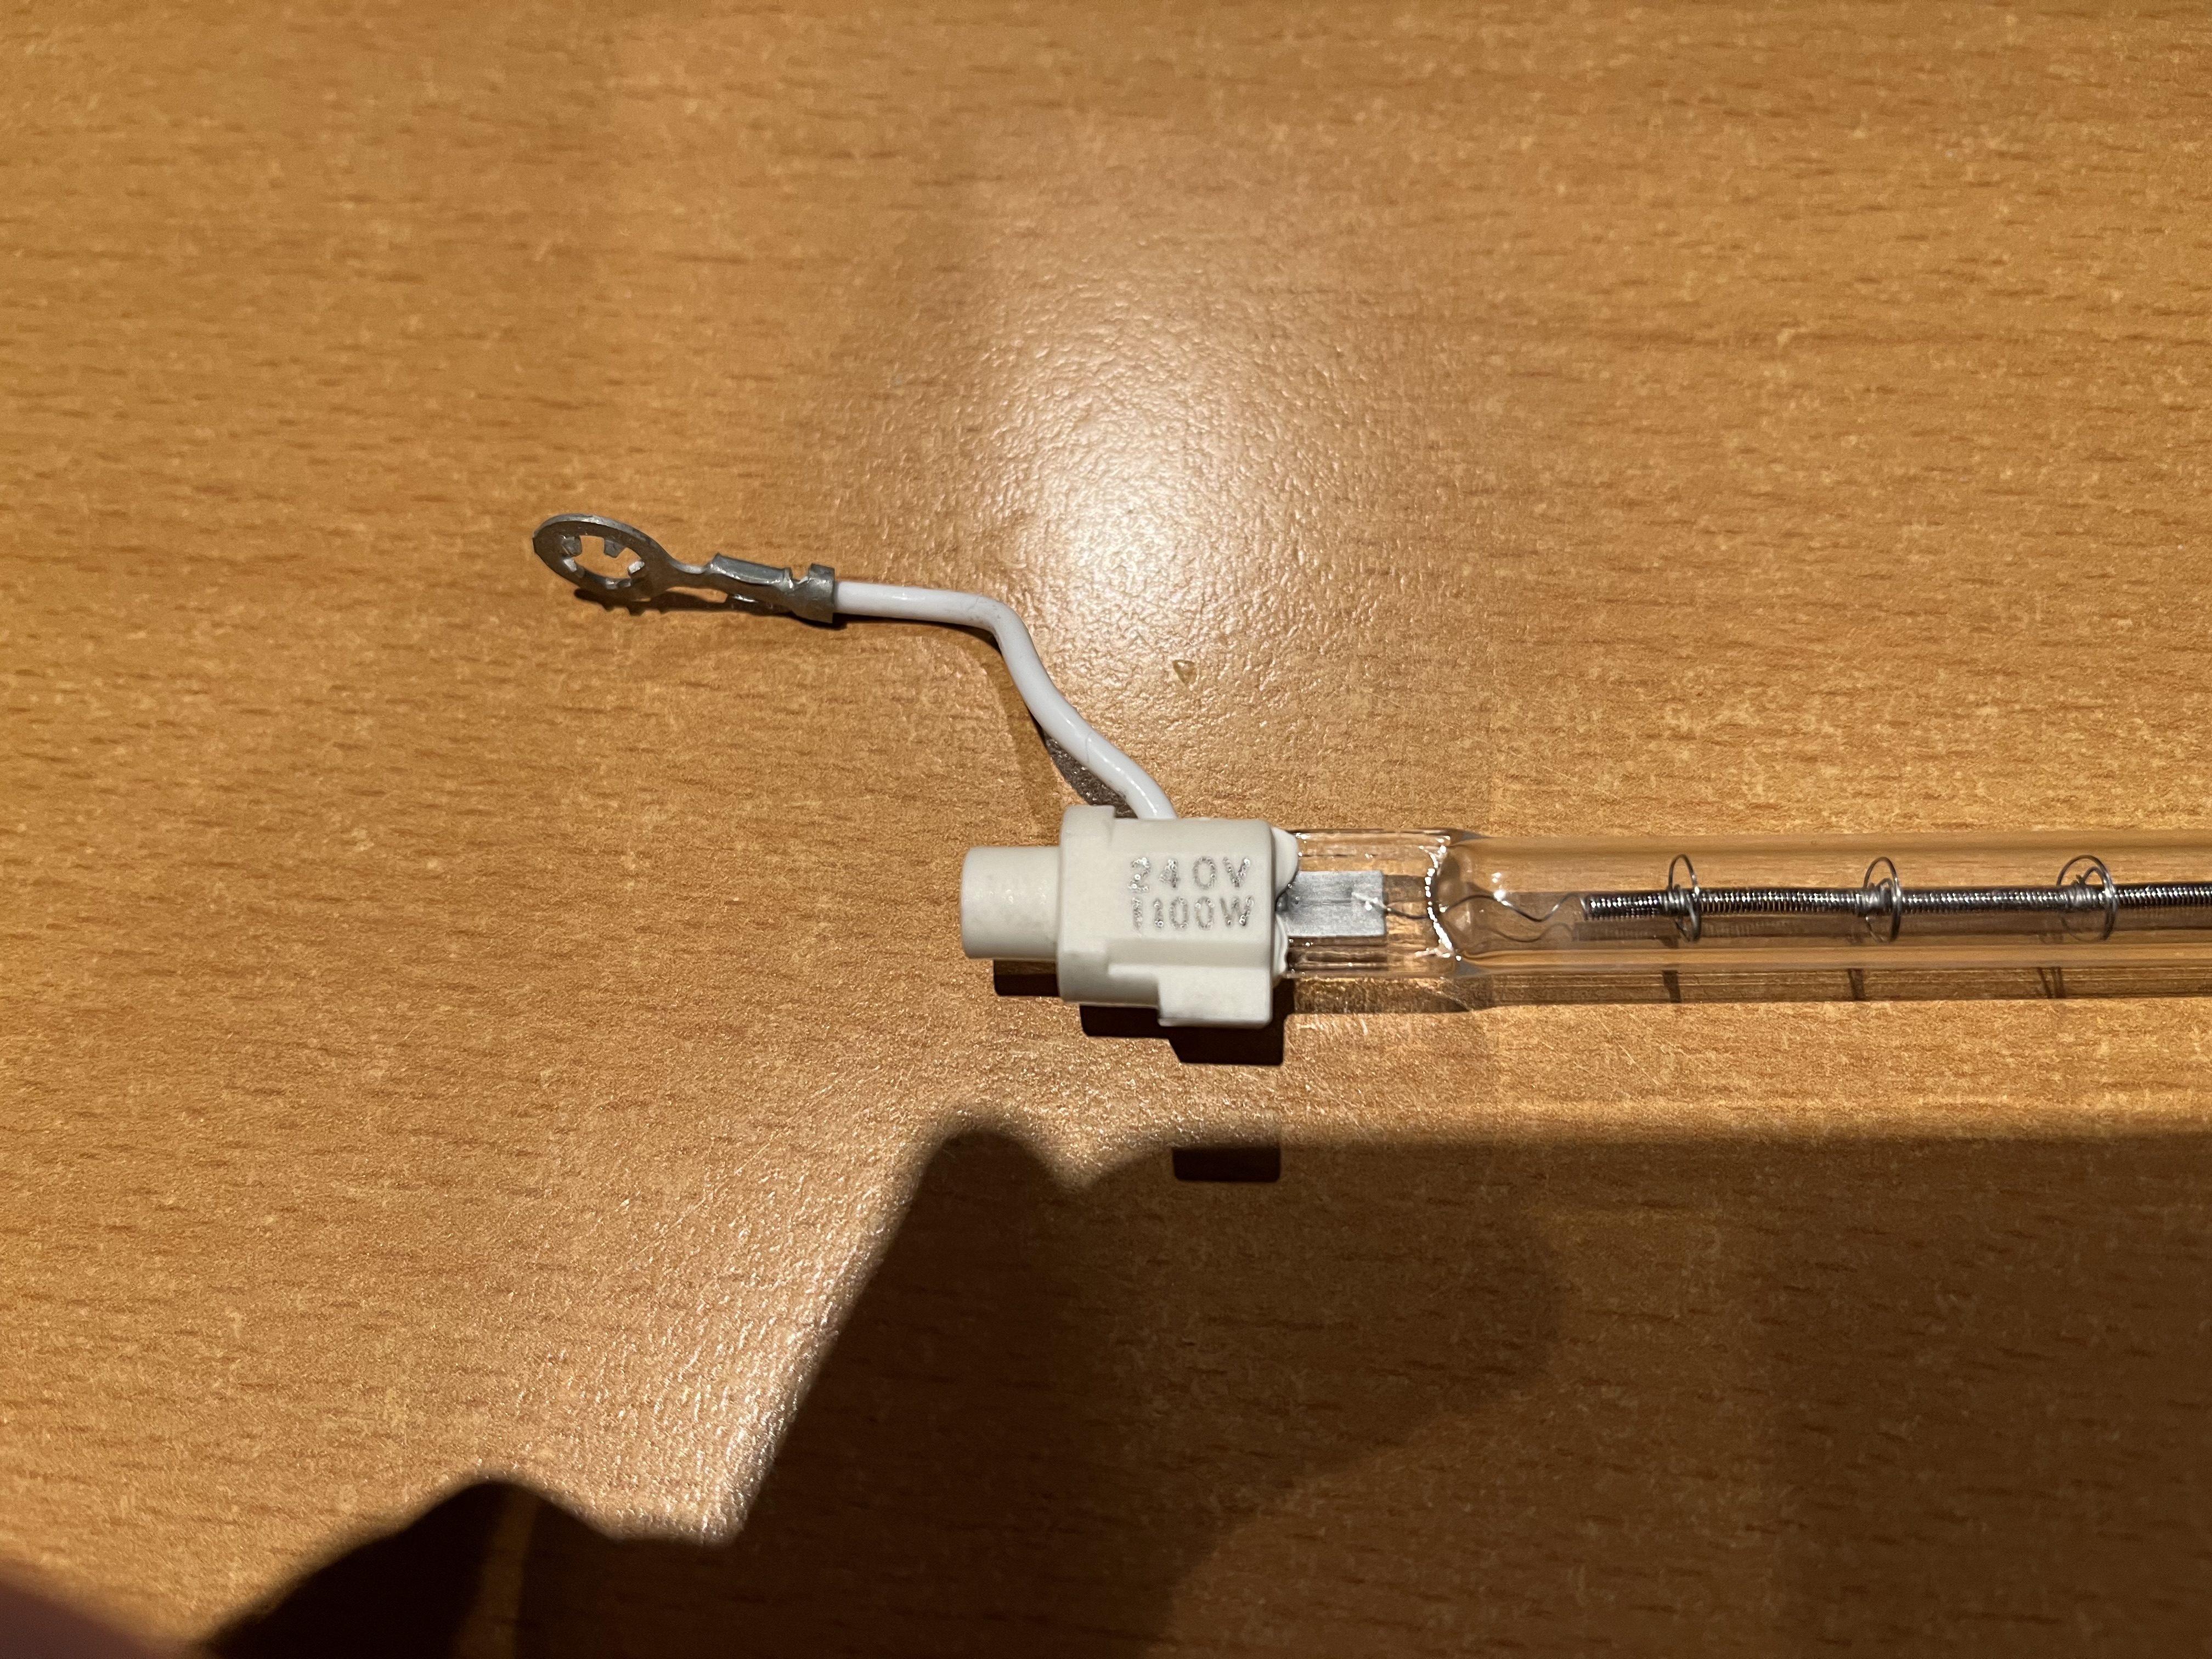
Title: Re: I destroyed a printer so you don't have to.
Post by: spitfire on July 21, 2022, 04:43:42 PM
Post by: spitfire on July 21, 2022, 04:43:42 PM
Other end of lamp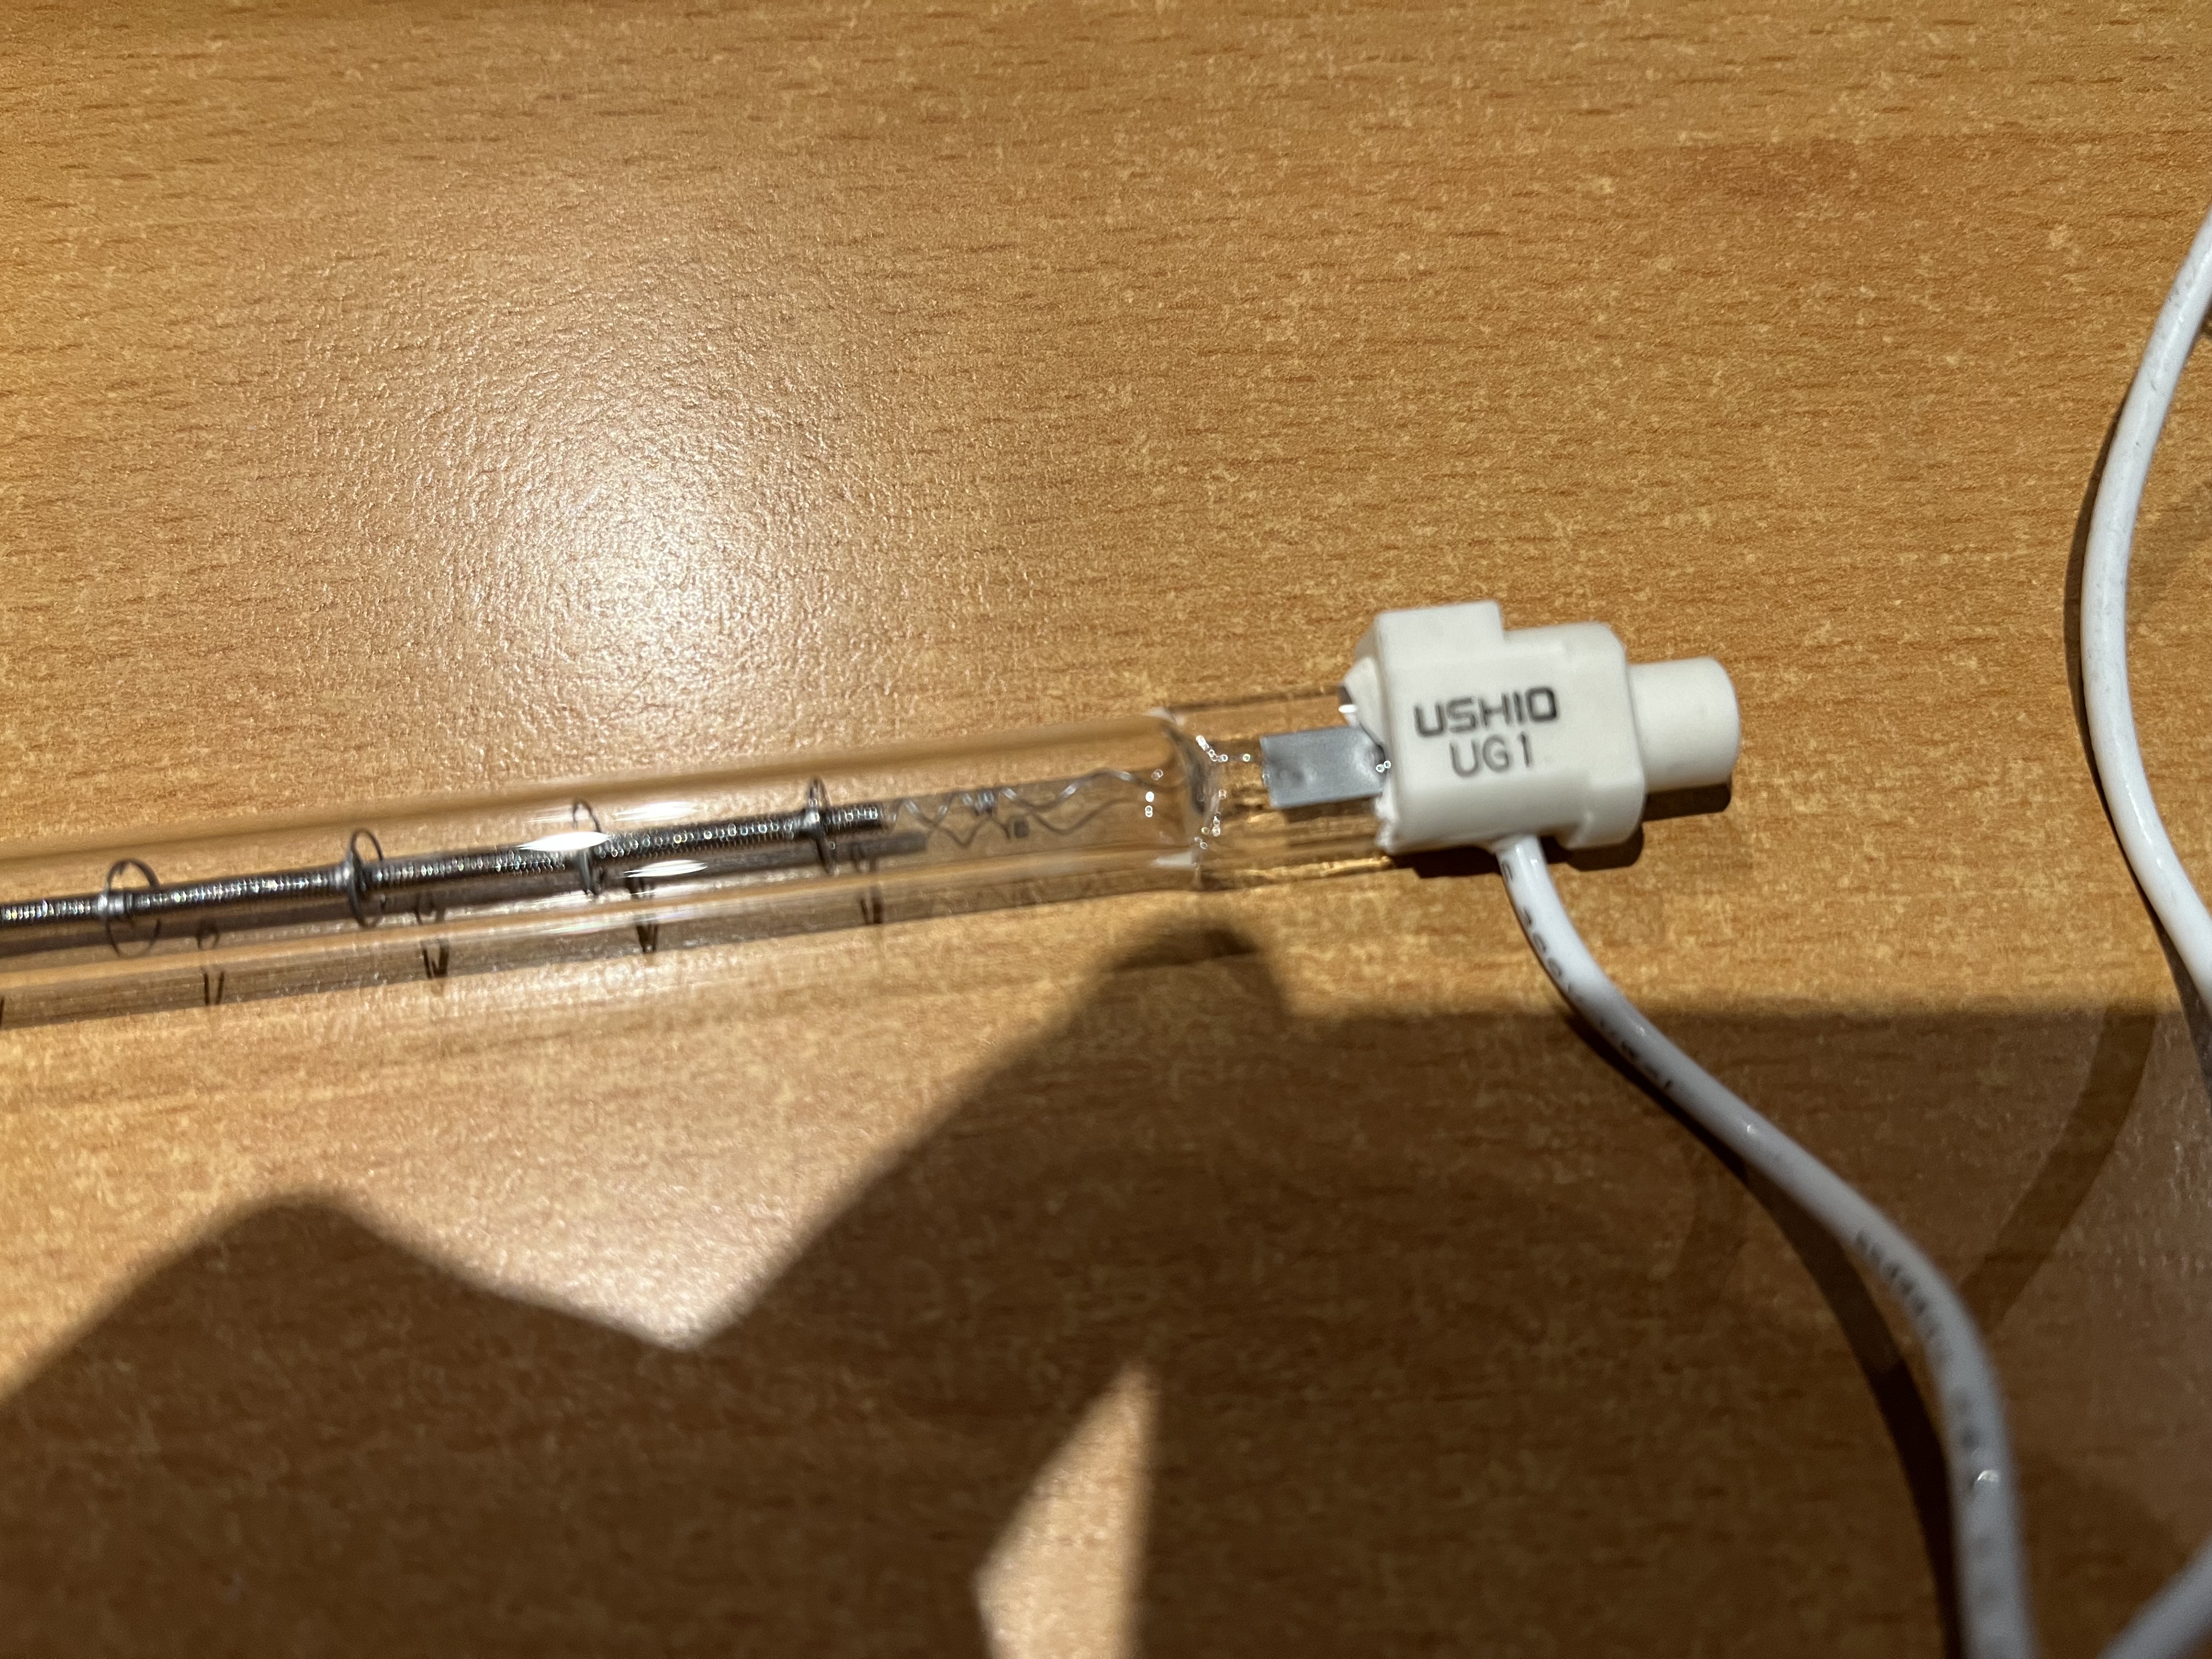
Title: Re: I destroyed a printer so you don't have to.
Post by: spitfire on July 21, 2022, 04:44:57 PM
Post by: spitfire on July 21, 2022, 04:44:57 PM
Fuser lamp connector.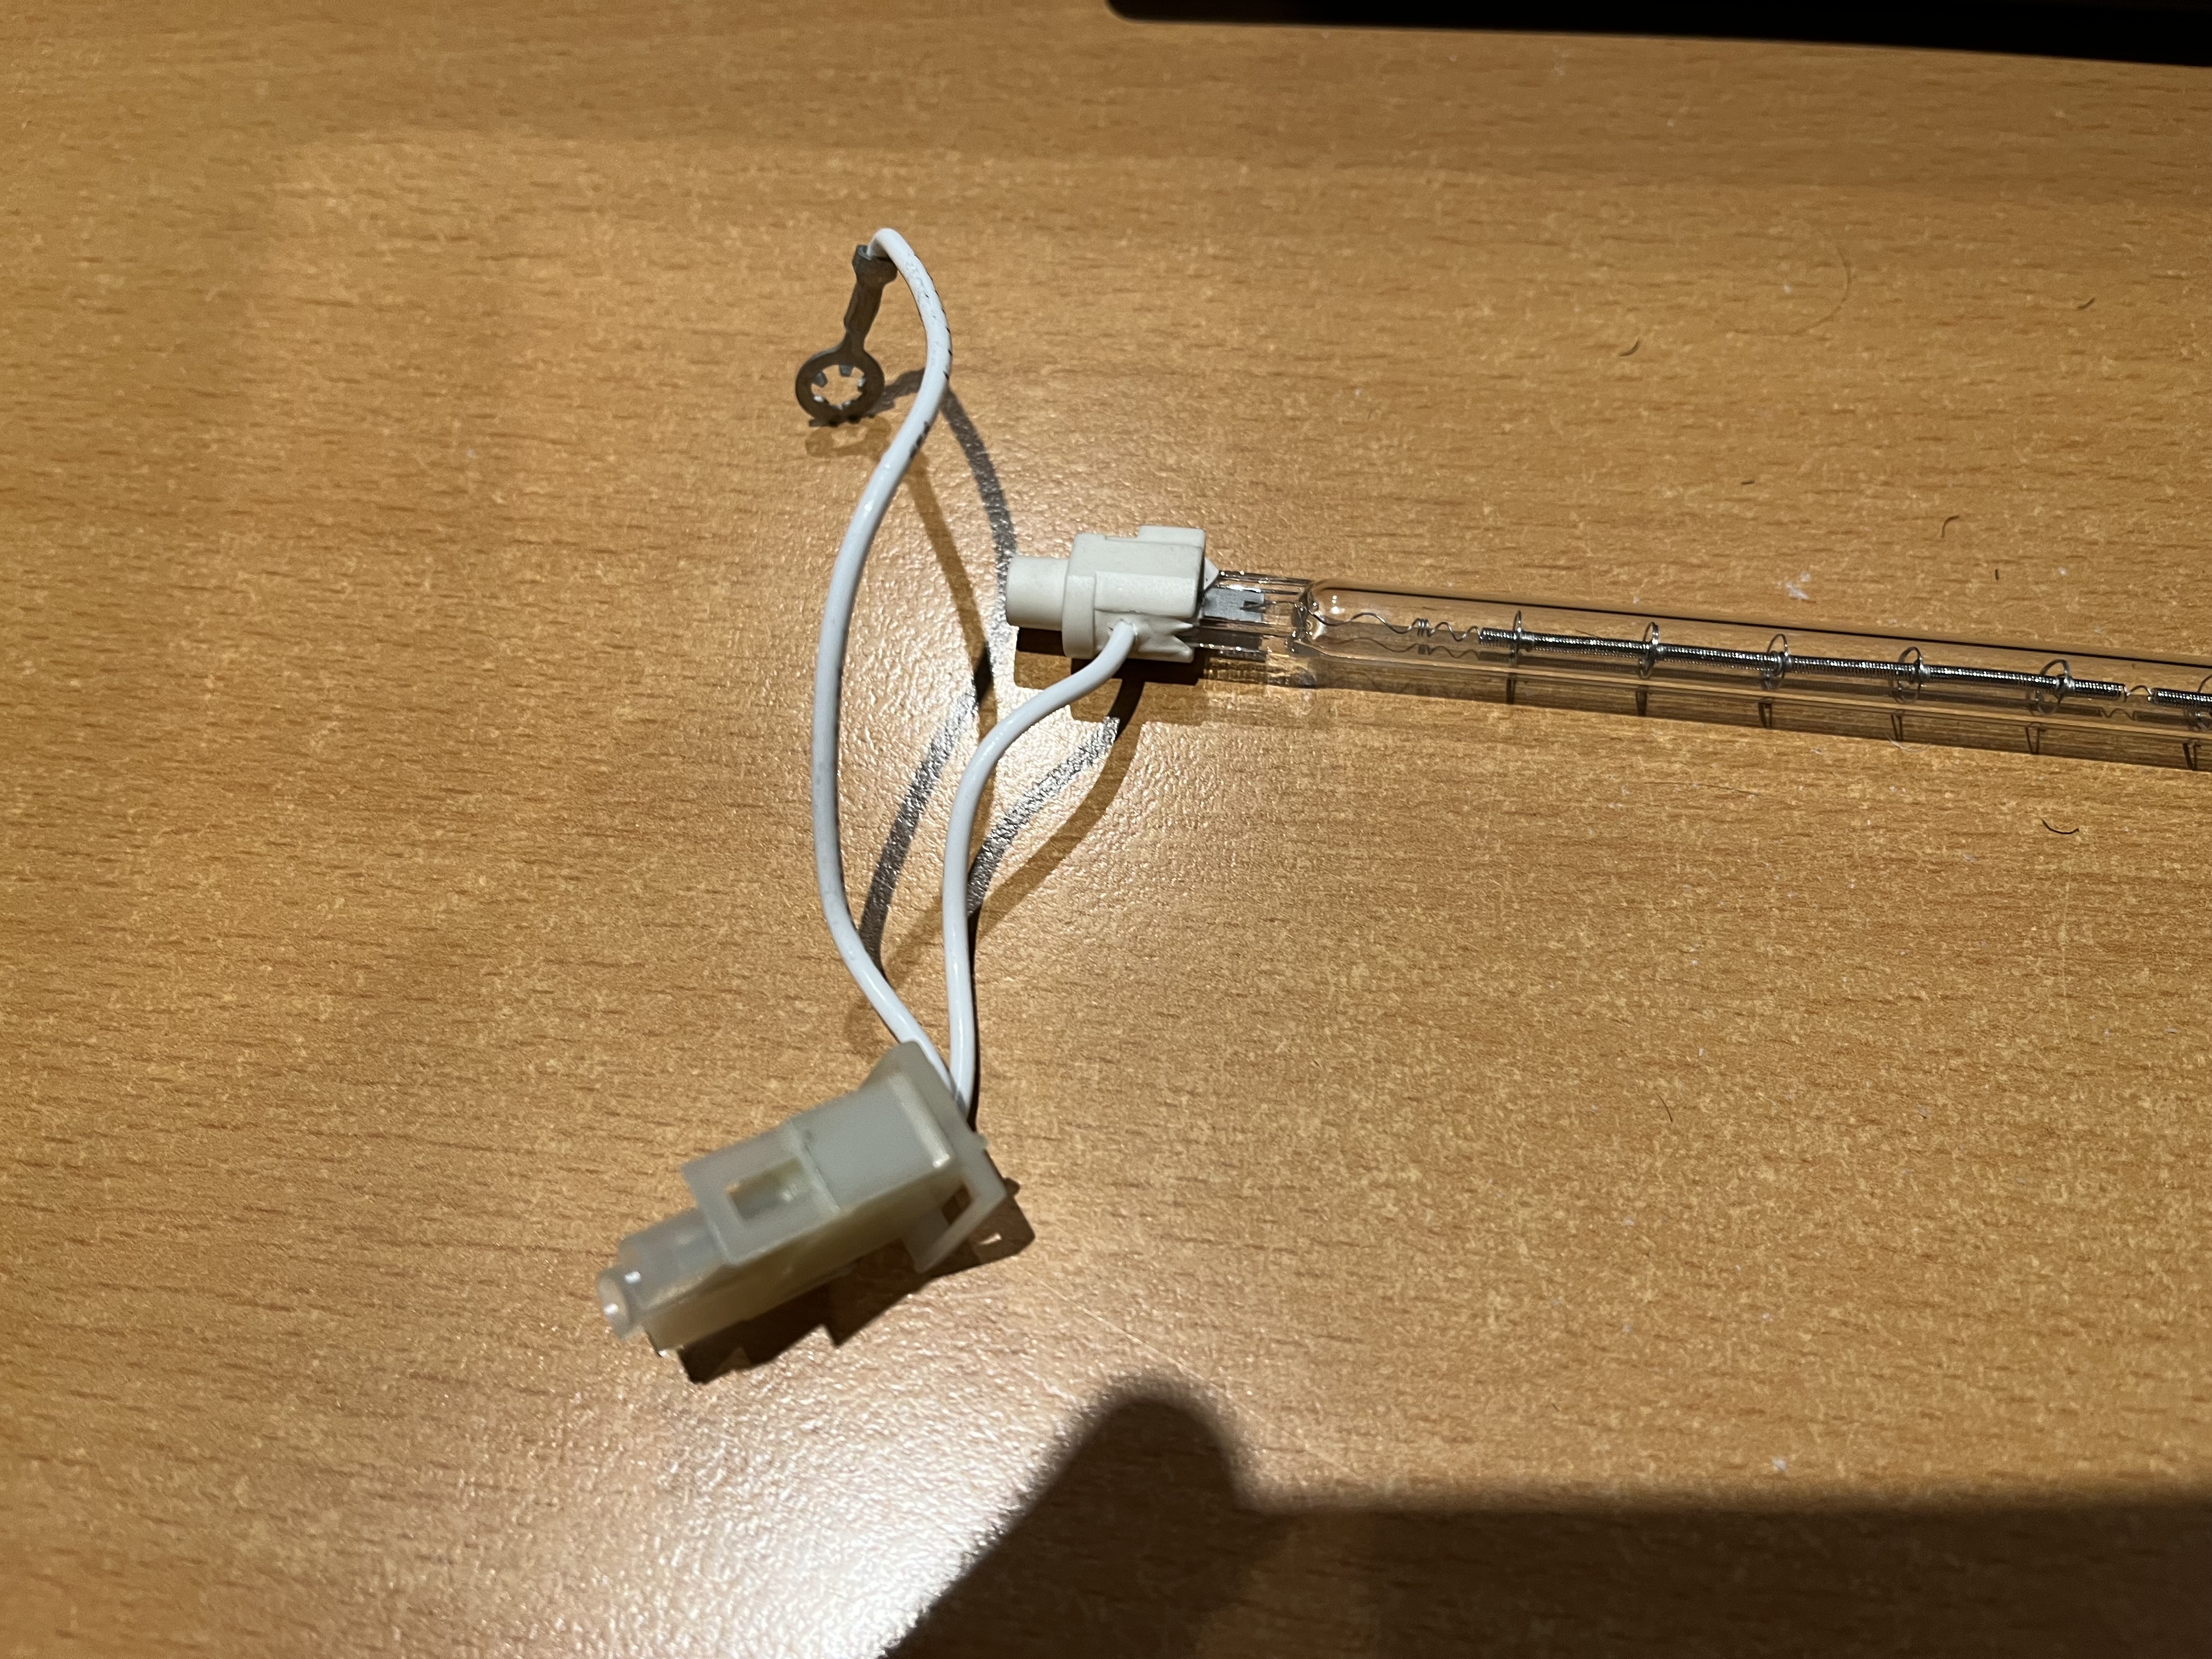
Title: Re: I destroyed a printer so you don't have to.
Post by: barcher174 on July 21, 2022, 06:42:21 PM
Post by: barcher174 on July 21, 2022, 06:42:21 PM
Thanks for putting this list together!
Title: Re: I destroyed a printer so you don't have to.
Post by: Scutboy on July 22, 2022, 08:42:08 AM
Post by: Scutboy on July 22, 2022, 08:42:08 AM
This is gold - thanks!
Title: Re: I destroyed a printer so you don't have to.
Post by: NeXTnewbe on July 22, 2022, 09:28:58 AM
Post by: NeXTnewbe on July 22, 2022, 09:28:58 AM
I found the site last week, and I got some of the parts too, but sadly the lamp Ushio UG1 240V 1100W is unavailable anywhere.
I also made the same mistake with the longer lamp; the Upper Fuser Roller for HP LaserJet II is of thinner aluminium; please have that in mind, but seems to fit too.
I also made the same mistake with the longer lamp; the Upper Fuser Roller for HP LaserJet II is of thinner aluminium; please have that in mind, but seems to fit too.
Title: Re: I destroyed a printer so you don't have to.
Post by: spitfire on July 22, 2022, 04:59:36 PM
Post by: spitfire on July 22, 2022, 04:59:36 PM
For reference the only other printer that I could find with the Canon LBP-UX engine is the "NEC-Mitsubishi Silentwriter 2 990". If anyone wants to order a replacement fuser unit ($100USD or so on ebay and such) we can find out if they really fit. The replacement fuser units may have a different lamp which can still be sourced.
FWIW I'm being overly descriptive in all my text here to make things searchable in the future.
FWIW I'm being overly descriptive in all my text here to make things searchable in the future.
Title: Re: I destroyed a printer so you don't have to.
Post by: Rob Blessin Black Hole on July 24, 2022, 10:54:34 PM
Post by: Rob Blessin Black Hole on July 24, 2022, 10:54:34 PM
Thanks for doing this much appreciated !
Title: Re: I destroyed a printer so you don't have to.
Post by: Rob Blessin Black Hole on July 28, 2022, 11:59:17 PM
Post by: Rob Blessin Black Hole on July 28, 2022, 11:59:17 PM
Hello Spitfire: So Mr. Pix was in town for a few days and we replaced the rollers on 4 printers. One actually takes the paper through and prints all black pages and I think this is due to the broken corona wire it is an easy to remove assembly. Hopefully swapping one out cures that probelem. There is a small slit by the exit tray and when your NeXT boots up if you see an orange glow that is a good sign. The other 3 unfortunately did not glow upon boot up and subsequently hang during the print process.
You mentioned a PP utility and yes I've been looking at the manual we have in the archives. Here http://www.nextcomputers.org/NeXTfiles/Docs/Hardware/NeXT_Laser_Printer_N2000/NeXT%20400%20DPI%20Laser%20Printer%20Complete_OCR.pdf chapter 2 ,
Questions : Is the fuser lamp ("fixing roller heater") burned out ? Any thoughts on where to find the coorect one ? I looked in Original USHIO fuser lamp ... ushio.com no joy.
Title: Re: I destroyed a printer so you don't have to.
Post by: Rob Blessin Black Hole on August 01, 2022, 05:21:29 PM
Post by: Rob Blessin Black Hole on August 01, 2022, 05:21:29 PM
This one looks really close for the lamp replacement https://morelectricheating.com/ushio10010-ushio-qih240-1000-s2-quartz-lamp-240v-1000w
Title: Re: I destroyed a printer so you don't have to.
Post by: Rob Blessin Black Hole on August 30, 2022, 01:16:22 AM
Post by: Rob Blessin Black Hole on August 30, 2022, 01:16:22 AM
Hello NeXT Community: I have been trying to simply get a working NeXT laser printer. I've succeeded in the past and usually an orange glow upon boot up is a good sign.
So my questions are if it does not glow and printer tester app indicates a problem with the fusing section .
What components are most likely the culprit in the fusing section ,
as my guess is no way all of these printers (as in 15 some in the original box) have burned out bulbs and I don't think we have located a worthy replacement for the bulb.
I've heard the thermister switch may be an issue,
Would a bad thermister switch prevent the bulb from lighting up during boot,
I recall a thread on this but have scoured the forum and coming up empty.
I'm making notes on all of these as some actually try to pull in paper then get the paper jam sp I'll try a
new in take roller to see what happens ..... I had one that actually took the paper all the way through and it printed solid black.
I'm humbled and before I start shuffling parts around and yes I'm looking at the manual , we may be able to
create a beyond replacing the intake roller guide.
Any help appreciated ,
PS Canon LBP-UX engine is the "NEC-Mitsubishi Silentwriter 2 990". If anyone wants to order a replacement fuser unit ($100USD or so on ebay and such), Spitfire if you can point me at this part , I'll give it a go for the community and BUY ONE :)
Title: Re: I destroyed a printer so you don't have to.
Post by: spitfire on August 30, 2022, 10:26:03 PM
Post by: spitfire on August 30, 2022, 10:26:03 PM
Hi Rob,
So I'm in the process of repairing my good printer. We've slowly partially disassembled the fuser section. I say we, as there's so many screws to keep track of it really ix a two man job. One for disassembling, one as safety/spotter.
Anyways, We're disassembling the fuser and replacing the thermo-switch and thermistor.
We've checked the fuser lamp and it has continuity, so it seems good. If you give me a week or two I'll finish that replacement up and see if it works. If a new thermo-switch and thermistor fail to correct the issue, then I'll suspect the problem is in the PSU or logic board.
As for a fuser unit an ebay search pulled this up immediately, $100USD buy it now:
https://www.ebay.com/itm/111786459736?hash=item1a06fe0258:g:-jMAAOSwVL1WDU7w&amdata=enc%3AAQAHAAAAwCVCZR4rIGCgW4ofMqDSGj2%2BncP25cAcfw5Yv%2BBoq5l84UWCrqQBxlg4PjVILTLUYXDeiQznhzsxqBfBV7iN5kLUG2i0upz20Ug%2BBuhY1XpPk8yP36KKaVJn4YGupnh09%2B6tbZo8aW4QR4vHt1YbRZHEcfi1SOvBF9MOzD4er70NZ6xgIxMexkyk8Plizxrqzo3sscZ%2BqTVLa3olkj7iHt8caSO8gDlsRFh4yXSedJPGtX%2BHBhIJ7%2B2%2FMA5U0DuPVw%3D%3D%7Ctkp%3ABk9SR9S10J7eYA
If you do purchase that, before testing it out take out the fuser lamp and either use gloves, or clean with alcohol before reinstalling. Grease from your hands will cause the lamp to fail quickly.
Also take photos of any markings. Better yet take detailed high res photos of the entire lamp, along with detailed photos of the fuser from all angles.
Title: Re: I destroyed a printer so you don't have to.
Post by: Rob Blessin Black Hole on August 31, 2022, 12:15:46 AM
Post by: Rob Blessin Black Hole on August 31, 2022, 12:15:46 AM
Hello Spitfire: Thank you , Dave gave me a great tip to manage screws , a stack of small Dixie cups and at each level fill the cup with screws, washers, etc. and stack the next cup on top repeat, this makes it easy to keep track of all of them and when it comes to reassembling the cups with parts are in perfect order .
I took a chance on this one for a Laserjet 2 as it was only
https://www.ebay.com/itm/111786459736
Order total: $69.91 :)
Order number: 05-09046-75606
HP LaserJet 2/2D/3/3D/SX Fuser Assembly - HP-RG1-0939
HP LaserJet 2/2D/3/3D/SX Fuser Assembly - HP-RG1-0939
You should get it by Sep 9.
I'm' hoping this fuser matches as the toner cartridges are hp laser jet 2, 3 compatible for the NeXT laser ought to be fun, I'll wear gloves to prevent screwing up the bulb lol. If this part works it will be gold .
Title: Re: I destroyed a printer so you don't have to.
Post by: spitfire on August 31, 2022, 03:32:54 PM
Post by: spitfire on August 31, 2022, 03:32:54 PM
That LJ2 part looks like it may work. Most of the LJ2 parts I've seen have a large plastic tab on the top of them which made me leery. Perhaps there are multiple fuser assembly versions? If we can find a common LJ2 part that works that would be great.
Dixie cups, that's an excellent idea.
Dixie cups, that's an excellent idea.
Title: Re: I destroyed a printer so you don't have to.
Post by: Scutboy on September 01, 2022, 08:26:45 AM
Post by: Scutboy on September 01, 2022, 08:26:45 AM
Since we're digging into old printers in this thread, does anyone have ideas/links for replacement parts for the original Apple Laserwriter? I know it's a Canon engine, but I have a couple that have pickup rollers and the separation rollers that have turned to goo.
So far I've not found anything correct, or cheap enough that I want to take a chance on them.
I do have a NeXT laser printer so this thread has already produced dividends!
So far I've not found anything correct, or cheap enough that I want to take a chance on them.
I do have a NeXT laser printer so this thread has already produced dividends!
Title: Re: I destroyed a printer so you don't have to.
Post by: spitfire on September 01, 2022, 04:29:12 PM
Post by: spitfire on September 01, 2022, 04:29:12 PM
A simple search leads to the Wikipedia page on the Apple LaserWriter.
"The LaserWriter used the same Canon CX printing engine as the HP LaserJet, and as a consequence early LaserWriters and LaserJets shared the same toner cartridges and paper trays"
So it uses a Canon LBP-CX engine. LJ1 parts should work in it.
"The LaserWriter used the same Canon CX printing engine as the HP LaserJet, and as a consequence early LaserWriters and LaserJets shared the same toner cartridges and paper trays"
So it uses a Canon LBP-CX engine. LJ1 parts should work in it.
Title: Re: I destroyed a printer so you don't have to.
Post by: Rob Blessin Black Hole on September 08, 2022, 07:55:56 PM
Post by: Rob Blessin Black Hole on September 08, 2022, 07:55:56 PM
Hello NeXT Community : I also found this to be useful an original HP Laserjet II and III Factory manual
https://diagramas.diagramasde.com/impresoras/HP%20LaserJet%20Classics%20II%20III.pdf There are a lot of similarities between these and NeXT Laser Printers shared parts and excellent component breakout diagrams with detailed cleaning materials and instructions. I like the how to pointers , lots of do's and dont's tips which help to avoid or prevent damage and extend the life of the printer. I'll see if we can upload this doc to our archives as web links always change. Best Regards Rob Blessin I'm proud of the fully refurbished working NeXT Laser Printer project that I just completed and even diagnosed misaligned paper causing the paper jam on the fly lol https://youtu.be/SBWiJkBsaj4
https://diagramas.diagramasde.com/impresoras/HP%20LaserJet%20Classics%20II%20III.pdf There are a lot of similarities between these and NeXT Laser Printers shared parts and excellent component breakout diagrams with detailed cleaning materials and instructions. I like the how to pointers , lots of do's and dont's tips which help to avoid or prevent damage and extend the life of the printer. I'll see if we can upload this doc to our archives as web links always change. Best Regards Rob Blessin I'm proud of the fully refurbished working NeXT Laser Printer project that I just completed and even diagnosed misaligned paper causing the paper jam on the fly lol https://youtu.be/SBWiJkBsaj4
Title: Re: I destroyed a printer so you don't have to.
Post by: spitfire on September 11, 2022, 06:03:36 PM
Post by: spitfire on September 11, 2022, 06:03:36 PM
Sigh.
So I finally had time to put my printer back together with new thermoswitch and thermistor.
On bootup the lamp lit up and I saw a warm glow out the exit slot.
It printed! .... twice. After printing a test page, and a few pages of another document it ran out of paper. The printer now refuses to print, doesn't warm up the lamp and "PP" reports No errors.
Sigh.
Lets see how Rob gets on with the LJII assembly. If that works out, I'll just order one of those and replace the whole thing as one unit.
Title: Re: I destroyed a printer so you don't have to.
Post by: crimsonRE on October 30, 2022, 06:22:13 AM
Post by: crimsonRE on October 30, 2022, 06:22:13 AM
Thanks for investing so much in the attempt, though, whatever the outcome...
Title: Re: I destroyed a printer so you don't have to.
Post by: Rob Blessin Black Hole on October 30, 2022, 10:57:23 PM
Post by: Rob Blessin Black Hole on October 30, 2022, 10:57:23 PM
Hello Spitfire: It sounds like you are so close. On cold start boot does it find the printer in software? if you are not sure check usr/adm/messages Does it glow on boot? We can try and trick it with ye old hot swap printer foo, if you have another NeXT laser printer that gives errors like paper jam and is found on boot but no glow , login with this printer surrogate, send a test print or 2, when it says printer jam , pop the cover open, which I think sets it at rest and leave it open, unplug and disconnect printer cable.... then hot swap to your recently working printer you just refurbished with its lid open and paper and ink cartridge, plug it in
printer cable then power cable,,,,, shut the cover , clear the paper jam error window not the que and see if it now finds the refurbished printer and with any luck prints the test pages in the printer que window like Frankenstein adding the juice lol.
It is worth a shot.
I would also try it on a fresh install of the operating system to try and narrow it down to a hardware or software issue as hardware sounds repaired but software is tweaking.
Title: Re: I destroyed a printer so you don't have to.
Post by: paolo.bertolo on March 04, 2023, 11:22:56 PM
Post by: paolo.bertolo on March 04, 2023, 11:22:56 PM
Hi Guys,
Any update on this interesting thread?
I recently scored a NeXT Laser Printer, it arrived in rather good cosmetic conditions. It must have been some department printer or whatever, as there's a clear sign of a peeled identification label.
So, it probably has some serious mileage on it.
Anyhow, according to the seller, both the pick up roller and the delivery rollers are gone, but otherwise it should work. When it turns up, the lamp is clearly visible as it glows.
However, there's no toner. So, I'm now waiting for a NOS unit, but after some 20+ years I don't know what to expect.
Interesting thing, though, according to this excellent video it should be possible to refurbish the toner unit.
Has anybody ever tried that?
https://www.youtube.com/watch?v=yhqkPplgPaw
Title: Re: I destroyed a printer so you don't have to.
Post by: paolo.bertolo on March 25, 2023, 07:24:05 AM
Post by: paolo.bertolo on March 25, 2023, 07:24:05 AM
So, I received a toner cartdrige and finally started testing the printer.
Immediately bad news: I could not print a single page, the printer throwing generic hardware failure errors (according to the utility PP).
Initially I thought about mechanical problems, so I dismantled and cleaned the whole mechanical section, but to no avail.
Eventually, I decided to inspect the digital board and... Boom! Many through hole caps are totally busted, god only knows since how long.
So, recapping be it.
However, while reading the service manual, I got cautious about one part: shorting the laser connector J202 once it has been unplugged for preventing damage from static electricity. While repairing minidisc and CD readers, I have found the same precaution to apply, but in that case it was a matter of shorting to connectors with a little solder.
Here the manual indicates a dedicated piece of hardware, which of course I do not have.
I must admit it's not fully clear to me if the part to protect is on the board or downstream the cabling or both.
Would you have any suggestion?
Title: Re: I destroyed a printer so you don't have to.
Post by: paolo.bertolo on April 02, 2023, 09:57:00 AM
Post by: paolo.bertolo on April 02, 2023, 09:57:00 AM
While consulting the printer service manual, I noticed that the document appendix is truncated at page A-4 and some key pages are missing.
Does anyone know if there's the faintest chance to retrieve them?
Does anyone know if there's the faintest chance to retrieve them?
Title: Re: I destroyed a printer so you don't have to.
Post by: paolo.bertolo on April 03, 2023, 07:32:26 AM
Post by: paolo.bertolo on April 03, 2023, 07:32:26 AM
For those (apparently, not many...) who are following this thread, I have recapped the main DC board.
Now the printer is giving some sign of life, but it's still unable to start a printing job.
PP still giving hardware failure message, the printer monitor is complaining there's no paper in the tray or that the printer cover is open, even if it's not.
I need to check the other boards...
Now the printer is giving some sign of life, but it's still unable to start a printing job.
PP still giving hardware failure message, the printer monitor is complaining there's no paper in the tray or that the printer cover is open, even if it's not.
I need to check the other boards...
Title: Re: I destroyed a printer so you don't have to.
Post by: paolo.bertolo on May 01, 2023, 06:56:29 AM
Post by: paolo.bertolo on May 01, 2023, 06:56:29 AM
So, I could finally get the first (and so far sole and last) page printed.
After recapping all the boards, the unit came back to life (still something weird going on, though...).
It's hooked to a Cube 030.
During the booting sequence, at the very end, just before the login prompt, the unit is powered up, the main motor spins for 1 second (making sometimes very clunky and scary noises, which is not a good sign...).
Once you are logged in, the printer takes some 2 minutes to warm up. At that point, I can send something to print, means the printer status is "ready", which means that the fuser is at the right temperature.
First issue: the default state of the printer is "paused", and it doesn't wake up unless I open the Print Manager and push the button "Continue". Shouldn't be like that, I assume there's still something wrong... (Note: if I boot from MO with NS 1.0, the default status of the printer is NOT paused, so it could be some software thing...)
Anyhow, after sending something to the printer, it takes some time before the job is ready.
Once it's ready, the printer tries to load the paper. If it fails (in my case, it's 100% of the cases), it throws the dreary "Paper jam" error (which is triggered when there's too much delay from the start of the print job and the moment the paper is reaching the exit sensor) and from there on it's impossible to recover the situation, I have to restart the whole machine. Every time. Which surely is not normal either...
Main issue: the pick up roller. Or, better, in my case the combination of pick up roller and paper tray.
I have to say I'm not sure my printer is indeed 100% in original conditions, as the previous owner mentioned some attempts he made for fixing the faulty paper feed section.
So it could be that the pick up roller is no longer original.
Anyhow, I dismantled it, the rubber roller is in fact a chunky plastic roller sheathed by some 3 mm thick rubber sleeve.
To my eyes and to the touch, I would say the rubber sleeve is still sufficiently grippy. Anyhow, I removed the sheath, cleaned carefully with slightly abrasive "magic eraser", then remounted rotated some 90 deg compared to original position.
Better, but still unable to load the paper.
My attention then moved to the paper tray, which in turn is not exactly in pristine condition.
I could see that there's a pad in the front of the tray that has been replaced by something grippy and not at the right level, but my understanding is that - on contrary - it should be as frictionless as possible.
So, bottom line, by playing with the pad and by manually pushing a sheet through, I could get - by sheer chance - at least one page printed.
Sufficient for having confirmation that the rest of the printer is somehow healthy, which is already something...
Anyhow, I would appreciate if someone could share pictures of the original roller and the front pad in the paper tray.
Thanks!
Title: Re: I destroyed a printer so you don't have to.
Post by: paolo.bertolo on May 02, 2023, 07:03:24 AM
Post by: paolo.bertolo on May 02, 2023, 07:03:24 AM
I could get more pages printed, the output quality is not bad, the pages are still a little dirty, but the more I print, the cleaner they get.
Anyhow, the major issue I still have is that the paper is getting jammed 98% of the times, I guess the pick up roller needs to be replaced.
I have seen that spare part RA1-3851-0000 is suggested, but the roller I have in my unit is definitely different, it has a plastic core and a rubber sheath, similar to the one appearing in the service manual. The shape of the cam also looks somehow different.
Is it confirmed that RA1-3851 is fully compatible?
Second point for which I would need some help: is there a pragmatic way to recover from paper jam error? So far the only way I could figure out is to reboot the main unit.
Thanks in advance for support!
Title: Re: I destroyed a printer so you don't have to.
Post by: paolo.bertolo on May 13, 2023, 05:07:51 AM
Post by: paolo.bertolo on May 13, 2023, 05:07:51 AM
So, eventually I managed to bring back to life my Laser Printer, it now works like a charm, without missing a beat.
The wiper blade in the cartridge is probably deteriorated, so there are still two thin horizontal lines in the printouts, but it's more than acceptable.
Concerning the pick up roller, I replaced the rubber sleeve (probably not original) with some ultra cheap silicone rubber bands.
They are extremely grippy, durable and temperature resistant.
Paper feeding works flawlessly, both from the cassette and from the manual feeder.
Title: Re: I destroyed a printer so you don't have to.
Post by: paolo.bertolo on May 15, 2023, 07:57:46 AM
Post by: paolo.bertolo on May 15, 2023, 07:57:46 AM
Nothing new or particularly exciting, but - just in case - here's a short video showing the printer at work.
https://www.youtube.com/watch?v=IiNabliKIlc
https://www.youtube.com/watch?v=IiNabliKIlc
Title: Re: I destroyed a printer so you don't have to.
Post by: paolo.bertolo on June 21, 2023, 08:17:40 AM
Post by: paolo.bertolo on June 21, 2023, 08:17:40 AM
Simple question (or maybe): is there any possibility to print alternate pages (even/odd) in such a way to get a front / back print in two passes?
Is there any specific printing utility a little more flexible than the default one?
Thanks in advance for feedback
Is there any specific printing utility a little more flexible than the default one?
Thanks in advance for feedback
Title: Re: I destroyed a printer so you don't have to.
Post by: Rob Blessin Black Hole on November 03, 2023, 06:16:06 PM
Post by: Rob Blessin Black Hole on November 03, 2023, 06:16:06 PM
Hello NeXT Community: I'm having one of those days in NeXT hardware repair that I needed to take a break from it all.
The equipment is aging as am I ,
The latest NeXT Laser printer , I had it working right ,with new intake roller , cleaned it up ,
then it started bunching up the paper , had not seen this one before , the new intake roller basically crumpled it up taking the whole sheet in,
it would work fine hand feeding single sheets and spitting them out the other side with nice prints.
So I removed the intake roller assembly ,I can do it in the dark now .
I had fixed the issue of it also not recognizing the intake paper tray with paper in it,
as there is a spring that holds the tension that had come loose so it would not engage the contact for the paper and tray sensor located lower right on base of printer.
Setting the spring back into the slot so it had a return spring action to it resolved it. I also noticed some of the assemblies have different style springs .... 3 coils verse 4 coils
I swap in a new assembly their are 2 very small parts , aluminum non magnetic that make contact with a brass roller and this starts the process of creating static on the paper. https://www.nextcomputers.org/NeXTfiles/Docs/Hardware/NeXT_Laser_Printer_N2000/NeXT_Laser_Printer_Service.pdf figure 5 on feeder roller assembly instructions:
The Little part drops directly down into the gears, seriously the last screw holding it in bumped it into the void aaaaarg.
I disassemble the feeder apparatus once more and I can see the damn thing , shaking no go, needle nose nope' Oh it gets worse as it disappears under the next set of gears, enter my stupidity at this point.
So there is a part with nylon thread , I know not to mess with that ever, yep it came loose, I think the needle nose clipped it so now I'm screwed six ways to Sunday.
I'm thinking myself there is no way in hell 20+ NeXT laser printers, I have here all have burned out bulbs. As this one, the one I just screwed up actually lit up orange.
I'm going to try swapping the top assembly with the bulb that lights up into another printer by referring to the manual. Some where in chapter 6
https://www.nextcomputers.org/NeXTfiles/Docs/Hardware/NeXT_Laser_Printer_N2000/NeXT%20400%20DPI%20Laser%20Printer%20Complete_OCR.pdf
It is now personal with this printer but it has screwed me on doing my other NeXT hardware projects for today which in turn creates a domino effect.
I'll work through the weekend in silence finally, getting stuff done for my customers as the hardware Cubes and Stations will be much easier.
I am multitasking as well with several systems set up ,
installing software images on sd's and my latest round of ZULU scsi cards have arrived.
UPDATE on the Printer: Well 4 hours later and with help of a surrogate printer and the manual , I was able to check and recheck where all the screws and parts went and the order to reassemble successfully . Some good new she powers up and lights up and starts to take he paper in but it uniquely folds it upwards rather than send it through the processing assembly . Enough for today, my NeXT move is to try a completely different feeder assembly with it's own new intake roller and drop it in , I've got this if it still bunches up then my guess is gearing alignment or the orientation of the new intake printer roller and side pieces as they are oblong , I currently have all 3 aligned but maybe the 2 end pieces may need to be opposing the center piece stay tuned. Try try again....now I'm comfortable with an almost complete tear down of the NeXT laser printer , so I learned something today ....
############### Comment section , to follow as the Black Hole Turns lol personal drama and dilemmas general bitching below #######
So first is my left hip is so painful; I can hardly get from my bed to the bathroom some days, I'm trying I like to work .
The frustration for me mainly is my left hip was so damaged by MRSA , it collapsed the femoral head which means , I'm walking working on a fractured hip with no way to support it as I've tried with a brace.
I've been to at least a dozen appointments, MRI's, XRays and told by 3 orthopedic Dr's with a lot of experience it is a no go from them. Meaning they have passed on doing my hip replacement surgery , even though it was cleared by a infectious disease Dr this week.
Anticipating a cluster f$#% , fortunately, I kept the best orthopedic Dr. in the state Dr. Hug , yep that is his real name in my hip pocket and the appointment for December 7 still stands.
I am assured today by his nurse , he will be able to handle any potential complications should they arise with my hip and joint replacement surgery.
However , he probably won't be able to have time to do the surgery until late March because he is in high demand.
That is why I tried t find other Orthopedic Dr's that would have been able to do this in a matter of weeks, so it was disappointing. Now normally I would be prescribed pain killers and arthritis meds like Embrel to help with pain management. The pain killers apparently are out as my primary care Dr is hesitant to prescribe anything beyond naproxen, ibuprofen and Tylenol these days because of my sleep apnia /asthma and my arthritis Dr won't prescribe enbrel because my immune system has been hammered by MRSA and antibiotics.
My walker arrived today which makes it easier to move around the house and get to the NeXT equipment as my most recent helper Tom is MIA . Tom suffers from aging and is recovering from eye surgery lol
I'm considering ordering a tiny Violin trophy from Temu lol .36 Cents to help restore my confidence and honor , I know I'm good at this stuff it is just one of those days. On a real positive note I have the house back to myself . So no more constant interruptions from Crazy roommates in their bad relationship which ended last Friday with her basically breaking in here taking a sledge hammer to his bedroom door. Then ransacking the room while I was on the phone with 911 and I found the restraining order paper work which helped a lot. Lisa was uber pissed at Todd as he took another girl to Guns and Roses.
I'm not making any of this stuff up and man bro is seriously motivated now, moving his stuff out daily under the cover of darkness finally.
I feel for the people, Todd is moving in with as I don't know if they are aware that he has 3 junker cars, 2 work trucks, one not working and a big trailer. Also half a garage of tools and crap, hey I'll have my garage back and 2 additional rooms of stuff like 3 fish tanks, oh add a shed and my old van full of more of his hoarder crap and no more excuses about him / her not being able to pay rent or any bills. He started this move in July by the way last time I received any rent as well but he promises to do work on the house in the future, we shall see .... as for Crazy Lisa aka sledge hammer nelly, where about s unknown, I would not be surprised if she pop's out from behind a bush ambushing him lol she is a vet and sneaky. I don't want to know, not my circus not my monkeys, I think she drove them crazy at the jail as she was released the next day and all records of the incident mysteriously vanished but I did here she was kicked out of the Catholic Charities Homeless shelter so probably at a motel 6 with tweakers until she figures out where Todd moved to lol. I'm off to the post office to mail small packages then back to work the evening on the NeXT printer and many other projects. Thank you I have that off my chest, it is therapeutic for me and for those of us burdened with working on our beloved vintage hardware in spite of the environment , peace out. Rob
###################
Title: Re: I destroyed a printer so you don't have to.
Post by: paolo.bertolo on November 04, 2023, 03:44:34 AM
Post by: paolo.bertolo on November 04, 2023, 03:44:34 AM
By chance, today my printer went on strike, too.
I was in a rush for printing something, the printer ran out of paper (for real), I tried to feed some paper on the fly, but then it just stopped working at all.
I restarted the printer a few times, to no avail.
Eventually, though, just as I was just about to start dismantling the damn thing all over again, it came out of strike.
As for the feeder, it's indeed the most delicate part of the printer, light bulb aside. In fact, it was factory aligned, so in principle never ever touch it.
By the way, it still wonders me the fact that I am writing these lines on a machine with 4096 times the memory and god-only-knows how much cpu power more than the 030 cube driving my printer and that still I get seriously disappointed if something built some 35 years ago doesn't work as factory new.
I would have liked to have aged as gracefully as the NeXTComputer and the Laser Printer I play around with...
Take it easy, and all the best with your hip.
Title: Re: I destroyed a printer so you don't have to.
Post by: Rob Blessin Black Hole on November 05, 2023, 09:09:38 PM
Post by: Rob Blessin Black Hole on November 05, 2023, 09:09:38 PM
Hello Paolo: I read back through your thread messages here and last night I disassembled and reassembled the feeder assembly and horrendous clicking noises on power up. Like you experienced :)
It is frustrating because you can't open the printer or remove the lid and activate the lid sensor switch to see in and identify the source noise. My guess is the gears are not in synch and this is probably my fault ,
I'm about 30 hours in to diagnosing this thing, at least 6 tear downs and rebuilds all carefully and fortunately,
I have a stack of NeXT laser parts printers.
I think the clicking noises after studying the manual probably has to do with the clutch alignment.
As my guess is the factory fine tuned the clutch assembly to match the gearing for each printer and it appears the made slight modifications to the assemblies in different revs.
I was hoping a simple feeder assembly swap would resolve the paper bunching issue.
As the original feeder assembly lacked spring or give so the paper simply hits a metal wall .
The replacement assembly does have spring however creates horrendous clicking noises and still bunches , the gears may differ just enough from earlier to later models. Reminds me of the throw out bearing grinding in my 61 Karmann Ghia because the 1650CC engine and transmission differ just enough to cause an issue in first gear.
The section above has the latching mechanism also had a broken latch on one side (most likely previous owner printer jam deck slam), so I swapped it out by doing so I may have misaligned it just enough reassembling it ,
we are talking millimeters of tolerance here causing front end paper jam bunching, maybe I should try using a spark plug gap tool.
The new intake roller is working like a champ, it pulls in the full sheet of paper but it crumples it up never making past step1
and I have actually had successful manual feed prints, so possibly the tray I'll try a new old stock intake tray.
I don't even want to get started as to how annoying it is to have the 2 small aluminum parts drop into the gears , non magnetic so magnetised screw driver retrieval is out.
It is literally the last 2 screws when it happens it royally sucks
as does dropping 1 of 3 cover screws dropping into the damn gears, I've found setting a sheet of paper in their works most of the time to catch them.
The tip says shake the printer upside down lol if this happens but murphies law the part you need to shake loose will fall further into the assembly 50% of the time and I have a fractured hip bone lol .
I only wish I had a 24 hour cam on my efforts that I would be able to show to my customers waiting on their cubes and stations,
but I'm trying to fix this printer for an interactive museum display in Washington DC.
I had sent them a perfectly restored one but the damn ink cartridge exploded all inside the printer probably due to the difference in cargo hold pressure changes or no pressure, just drop testing it by shipper.
I usually ship the ink cartridge for just this reason outside of the printer again murphies laws on this one.
I'm having one more go at this printer as we speak an if it doesn't go. It is being put on the bench for few days as I have so many pending projects,
On a plus note my new red hot rod walker lol makes it easier for me to hobble around the house / shop and has a seat that works well for transporting cubes and monitors. Also it is nice to have peace and quiet restored to my living and working environment as my constantly arguing roommates are gone moved out finally! I may have to call 1 800 got junk because Todd has left a dumpster of stuff and I'm not sure he will finish up cleaning it out.
It was so much easier when all of this NeXT equipment used to just work and I was physically healthy.
Thank you for the emotional support as you know working on the vintage hardware with problems IMHO causes emotional repairman PTSD trauma lol I know I am not alone.
The screw I was searching for an hour last night just fell out of the printer when I put the paper feeder tray in lol however it still makes noises and jams.
I'll try one more time tonight, like Thomas Alva Edison , by try 1001 the light bulb worked!
Paper Jam issue , I think it is the sensors and timing on the software combined with residual print jobs in the nextstep software usr/printer/spool swap disk pool , the amount of ram for theday and our patience causing us to just reboot the system as computer things are so much faster now, doesnt mean they work any better though lol .
I'm going with a small image on sd card as the old scsi drives noises are a form of torture lol
and using a dedicated NeXTstation for the print repair and server testing , keeps screwing up other NeXT systems out of the equation .
In theory when clearing the paper jam works leave the lid open, remove the offending paper
Before closing the lid ,clear all print jobs from the print manager.app cue ,
"clear the paper has jammed in your printer" pop up window (just press X in the corner to make it go away and then close the printer cover ,
With any luck you should hear the printer make a start up noise...
then try a new fresh test print from the printer manager app.
Open the cue in printmanager.app as well to see any still pending jobs as I say clear those out before setting the lid back down after clearing the jam. I do have new old stock NeXT Laser Printer intake rollers for $15 and new old stock intake Trays for $20 and exit trays for $15, NeXT Logo Laser Printer Cables $20 for forum members.
If that fails to work yep power off and back up and it is OK to curse lol.
Don't slam the lid down on the printer as the plastic latching mechanism has become brittle with age when hearing the paper jam error , you can change the language of the voice of the printer jam error as well lol the original siri. A broken NeXT laser printer latching mechanism opens a whole new can of worms lol trust me , you may need a rubber room to decompress after working on repairing the NeXT laser printer or old malfunctioning computer hardware in general. Remember if you are frustrated take a break from it and try again another day.
Title: Re: I destroyed a printer so you don't have to.
Post by: paolo.bertolo on November 26, 2023, 02:47:45 AM
Post by: paolo.bertolo on November 26, 2023, 02:47:45 AM
Hi guys,
So, apparently my printer too has decided to abandon me.
Not using it intensively (what for?), last week I printed a few pages, then switched everything off normally.
At the next restart, though, it got simply dead quiet. Not even the relay in the AC power brick gets triggered.
Now, in fact, if I disassemble the whole thing, reset it, put it back together, the relay closes and then immediately opens up again.
So, I would say there must be something that got busted and is now shorting.
At close visual inspection of each board and component, though, everything looks fine.
The lamp seems also to be OK.
Would you have any suggestion where to start from?
Title: Re: I destroyed a printer so you don't have to.
Post by: Rob Blessin Black Hole on November 26, 2023, 04:34:01 AM
Post by: Rob Blessin Black Hole on November 26, 2023, 04:34:01 AM
Hello Paolo: First to make sure it is a printer issue , if you have another NeXT see if the same thing happens on a NeXT with an original SCSI hard drive as I'm wondering if some of the Printer reset issues are related the ZULU or SCSI2SD images and their interface with NeXT software , printer drivers and timings etc......
Another troubleshooting option , I have plenty of NeXT Laser Printer OEM parts , I don't know if you still have the molds for NeXT 4000 Monitor feet but may be we can work a trade if you do.
I have a new old stock intake printer roller , Paolo, I admire your ingenuity on modifying the original roller but if you would like a factory replacement I have one fo $15 also I'm wondering if it may be your NeXT printer cable I have a lot of these and would like to see them put to good use Used $10, or new old stock $20.
We both both have been tearing these NeXT Laser printers down and rebuilding them or at least trying to with many others and it is kind of fun and a challenge.I just watched videos of someone restoring a 1958 Rolex watch lol the NeXT Laser Printer is much easier lol .
Check to make sure those 2 metal pieces one the right side of the feeder (Intake) roller assembly
are making contact as this starts the electrostatic process https://www.nextcomputers.org/NeXTfiles/Docs/Hardware/NeXT_Laser_Printer_N2000/NeXT_Laser_Printer_Service.pdf pictured in figure 5
Along the left side of the front intake paper assembly, cover latching mechanism and cover sensor is a little ribbon connector make sure it is plugged into the PCB board,
If you remove that assemble underneath it are 3 relay switches , these detect if there is a paper tray and the manual or automated feed all dependant on a few seconds of timings . If the roller doesn't feed the paper through it signals paper jam. So make sure they all click.
My issue with the printer is a horrendous clicking sound when it powers up and my guess is looking through the manual it refers to a clutch with a special factory tool , The NeXT / Canon factory Laser Printer Manual I scanned awhile back is proving to be gold https://www.nextcomputers.org/NeXTfiles/Docs/Hardware/NeXT_Laser_Printer_N2000/NeXT%20400%20DPI%20Laser%20Printer%20Complete_OCR.pdf
The Electrical System is thoroughly covered in Chapter 2 and The Mechanical in Chapter 3 step by step diagrams.
If it just was working as I say if you have a second NeXT see if it jump starts the printer ,
#### War Story ,I know when we had a full time NeXT laser printer for the Network at Alembic, we had a headless NeXTstation for the dedicated print server connected to the NeXT laser accessed over the network and usually when it went south , it was at the worst possible time. Faxing was big back then so I found on an inbound fax you could send it to PDF then edit the postscript with the Tailor post script editor app, which was earth shattering back then as I filled the forms out in Text and faxed them back blowing many peoples minds back then.
##### I also know customers that day in day out printed up to 2000 page documents on a bank of NeXT Laser Printers, I would have to see it to believe it as a chorus of your paper is jammed inyour printer no doubt ensued at some point.
##### We moved over to an HP 4MP Post script printer with a Jet Direct Card and that solved a lot of issues ,no more more having to reboot the print server , the server and the clients but it was neat when everything NeXT just worked.
>>>>>>>>>
I've been going through reading this entire document NeXT Laser factory service manual , this may help you....https://www.nextcomputers.org/NeXTfiles/Docs/Hardware/NeXT_Laser_Printer_N2000/NeXT%20400%20DPI%20Laser%20Printer%20Complete_OCR.pdf page 2-28 and figure 2-41 talks about a protective system for over current that automatically shuts off the power supply to prevent damage if to much current flows through then it says to power it off .
I know there is that little NeXT Printer utility on one of the Peanuts CD's for powering the printer on and off from the OS, which I might try to see if it will simply reset the Laser Printer after a paper jam , in effect trick the printer into powering up and trying to intake the paper again without having to reboot. Also this is separate from the NeXT printer manager software.
I also found the NeXT laser Printers have a fuse , located by removing the ozone filter and fan :)
I would check the power cable as well , I hope it is something simple .... I'll try and help . I
For my printer issue... I'm also trying to see if there is something like a top dead center mark on the gears for alignment like in an engine .
I think before disassembly next time I'll make a red alignent mark on the gears before removing the feeder assembly (intake roller) .
To try and trouble shoot this noisy sound and it to see if I can get it to align I may try rotating it 45 degrees at a time to see if the noise gets better or worse, dial it in as nothing in the manual points how to just referencing a "special tool"lol .
The frustrating part with this Laser Printer is I had everything working perfectly and the very last deck lid screw fell into the gears lol murphies laws.
I now set a simple sheet of paper inside the printer so if the deck lid screw drops from the magnetic screw driver , the paper catches it and it doesn't disappear in the gears. At first I thought the noise I'm describing might have been a screw in the gears lol but no it is definitely gear alignment.
Stay tuned as I had another NeXT printer come in the original box and I'm hoping it will simply be an intake roller replacement.
#######
It is cold here with about a foot of snow on the ground so I'll be working on more NeXT projects all week.
Hopefully my assistant Tom will be able to help as it makes it so much easier for me to keep pace with all of this holiday NeXT madness lol. Normally we have Black Friday shopping event, this year in the states a lot of the stores we're very empty so a lot of merchandise is piled high in the stores and amazing deals on electronics will probably happen.
The economic problem is prices for everything like food , utilities, rent, property value and mortgage interest rates, cost of health care and insurance and people with heavy credit card debt and interest, people are leveraged and stressed every where and many are priced out of holiday shopping....
I've been lucky enough to remain in a frugal lifestyle, paid down my debt and miraculously covered the hospital expenses, I also try and remain fair on my prices for everyone , thank you all for your support and I hope all is well with your friends and family
I'll never get rich doing this NeXT stuff and don't need to be as I'm happy doing it and who would hire a 60 year old vintage computer specialist with multiple health care issues. So it is a good thing I hired myself to continue carrying the NeXT torch awhile back and against all odds have made it work.
#### End of rant jibberish lol
Oh and my hobby is tracking the Powerball with statistics and code breaking , I have to put the good old NeXT's to work with Mathematica and Improv and when you hear someone some day in Fort Collins wins big, it has to be me lol, I'm trying to manifest a win , according to tic toc social media advice .....well that would be me, ha....
It is funny CNN says we broke a record today of 9.8 Billion in sales for Black Friday, conspiracy theory of sponsors perhaps influencing the news but Tic Toc says something else and I honestly believe the folks showing video of empty Black Friday parking lots Walmart, Kohl's and Best Buys piled high with unsold merchandise from yesterday,
I know here in Fort Collins as it was 10 degrees and a foot of snow not much Black Friday shopping was going on lol Cyber Monday is easier. Link to my NeXT eBay store https://www.ebay.com/str/blackholeinccomputerpowwownext , if you want to learn all about NeXT , I have an Excellent book / gift Inside NeXT available here https://www.ebay.com/itm/285488380132 Happy holidays !
Title: Re: I destroyed a printer so you don't have to.
Post by: paolo.bertolo on November 27, 2023, 06:49:46 AM
Post by: paolo.bertolo on November 27, 2023, 06:49:46 AM
Hi Rob,
Thanks for the very detailed reply to my generic inquiry, it's very kind of you, I appreciate it.
I spent the whole afternoon trying to figure out the root cause of this sudden death. To no avail.
Unfortunately, I don't have at hand my second NeXT system, which is temporarily stored some 12000 km away from where I live now. But I would rather have a second printer (which I don't), for narrowing down the defective section.
However, I have swapped motherboard with a spare and I have also tried to boot the system from a different OS and start up device. No effect.
There seems to be some negotiation taking place in the boot sequence, but the printer just doesn't wake up.
I have thoroughly inspected all the recently recapped boards and they do look fine to me. I also tried to desolder some recently replaced capacitor just to check if some super fast degradation occurred. They are still perfect.
So far the only fact I know is that the relay (which I have tested as OK) is not closing when the main unit is supposed to be sending the "wake up" signal.
I attached a logic analyzer to the interface, I could record some activity, but I am afraid attempting some reverse engineering is beyond my reach without knowing what is what in terms of pinout and expected values.
Assuming the signal is sent and received by the DC controller, could be there's a safety circuit preventing the system from starting. So, maybe connected to the heater, which I am very reluctant to dismantle, for the reasons you know very well.
To this regard, about the scanned Canon / NeXT manual: do you still have the original copy? The PDF is truncated halfway into the appendix, where the interface to the system should be described... without that section, it's like having just half of the treasure map.
As for the rubber rollers mould, I still have it, but I am afraid I am not in the position of committing to making a new run any time soon (all the necessary items are also stored far away).
Title: Re: I destroyed a printer so you don't have to.
Post by: Rob Blessin Black Hole on December 03, 2023, 04:43:09 AM
Post by: Rob Blessin Black Hole on December 03, 2023, 04:43:09 AM
To this regard, about the scanned Canon / NeXT manual: do you still have the original copy? The PDF is truncated halfway into the appendix, where the interface to the system should be described... without that section, it's like having just half of the treasure map.
As for the rubber rollers mould, I still have it, but I am afraid I am not in the position of committing to making a new run any time soon (all the necessary items are also stored far away).
[/quote]
I'll take a look around for the manual as I did not notice the missing section before :) , if you have an idea of which boards it may be I have a couple parts printers here :) or send a photo I can send you the parts cheap :)
Title: Re: I destroyed a printer so you don't have to.
Post by: paolo.bertolo on December 03, 2023, 06:31:25 AM
Post by: paolo.bertolo on December 03, 2023, 06:31:25 AM
I think I have narrowed down the issue to the DC power supply.
First off, I found out a capacitor which was totally out of spec, then a cracked solder joint.
Once both issues had been addressed, at the next restart the fan briefly spun before the safety relais cut the current off, clear signal that there's still something serious which is not OK.
By the manual, the safety board seems to be connected to the heating unit, but before moving to that (almost hopeless) part of the printer, I would like to understand if the DC power supply is OK or not.
What I see is that the AC unit is filtering and directly feeding line tension to the DC unit, which in turn should supply +24, +5 and -5 V DC. However it doesn't seem to be doing so when under tension.
What I don't understand so far from the documentation is whether this is intentional (i.e. the DC unit is switched on only if triggered by the logic board, in turn controlled by the external device via the interface board) or not (i.e. the logic board needs in the first place to be powered by the DC unit for operating the whole thing). Kind of chicken and egg problem which hopefully will be further addressed in the remaining part of the manual, assuming it will ever be available.
Else, it would be very helpful if someone could check with a tester on a working printer whether the DC unit is always live or not. Thanks.
Title: Re: I destroyed a printer so you don't have to.
Post by: paolo.bertolo on January 14, 2024, 03:54:14 AM
Post by: paolo.bertolo on January 14, 2024, 03:54:14 AM
Quote from: Rob Blessin Black Hole on December 03, 2023, 04:43:09 AMI'll take a look around for the manual as I did not notice the missing section before :)
@Rob Blessin Black Hole : did you manage to check if the missing manual section is there?
From my side, I have thoroughly checked the fuser unit and everything seems to be OK. According to the service manual, there are some conditions which trigger the safety circuit, but proceeding without schematics is very difficult.
Title: Re: I destroyed a printer so you don't have to.
Post by: Rob Blessin Black Hole on January 14, 2024, 07:06:37 PM
Post by: Rob Blessin Black Hole on January 14, 2024, 07:06:37 PM
Quote from: paolo.bertolo on January 14, 2024, 03:54:14 AM@Rob Blessin Black Hole : did you manage to check if the missing manual section is there?Yes I ust double checked and unfortunately it is not . Also checked all of my NeXT service manual sets to see if it was misplaced and no luck so far. So I went on an internet search deep dive
From my side, I have thoroughly checked the fuser unit and everything seems to be OK. According to the service manual, there are some conditions which trigger the safety circuit, but proceeding without schematics is very difficult.
Canon website has a legacy Printer manual section so I will try send a contact form enquiry to see if this is something they may have in a document arhive.
Also was able to find Apple Laserwriters manuals but they use a different printer engine , a really nice page which may be of use to any one troubleshooting Laserwriters https://www.vintageapple.org/laserwriter/
also found the HP laser Jet Manual Archive here https://archive.org/details/printermanual-hp-laserjet-family-quick-reference-service-guide-volume-ii ,
I think their may be a lot of cross over between the NeXT laser and HP II Laserjet printers ie Ink Cartridge, engine
this will actually help me trouble shoot and repair my old Laser Jet 4Mp with Jet Direct card with a bad fuser this was a great solution for Black Hardware , pc's and macs , never ending ink cartridges. If I get it working again it will save thousands of dollars in ink :)
I have a NeXT laser parts printer here ,Paolo if you cover shipping(or I have a Cube going to Italy this week with enough room for printer parts.)
I would happily donate the Laser printer boards you need ...
My guess is you would you like a new old stock intake roller for $15, I'll take a chance and include one for you. :)
I think it has a good power supply as well . I needed the intake roller assembly, latching mechanism ,fusing section , logo and non ADB emulator chip off of the logic board. So I would have the power supply and logic board and probably have a fusing section where the thin nylon cord broke.
I'm shipping a NeXT Cube to a school in Italy this week so I'll just drop the printer parts in the box with a note for Maurizio about the spare NeXT printer parts..... sound good ?
Title: Re: I destroyed a printer so you don't have to.
Post by: paolo.bertolo on January 15, 2024, 06:22:19 AM
Post by: paolo.bertolo on January 15, 2024, 06:22:19 AM
Dear Rob, thanks a lot for your prompt feedback and for your very generous support, I sincerely appreciate it.
However, I now live in Japan, so there's no possibility to combine the shipment with the Cube on the way to Italy.
Anyhow, I am curious to see if Canon will ever reply to your inquiry, it would indeed be great!
My printer worked flawlessly until... the moment it decided to let me down.
I am now in the situation where it powers up and then a few instants later the safety relay is triggered and the current cut. According to the service manual, there are a few conditions which can trigger the safety circuit. Most typically, when a malfunctioning occurs in the heater, but in my case everything seems to be in working order. Else, some other fault condition may force the DC board to cut down the current.
As these symptoms are common to other "dead" Laser Printers, I suspect there must be something specific that fails after so many years (capacitors aside, of course).
I will keep on investigating the issue, if I won't be able to get anywhere I will surely revert back to you for some spares (in any case, I need an intake tray, mine is cracked).
I will post any progress on this thread, I hope we will find a fix.
Thanks again for your support!
Title: Re: I destroyed a printer so you don't have to.
Post by: spitfire on January 15, 2024, 06:27:21 PM
Post by: spitfire on January 15, 2024, 06:27:21 PM
Quote from: Rob Blessin Black Hole on January 14, 2024, 07:06:37 PMAlso was able to find Apple Laserwriters manuals but they use a different printer engine , a really nice page which may be of use to any one troubleshooting Laserwriters https://www.vintageapple.org/laserwriter/
also found the HP laser Jet Manual Archive here https://archive.org/details/printermanual-hp-laserjet-family-quick-reference-service-guide-volume-ii ,
I think their may be a lot of cross over between the NeXT laser and HP II Laserjet printers ie Ink Cartridge, engine
this will actually help me trouble shoot and repair my old Laser Jet 4Mp with Jet Direct card with a bad fuser this was a great solution for Black Hardware , pc's and macs , never ending ink cartridges. If I get it working again it will save thousands of dollars in ink :)
The only printer I've found with the same engine is the "NEC-Mitsubishi Silentwriter 2 990". As noted at the start of this thread both this printer and the NeXT use a Canon LBP-UX engine. This is very close to the Canon SX found in Apple laserwriters and HP laserjets, but not quite. Many parts are interchangable.
Title: Re: I destroyed a printer so you don't have to.
Post by: Rob Blessin Black Hole on March 11, 2024, 09:54:57 PM
Post by: Rob Blessin Black Hole on March 11, 2024, 09:54:57 PM
Quote from: paolo.bertolo on January 15, 2024, 06:22:19 AMDear Rob, thanks a lot for your prompt feedback and for your very generous support, I sincerely appreciate it.I found schematics for the Apple Laser writers and it looks like the model 2 G and 2 F are close to NeXT laser printers and may share some of the same replacement parts (Space rat).
However, I now live in Japan, so there's no possibility to combine the shipment with the Cube on the way to Italy.
Anyhow, I am curious to see if Canon will ever reply to your inquiry, it would indeed be great!
My printer worked flawlessly until... the moment it decided to let me down.
I am now in the situation where it powers up and then a few instants later the safety relay is triggered and the current cut. According to the service manual, there are a few conditions which can trigger the safety circuit. Most typically, when a malfunctioning occurs in the heater, but in my case everything seems to be in working order. Else, some other fault condition may force the DC board to cut down the current.
As these symptoms are common to other "dead" Laser Printers, I suspect there must be something specific that fails after so many years (capacitors aside, of course).
I will keep on investigating the issue, if I won't be able to get anywhere I will surely revert back to you for some spares (in any case, I need an intake tray, mine is cracked).
I will post any progress on this thread, I hope we will find a fix.
Thanks again for your support!
I'm not sure of the overlap of schematics with NeXT layouts but it may provide some clues.
https://www.applerepairmanuals.com/the_manuals_are_in_here/LaserWriter_II.pdf
My wheels are turning of course and looking at some of the II G and F boards may be a direct swap ,
The one I find really intriguing is the I/O board which features ethernet and scsi and some similarities in Laser Writer to NeXT case design.
First thought is it would be epic if that board would interface with a NeXT laser a long shot as NeXT laser is powered up by the stations or cube lol but having a NeXT laser printer with built in scsi connector, uprgradeale ram and ethernet would rock . Reality Distortion Field for sure .
Searching for photo's of the fuser lamp as these may be what we need for the NeXT laser:)
Or super modding a NeXT laser printer shell, as I have a few that are gutted and will be fun experimenting by dropping in an SCSI Apple Laser Writer B&W or better yet Apple / HP / other Color Laser printer core if footprints match and it doesn't look like a kludge , 3d custom adaptor parts .. into a NeXT Laser Printer Shell result would be hack a day ha.
Title: Re: I destroyed a printer so you don't have to.
Post by: Rob Blessin Black Hole on March 12, 2024, 03:08:04 AM
Post by: Rob Blessin Black Hole on March 12, 2024, 03:08:04 AM
Hello NeXT Community: I found this interesting as well and I'm wondering if this may happen with NeXT Laser printers? .......
https://www.applerepairmanuals.com/the_manuals_are_in_here/LaserWriter_II.pdf
This is instructions for an Apple Laserwriter II models G and F very similar to NeXT laser printers !
Troubleshooting Capacitor Discharge - 2
Capacitor Discharge
When there is a failure of the fusing system, the DC controller
board shuts off current to the fuser roller heater and charges
capacitor C211 to prevent overheating. If there is a failure of the
fusing system, you must turn the power off for about 30 minutes
or manually discharge the capacitor before switching power back
on.
C211
DC Controller Board
Troubleshooting Capacitor Discharge - 3
Switch off and unplug the printer, and remove the bottom panel
and lower cover. Locate capacitor C211 on the DC controller
board. Carefully jumper the two wires at the base of the capacitor
using some kind of conductive tool, as shown on the next page.
Caution: Take care not to damage the board tracings or the
components neighboring the capacitor.
Note: There are many different tools that can be used to discharge
the capacitor: a flat blade screwdriver, paper clip, or aluminum
foil doubled over. The tool illustrated is a length of lead solder. It
has the advantage of being ductile and is less apt to damage the
controller board.
Troubleshooting Capacitor Discharge - 4
Capacitor C211
Troubleshooting Controller Board Readings - 5
Controller Board Readings
Voltage readings on the Canon SX engine controller board are
difficult to make and require accessing the underside of the
printer.
Rest the printer on the I/O board rails with the rear side facing
you and the near rail at the front edge of your work surface. If you
need to elevate the printer to get clearer access to the DC
controller board, use the bottom panel and lower cover.
Caution: The printer must be in an upright position during a
print cycle or while the clamshell is open.
Title: Re: I destroyed a printer so you don't have to.
Post by: Rob Blessin Black Hole on March 21, 2024, 05:19:53 PM
Post by: Rob Blessin Black Hole on March 21, 2024, 05:19:53 PM
Hello NeXT Community: I wanted to show you 2 videos
I suspected the SC2SD, ZULU SCSI and Blue SCSI Cards all have issues when trying to troubleshoot NeXT Laser Printers and wonder if this carries over to other platforms as well.
I suspect when a print job spools on a NeXT it is far more complicated that on other time period hardware. This probably has to do with the timings and integrated sound messages on any error. Then Clearing the error manually often results in the process hanging , even when removing the print jobs in cue and resending.
I was able to prove this by using the different cards and different NeXTSTEP images on the cards on a working fully refurbished NeXT laser printer where it prints one page and jams at the back end as it doesn't expel the last inch of the paper. So it gives a paper jam error on the second page and it .....................hangs..............hangs.............. hangs
Example Here https://youtu.be/qnO62c1F1sA?si=SZOQaf5VTveyFJXr
Eureka , Paolo are you using a SCSI2SD , Blue SCSI or ZULU SCSI card on that system with problems?
Where with SCSI Hard Drives it just works and makes my headache go away to make trouble shooting with out having to reboot a breeze leaving time to tell crappy jokes lol:
https://youtu.be/zBky-iIH-w4?si=jVSTr-b6yP18PzwR
I think adjusting cleaning possibly replace the exit gears will resolve it.
Title: Re: I destroyed a printer so you don't have to.
Post by: spitfire on June 20, 2024, 02:53:49 PM
Post by: spitfire on June 20, 2024, 02:53:49 PM
Adding links to these threads here so people can find them.
https://forum.vcfed.org/index.php?threads/next-400dpi-laser-printer-restoration.1242501
https://www.nextcomputers.org/forums/index.php?topic=5676
https://forum.vcfed.org/index.php?threads/next-400dpi-laser-printer-restoration.1242501
https://www.nextcomputers.org/forums/index.php?topic=5676
Title: Re: I destroyed a printer so you don't have to.
Post by: paolo.bertolo on July 14, 2024, 08:13:56 AM
Post by: paolo.bertolo on July 14, 2024, 08:13:56 AM
So, a few months on...
I finally managed to source a replacement for the 24V Switching Regulator IC, the totally elusive and undocumented Sanken SI-9509.
I was very optimistic, but... no way, same as before. First start after reassembling the whole damn thing, everything fine for a few seconds. From the second start-up on, just a brief pulse of life before the 24V rail goes dead.
Note that in between one has to literally pull the plug for discharging the capacitors and resetting the status of the printer.
I honestly run out of ideas, could even be that the logic board is toasted, but without a know working PSU it's impossible to tell...
Title: Re: I destroyed a printer so you don't have to.
Post by: paolo.bertolo on November 02, 2024, 06:16:35 AM
Post by: paolo.bertolo on November 02, 2024, 06:16:35 AM
For those who are still following this "cold case".
This time I finally have some real progress to share.
I re-started from page 2-28 of the service manual, which states that - in case of short circuit in the 24/5/-5 V rails - the protection circuits automatically switch down the PSU.
A good match for the symptoms.
Long story short, I could eventually identify a faulty little resistor (see picture) in the 24V overcurrent protection circuit (at least what I think it is, I'm no electric engineer...).
The resistor is connected to the base of one of the transistors controlling the optocouplers.
It looked kind of suspicious (kind of blown) and it actually tested bad. Bingo.
Now, the good news: after replacing the resistor, the power supply is again operating, the printer is recognised by the main unit, but...
...the bad news: the printer is not printing. It powers up, but after some time it shuts down.
To me it now appears as if the main motor is not spinning when commanded, which sounds ominous...
Luckily, though, I can see the heating lamp briefly glowing, which keeps my hopes alive...
To be (hopefully) continued...
Title: Re: I destroyed a printer so you don't have to.
Post by: paolo.bertolo on April 10, 2025, 11:08:39 PM
Post by: paolo.bertolo on April 10, 2025, 11:08:39 PM
Time for some updates.
In the process of testing the functionality of the various components of the printer, I had to deal with the unfortunate disgrace of a short circuit which toasted some chips on the logic board.
I could recover and fix the situation, but then - thanks to Rob - I just managed to source a spare, untouched PSU and a spare logic board.
After recapping the logic board (all the caps leaked and were dead) and after slotting the spare PSU in (I only changed the small resistor, which was in any case still good), I could confirm the rest of the printer was OK, including the previously toasted logic board.
The printer now works fine again, the culprit was definitely the PSU.
So, after this nightmarish journey, I would tend to confirm the following points.
- In case you have a "dead" printer, which doesn't power up as it should or that it faintly powers up and soon afterwards shuts down, it's almost certainly a failure of the DC PSU.
- Do not touch the fixing unit, which is the most critical part of the printer, for which there are no spares. If you have continuity across the heating lamp (never dismantle it!), you are just fine. The PP utility or the Printer Manager may hint at "Fixing Assembly Failure", but it's a false lead.
- Do not touch the logic board either, nor the high voltage PSU.
- The PSU also may contain leaking caps: replace them first.
- In my case, I should have just replaced the blown resistor. 10 cents and 30 minutes job. Instead, it took me (too) many hours to narrow it down to this silly issue. I learnt a lot in the process, but trust me it was totally unnecessary...
- Still - to be fully transparent - after replacing the resistor, in the original PSU (before replacing it with a spare) I still had another issue with the power-on-reset signal which was not getting properly generated and was causing the CPU not to recognize the printer as powered up. Printer would remain powered up and could still print the test pages when asked to. However, the CPU would not recognize it as powered up. I still don't know if it was because of yet another component gone off specs along with the resistor, or if it was caused by the many (not actually needed, in hindsight) interventions (desolder, test, solder back in) I tried before converging on the resistor. I would think it to be the latter, though, as besides the resistor I could not spot any out of spec component on the power-on-reset circuit.
- Pay special attention to the two varistors with the sealing glue, which might peel off when you open the PSU. They are used for calibration purposes, they are factory sealed and so should remain.
- Should you have specific questions, please feel free to reach me, I will be glad to share more details about my odyssey...
Title: Re: I destroyed a printer so you don't have to.
Post by: paolo.bertolo on August 25, 2025, 09:56:57 AM
Post by: paolo.bertolo on August 25, 2025, 09:56:57 AM
Hi All,
So, just to add a little excitement to this endless story, a couple of things more that could possibly go wrong with the printer.
Mine just survived a 3.5 month long intercontinental relocation.
Stupidly, I did not remove the cartridge, so the printer arrived covered with toner.
Very unhealthy, for me and for the printer.
Then, very stupidly, I just plugged it in to 220V power. Obviously, *before* toggling the position of the voltage selector from 115V to 220V.
You can imagine the result.
However, no panic. After some checking and (sometimes) a little of logical thinking, I identified the culprit in a blown resistor with a temperature fuse. Being quite difficult to source, I took it from a spare PSU and the printer was again alive.
So, if the PSU seems to be totally dead, one possibility is that it got fed the wrong voltage, blowing R2, which would otherwise look perfectly good.
I then had to clean the innards very thoroughly, especially in the high voltage connector to the cartridge (J701-J702).
Apparently, there was some toner preventing a good contact, as the test page was coming out white.
Now it's again working fine, I really hope it won't give me any more headache for a while...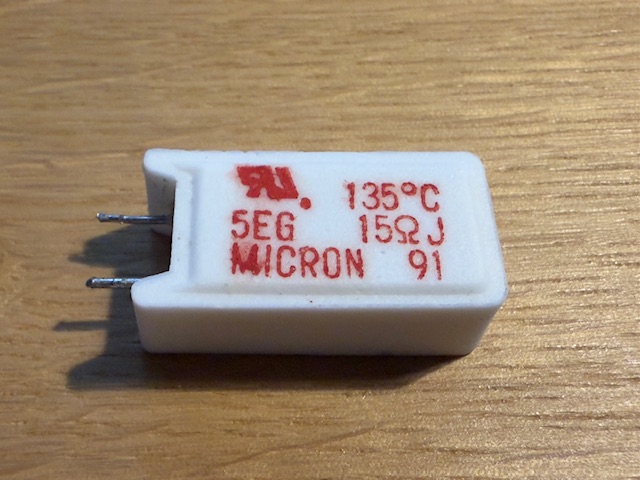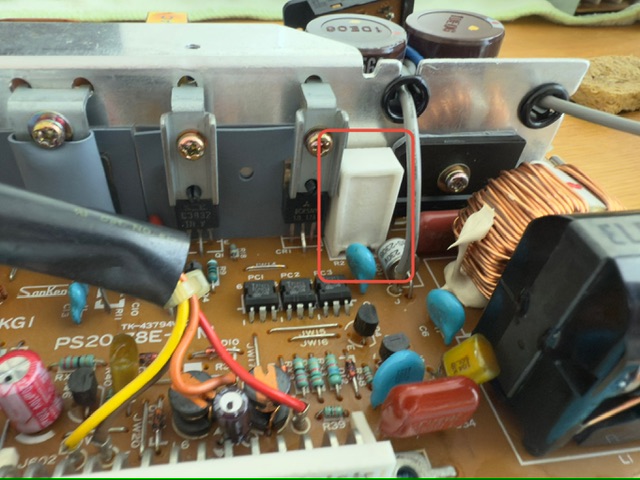
Title: Re: I destroyed a printer so you don't have to.
Post by: NeXTnewbe on August 27, 2025, 04:26:28 PM
Post by: NeXTnewbe on August 27, 2025, 04:26:28 PM
for the tonner, do you know where to source the Drum Cleaning Balde for the tonners?, I'm trying to find and been impossible to find :'(
Title: Re: I destroyed a printer so you don't have to.
Post by: paolo.bertolo on August 28, 2025, 04:12:41 AM
Post by: paolo.bertolo on August 28, 2025, 04:12:41 AM
In another thread there's a description of the procedure for replacing the wiper blade. In my current toner cartridge it is acceptable by my standards, so I am not planning to take any action.